
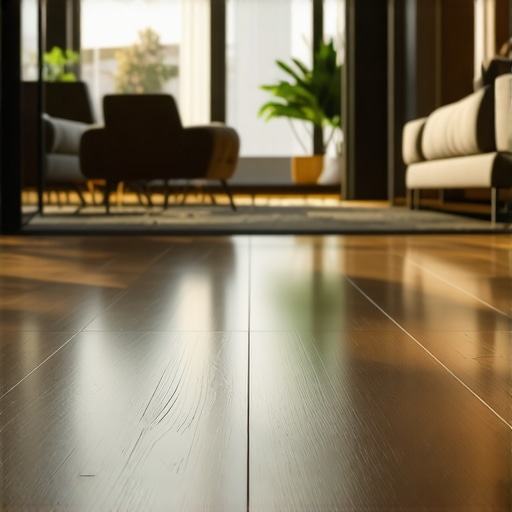
I vividly remember the day I stepped into my living room and realized my once-glossy luxury vinyl planks looked downright dull. That stubborn haze had taken over, and every step felt like walking on a cloudy mirror instead of sleek, polished flooring. Frustration bubbled up—what had I done wrong? It dawned on me that I wasn’t alone. Many homeowners face the same sinking feeling when their floors lose their luster unexpectedly.
Why Your Vinyl Floor Loses Its Shine and How to Fix It
Over time, even the best-maintained vinyl floors can develop a dull appearance due to dirt buildup, residue from cleaning products, or just age. The good news? Restoring that factory shine isn’t as daunting as it seems. With a few straightforward steps, I discovered my floors could regain their youthful glow, and I’m here to share what I learned—so your space can shine as brightly as you deserve. Did you know that regular cleaning alone isn’t enough to maintain a vinyl plank’s sheen? According to flooring experts, dirt and grime can embed into the surface, dulling its reflective properties over time. That’s why periodic deep cleaning and specific restoration techniques are essential. Today, I’ll walk you through the practical, proven methods that will breathe life back into your dull floors.
Is Restoring the Shine Worth the Effort?
Many skeptics worry that restoring a floor’s sheen might require expensive products or risky procedures. I made that mistake early on—buying over-the-counter polishes that left my floors even streakier. Trust me, not all solutions are created equal. Truth be told, a gentle approach and the right products can make a significant difference without risking damage. Want to learn the safe, effective ways to bring your vinyl planks back to life? Let’s dive into the steps I wish I had known from the start—and how you can do it too.
Prepare Your Surface for a Fresh Look
Begin by sweeping the floor thoroughly to remove loose debris, then vacuum to pick up dust in crevices. Next, clean with a mixture of warm water and a few drops of dish soap, using a microfiber mop to eliminate surface grime. Rinse with clean water and dry with a soft cloth. This ensures no dirt particles interfere with the restoration process. During my first attempt, skipping this step resulted in streaks and uneven shine, but a meticulous initial cleaning made all the difference. For stubborn residues, especially in textured areas, a solution of denatured alcohol mixed with water works wonders—dab it lightly and wipe clean to remove old polish remnants. If your floors are particularly dull, consider applying a commercial vinyl floor cleaner designed for restoration purposes.
Address the Haze with Gentle Polishing
Apply a vinyl floor polish or enhancer compatible with your specific floor type, using an applicator pad or a clean microfiber cloth. Work in small sections, buffing in circular motions to build up a protective, shiny layer. This process is akin to buffing a car’s paint—more polish and buffing can restore luster. I learned this from experience when I used a soft foam applicator, which prevented streaks. Always follow manufacturer instructions regarding drying times and reapplication intervals. For a more professional finish, a dual-action polisher with a soft pad can be used—just set it to the lowest speed to avoid damaging the surface. Keep in mind high-gloss finishes are attractive but may show scratches more prominently, so handle with care.
Use Proper Restorative Products for Lasting Shine
Select a reputable vinyl floor restorer or enhancer, focusing on products with UV protection and anti-static properties. Apply a thin, even coat with a microfiber mop or applicator pad, working methodically across the entire floor. After application, allow the product to cure as per instructions, typically a few hours. During my application, I noticed that multiple thin coats gradually built a more durable shine than a single thick layer. Always test on a small inconspicuous area first to ensure compatibility. If your vinyl has deep scratches or gouges, consider using a vinyl repair kit before applying restorative products, as this provides a smoother surface for polishing and enhances the final appearance.
Deep Cleaning and Maintenance Tips
To keep the floor shining longer, implement regular cleaning routines. Use a damp mop with pH-neutral cleaners, avoiding harsh chemicals that can strip the finish. Incorporate periodic deeper cleanings with a vinyl-safe degreaser or a mixture of water and isopropyl alcohol for stubborn residues. Protect your floors from excessive moisture by wiping up spills immediately and avoid excessive water during cleaning. Place felt pads under furniture legs to prevent scratches and marks. Consistent maintenance reduces the need for frequent restorations, saving you time and effort in the long run. Remember, a well-maintained vinyl floor not only looks better but also lasts longer, maintaining its beautiful appearance over the years.Many homeowners and even seasoned DIY enthusiasts often fall prey to misconceptions when it comes to tile installation, floor leveling, or hardwood flooring. One of the most widespread myths is that leveling concrete slabs is purely about surface smoothness. In reality, proper floor leveling demands attention to flatness, load-bearing capacity, and moisture barriers. Skimping on this step can lead to cracks, uneven tiles, or buckling in hardwood floors down the line. An advanced mistake many overlook is neglecting the importance of substrate compatibility; installing engineered wood over a high-moisture slab without adequate vapor barriers can cause bowing or warping—something even experienced installers should watch out for. For the savvy renovator, understanding the nuanced difference between spot leveling and full-surface leveling can make or break the project, especially in challenging terrains. A recent study by flooring experts highlights that nearly 70% of installation failures stem from poor substrate assessment and inadequate preparation, emphasizing that thorough groundwork is indispensable. When selecting materials, some believe that premium brands guarantee flawless results, but seasoned pros advise focusing on compatibility and proper application techniques instead. Have you ever fallen into this trap? Let me know in the comments. For detailed insights on achieving a flawless finish, check out our definitive guide to [floor leveling techniques](https://tiletrendshop.com/the-ultimate-guide-to-floor-leveling-for-a-perfect-finish) or explore [expert hardwood refinishing tips](https://tiletrendshop.com/mastering-hardwood-floor-refinishing-expert-tips-for-2025) to elevate your project.
Keeping Your Floors in Prime Condition Over the Years
Once your flooring is expertly installed, maintaining its integrity becomes paramount to ensure longevity and aesthetic appeal. The right tools, consistent routines, and understanding future trends can make all the difference. For drywall and subfloor maintenance, I personally recommend a high-quality magnetic broom, which allows effortless picking up of dust and metal debris without scratching the surface. This simple yet effective tool helps keep your floor pristine without the need for frequent deep cleans, extending the intervals between restorative treatments.
On the technical front, investing in a digital moisture meter is essential—especially when dealing with hardwood or tile installations—since moisture issues are leading causes of long-term damage. Regularly measuring subfloor and ambient humidity levels can prevent warping, buckling, or mold growth. I use the Tramex CM-10 because its precise readings allow me to address moisture anomalies before they escalate, saving me both time and money down the line.
As flooring trends evolve, automation enters these maintenance routines. Smart sensors embedded in subfloors can now monitor environmental conditions and notify homeowners via smartphone apps if levels drift out of safe ranges. This proactive approach ensures your investment remains protected, even when you’re away. Looking ahead, augmented reality apps will likely assist homeowners and contractors in visualizing upcoming repairs or upgrades, fostering informed decision-making.
How do I maintain flooring over time? Regular inspection and prompt attention to minor issues pay huge dividends. For hardwood floors, applying a quality wax buffer periodically restores shine and forms a protective layer—I’ve found that a rotary buffer with a soft pad not only enhances appearance but also reduces micro-scratches. For tile or vinyl surfaces, sealing grout lines every couple of years preserves their luster and prevents moisture infiltration, which can deteriorate the substrate.
Of course, no maintenance is complete without the right cleaning arsenal. I swear by a microfiber mop paired with pH-neutral cleaner—specifically, the Bona Stone, Tile & Laminate Floor Cleaner—because it cleans thoroughly without damaging the finish. For stubborn stains, a soft-bristle brush combined with denatured alcohol provides effective spot treatment without harming the surface.
Don’t forget the importance of ongoing education. Periodic review of source material like floor leveling techniques ensures you stay abreast of best practices and evolving solutions. As professional tools improve, adopting them early can be the catalyst for extending your floors’ lifespan.
Ready to give your flooring a durability boost? Try integrating a digital moisture meter into your routine this month; it’s an advanced tip that pays off. You’ll be surprised how early moisture issues can be detected and managed, saving you from costly repairs in the future. For more detailed guidance tailored to your specific project, don’t hesitate to reach out via our contact page.
Lessons from the Hard Knocks of Flooring
One thing I learned the hard way is that superficial solutions often mask deeper issues—like applying polish without addressing underlying dirt or unevenness in the subfloor. It’s tempting to chase quick fixes for that dazzling shine, but patience and proper prep are what truly pay off in the end.
Another insight is how crucial substrate assessment is before installation. I once skipped the moisture check on a basement floor, only to face buckling months later. Now, I know that investing in quality moisture meters and proper vapor barriers isn’t optional—it’s essential for long-term success.
The third lesson revolves around ongoing maintenance. I used to think a good clean once a month was enough—until I realized that regular, targeted upkeep prevents the dulling and damage that accumulate over years. Incorporating simple routines, like sealing grout lines and using pH-neutral cleaners, makes all the difference in preserving that pristine look.
Finally, I discovered that understanding the true nature of your flooring material—whether hardwood, vinyl, or tile—guides better choices in products and techniques. For example, using a UV-protected restorer on vinyl not only enhances shine but extends its lifespan, saving money and stress down the road.
Tools That Changed My Approach to Floor Care
There are a few tools I swear by that transformed my flooring projects. A high-quality digital moisture meter became my best friend, catching issues early before they turned into costly repairs. I personally rely on the Tramex CM-10 because of its accuracy and reliability. For cleaning, the Bona Stone, Tile & Laminate Floor Cleaner has consistently delivered gentle yet effective results, respecting the finish while removing grime. When applying restoratives or sealers, I trust a microfiber mop paired with applicator pads to ensure even, thin coats—helping me avoid streaks and bubbles. If you’re serious about achieving a professional look, incorporating these tools is a game-changer, and I encourage you to check out detailed guides on [floor leveling techniques](https://tiletrendshop.com/the-ultimate-guide-to-floor-leveling-for-a-perfect-finish) to elevate your knowledge even further.
Your Next Step Toward Flawless Floors
Remember, the journey to beautiful, durable flooring isn’t just about the products and techniques—it’s about commitment and continuous learning. Whether you’re restoring a tired vinyl or perfecting hardwood installation, taking proactive steps now will pay dividends for years to come. Don’t hesitate to explore resources like [expert hardwood refinishing tips](https://tiletrendshop.com/mastering-hardwood-floor-refinishing-expert-tips-for-2025) or reach out through our contact page for personalized guidance. Your floors can tell a story of craftsmanship and care—start writing that story today.