
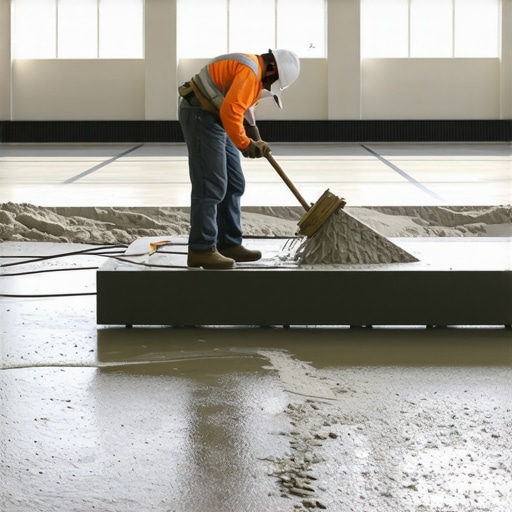
I remember the first time I tackled a large flooring project in my own home; the room was vast, and the floor had a noticeable slope that made every step feel off. As I reached for my tools, a small realization hit me—that my standard leveling methods weren’t enough to ensure the entire surface was perfectly flat. It was a lightbulb moment: how could I get even pours across such a big space without ending up with dips or bulges?
That’s when I discovered the power of the Leveling Pin Trick, a simple yet effective technique that transformed my approach. It’s become my go-to method for large rooms, ensuring the foundation is truly level before I proceed with flooring installation. If you’ve ever wrestled with uneven floors or the fear of ending up with a wobbling surface, you’re not alone. Achieving a flawlessly level floor in large spaces is one of the trickiest parts of installation, but trust me—by mastering this technique, you’ll save yourself time, frustration, and costly corrections.
Today, we’re going to dive into the essentials of the Leveling Pin Trick—what it is, how it works, and why it’s a game-changer for anyone serious about professional-quality results. Whether you’re installing hardwood, tile, or vinyl, starting with a perfectly leveled base is key. Did you know that poor floor leveling can reduce the lifespan of your flooring by up to 30%? (Source: Flooring Magazine, 2022) That statistic really hit home for me, and I want to help you avoid that same mistake.
So, if you’ve ever faced uneven subfloors or felt overwhelmed by the scale of your project, stick around. We’ll get into practical tips and visual tricks that make the process smoother and more predictable. Ready to elevate your flooring game? Let’s begin with the core principles behind the Leveling Pin Trick and how to set yourself up for success.
Set Up Your Base Properly
Begin by clearing the workspace and inspecting the subfloor for major dips or humps. Use a long straightedge or a laser level to identify high and low spots. I once worked on a kitchen renovation where I noticed a significant hump along one wall. Spotting these irregularities early prevented future tile lippage and uneven hardwood planks.
Gather and Position Your Leveling Pins
Choose appropriate leveling pins—these are small, adjustable wedges or shims. Place them strategically at corners or along the perimeter where the floor dips. For my project, I positioned pins at each corner of the room, ensuring they were snug but not overly tight. This set a reference point for subsequent adjustments. Think of it like tent pegs securing a tent—you want stability without pulling the fabric too tight.
Apply a Consistent Leveling Compound
Mix your leveling compound according to manufacturer instructions. Pour or spread the compound starting from the lowest points, working systematically across the floor. Use a trowel or float to help it spread evenly. During my experience, I poured a self-leveling underlayment in sections, pouring from the highest corner downward. This approach reduced air bubbles and prevented premature setting issues.
Tip: Use a Notched Trowel for Better Spreading
For larger areas, a notched trowel creates a uniform bed, crucial for even flooring installation. I found that a 1/4-inch notch was ideal for my hardwood underlayment, providing enough thickness without sacrificing smoothness. Remember, a consistent substrate prevents future squeaks and shifting.
Manipulate the Pins During Curing
As the compound begins to set, use your adjustable pins to gently tweak the floor’s level. Turn or slide the pins to raise or lower specific spots, guided by a level or laser guide. I once had a stubborn dip in the center of the room; by gradually adjusting a pin a quarter turn at a time, I evened out the surface without creating new high spots.
Allow Proper Curing Time
Let the leveling compound cure fully—usually 24-48 hours—before proceeding with flooring installation. Rushing this step can lead to uneven tiles or buckling in hardwood. In my case, I waited the recommended time, then checked the surface with a straightedge, which revealed a perfectly flat plane. Skipping this patience step can ruin your entire project and force costly corrections.
Verify the Result
Conduct a final check with a long straightedge or a laser level across the entire surface. Ensure there are no high or low spots. If necessary, apply a second layer of leveling compound to minor imperfections. Remember, a truly flat subfloor isn’t just about appearance—it prolongs the lifespan of your flooring and maintains aesthetics. For additional tips on perfecting your finished surface, explore [this ultimate guide to floor leveling](https://tiletrendshop.com/the-ultimate-guide-to-floor-leveling-for-a-perfect-finish).
While many DIY enthusiasts and even seasoned pros focus on the basics of hardwood and tile installation, they often overlook subtle yet critical nuances that can make or break a project. A common myth is that if the surface appears flat and level to the naked eye, it’s good enough. However, expert installers understand that tiny imperfections—less than 1/8 inch over several feet—can lead to significant problems down the line, such as cracked tiles or cupped hardwood planks. This is why investing in precise floor leveling techniques, like using the right tools and understanding how to manipulate leveling compounds during curing, is essential for long-lasting results.
Why Do Some Floors Fail Even After Careful Installation?
Many assume that once a floor is installed correctly, it will remain flawless indefinitely. But in reality, issues like moisture intrusion, temperature fluctuations, and subfloor movement can cause flooring to shift or warp over time. For instance, hardwood floors are particularly sensitive to humidity changes, which can lead to gapping or buckling if not properly acclimated. Studies suggest that up to 40% of flooring failures are due to improper preparation or neglecting environmental factors, emphasizing the importance of comprehensive pre-installation assessments (see more). Additionally, many overlook how big of a difference careful subfloor preparation makes, such as ensuring proper moisture barriers or fixing high spots that could cause telegraphing through tiles. Recognizing these hidden nuances helps prevent costly repairs and extends your floor’s lifespan.
Another prevalent misconception is related to the use of self-leveling compounds. Some believe that their primary role is just to fill in dips, but in reality, the technique used during pouring and curing can significantly influence the finish quality. For example, overworking the compound or rushing the curing process can introduce bubbles or cracks, compromising the surface. Advanced installers understand how to control variables like trowel angle, pour speed, and environmental conditions, which are crucial for flawless results (more tips).
Finally, many underestimate how important correct substrate preparation is. Even the most beautiful tiles or hardwoods will fail prematurely if laid over a contaminated or uneven surface. This includes removing old adhesives, sealing cracks, and verifying moisture levels. For high-traffic areas or large-format tiles, taking extra steps—such as screeding or using high-quality primers—can prevent future problems and save you money. Remember, meticulous attention to detail at every stage is what differentiates professional results from amateur work.
Have you ever fallen into this trap? Let me know in the comments. Elevate your expertise by mastering these subtle but impactful aspects of flooring installation, and your projects will stand the test of time.Maintaining the perfection of your flooring over time requires the right tools and a consistent approach. I swear by a high-quality moisture meter, like the Tramex Moisture Encounter, to regularly check the subfloor and hardwood moisture levels before and after installation. This proactive step helps prevent issues like cupping or buckling, which can be costly to fix later. Another critical tool is a laser level—personally, I prefer the Bosch GLL 55 because of its accuracy and ease of use for aligning tiles and hardwood planks perfectly over large areas, saving me hours of manual measuring. Regular cleaning is essential, but using the correct products is equally important; I recommend a pH-neutral cleaner designed specifically for hardwood or tile, which preserves the finish without stripping protective coatings. For hardwood refinishing, I utilize a floor buffer with a soft pad to restore shine periodically, preventing dullness caused by foot traffic. Looking ahead, I predict that smart tools—like digital surface scanners integrated with apps—will become more commonplace, enabling homeowners and professionals to monitor floor health remotely and detect potential issues early.
### How do I maintain hardwood floors and tiles over time?
The key is routine inspections combined with targeted cleaning and refinishing. Stick to a regular schedule, checking for signs of wear or moisture intrusion, and address small problems before they escalate. For hardwood, apply a protective finishing wax or polish every few months, which adds an extra layer of defense against scratches and dirt. Tiles benefit from sealing grout lines annually; I prefer using a penetrating sealant like Miracle Sealants 511 Impregnator, which penetrates deep and protects against stains and moisture. Investing in the right tools and techniques now makes a significant difference in how long your floors stay beautiful and functional. Remember, a well-maintained floor not only looks great but preserves its value and safety for years to come. For more in-depth tips on hardwood floor care secrets, check out [this guide](https://tiletrendshop.com/hardwood-floor-care-secrets-to-longevity-and-shine). If you’re serious about preserving your investment, I recommend trying a professional-grade moisture meter and establishing a maintenance routine that suits your specific flooring type. Regular maintenance isn’t just a chore; it’s an investment in your home’s long-term beauty and integrity. For advice tailored to your specific setup, feel free to [reach out](https://tiletrendshop.com/contact-us).
What I Wish I Knew Before Starting Your Floor Leveling Journey
One of my biggest lightbulb moments was realizing that no two subfloors are the same, and cookie-cutter solutions rarely work. Early in my projects, I believed that straightforward pouring and curing would suffice, but I learned that paying attention to environmental conditions—like humidity and temperature—can make or break your result. Now, I always check the weather forecast before beginning a leveling job to prevent cracks and bubbles.
Another lesson was understanding the importance of patience. Rushing the curing process, expecting immediate results, often leads to imperfections. Taking the time to wait, inspect, and only proceed when the surface is truly ready has saved me countless headaches and redo’s. It’s a reminder that craftsmanship requires respect for the materials and timelines.
Finally, I discovered that subtle adjustments during curing—using adjustable pins—can save hours of sanding or patching later. Small, incremental tweaks guided by a laser level turned out to be the key to a truly flat surface, especially in larger rooms where unevenness is more noticeable. Embracing these nuanced techniques transformed my approach and elevated my results.
Tools and Resources That Changed My Approach
For anyone serious about perfecting floor leveling, I highly recommend investing in a good laser level like the Bosch GLL 55. It’s reliable, easy to use, and makes checking for levelness straightforward. Additionally, a high-quality moisture meter, such as the Tramex Moisture Encounter, is invaluable for avoiding future issues caused by unseen moisture problems. When it comes to learning more about the theories behind proper leveling, I find this comprehensive guide invaluable.
Books like Mastering Hardwood Floor Refinishing also offer deep insights into substrate preparation and finishing touches. These resources have helped me refine my process and avoid common pitfalls—so I can deliver floors that not only look great but stand the test of time.
Believe in Your Skills and Keep Moving Forward
Floor leveling might seem daunting at first, but every successful project boosts your confidence and craftsmanship. Think of each floor you bring to perfection as a step towards becoming a true pro—resilient, precise, and proud of your work. Remember, even experienced installers still learn new tricks, and the key is to stay curious and persistent. Your floors can be more than just functional—they can be a beautiful testament to your skill and patience. If you’re ready to elevate your flooring game, embrace each challenge as an opportunity to learn and grow. What’s one mistake you’ve learned to avoid that made your future projects smoother? Share below and let’s grow together!