
I remember the moment vividly—my dog had an accident in the living room, and I didn’t realize the extent of the mess until days later when a strange, persistent odor started creeping up from the floorboards. That lightbulb moment hit me hard: pet odors can sink deep, soaking into the subfloor, and no amount of surface cleaning will do the trick. For months, I battled the smell, trying everything from sprays to shampoos, only to find that the odor kept coming back. It was frustrating, and honestly, a little embarrassing. If you’ve faced this, you know what I mean.
Why Pet Odors Hide Deep in Your Floors and Why It Matters
Are Subfloor Odors Really That Tough to Remove?
Absolutely. Pet odors aren’t just surface issues—they seep into the porous materials beneath your flooring, especially if accidents happen early on or go unnoticed. According to a study by the PetMD, urine can penetrate several inches into the subfloor, leading to lingering smells that are incredibly tough to eradicate. The unsavory part? If you neglect this problem, it can affect indoor air quality and even impact your home’s value.
Early in my own experience, I made the mistake of only cleaning the surface, thinking the smell would fade away on its own. Spoiler alert: it didn’t. Instead, the odor intensified over time, becoming embedded in the very foundation of my home. That was a costly lesson in patience and knowledge—something I want to help you avoid.
Today, I’ll share proven techniques that have helped me successfully remove pet smells soaked into the subfloor. If you’re tired of masking odors with sprays or replacing flooring prematurely, keep reading. You’ll learn how to tackle the root cause, making your home fresh again and preventing future odor infiltration.
Treat the Subfloor Directly
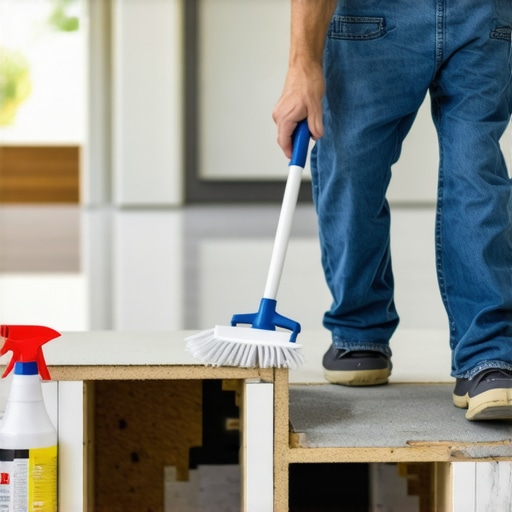
Begin by removing the affected flooring, exposing the subfloor. Use a circular saw or reciprocating saw to carefully cut away any damaged sections if necessary. Once exposed, clean the surface thoroughly with a commercial enzymatic cleaner designed for pet stains, such as bio-enzymatic sprays. Let it sit according to product instructions, then scrub gently with a stiff-bristled brush. This breaks down organic residues embedded deep within the material.
Identify Level and Repair Uneven Areas
Assess your subfloor’s flatness. Use a long straightedge or a laser level to spot high and low spots. If you notice bounciness or noticeable unevenness, level these using a self-leveling compound. Mix the compound following the correct water ratio to ensure proper bonding. Pour the mixture into low spots and spread smoothly with a trowel. Allow sufficient drying time as specified by the manufacturer for a flawless surface.
Sanding and Smoothing for Better Seal
Once the repair compound has dried, lightly sand the area to create a smooth, uniform surface. Use fine-grit sandpaper to eliminate any ridges or bumps. Clean the dust thoroughly with a vacuum or damp cloth to prepare for sealing. This step ensures an airtight, uniform base that prevents odors from seeping in further or escaping during subsequent processes.
Seal and Lock in the Odors
Apply a high-quality odor-blocking primer or sealant designed for concrete and wood. Products like epoxy sealers or specialized odor sealants penetrate deep, creating a barrier that traps residual smells. Use a roller or brush to ensure even coverage, especially in corners and joints. Allow the sealant to cure fully, following manufacturer’s guidelines, to lock in any lingering pet odors effectively.
Consider Flooring Material Replacement with Enhanced Odor Resistance
If odors persist despite these efforts, upgrading your flooring may be necessary. Consider materials like porcelain tile or luxury vinyl planks that resist pet stains and odors more effectively than traditional hardwood or carpet. Many options feature sealing options or antimicrobial finishes that prevent odor absorption. Look into innovative tile designs that elevate hardwood styles without sacrificing durability, which can be explored further at this link.
Implement Preventive Measures
After cleaning and sealing, prevent future issues by addressing pet behaviors and maintaining cleanliness. Regularly clean floors with enzyme-based cleaners, and consider applying a protective coating on your floors periodically. Installing mats or designated pet areas can reduce the chances of accidents reaching deep into the flooring. Proper maintenance extends the lifespan of your efforts and keeps your home smelling fresh.
When it comes to flooring, many homeowners and even professionals often rely on widely accepted beliefs that can be misleading. One prevalent misconception is that leveling floors is a straightforward process that can be achieved with simple tools or quick fixes. In reality, proper floor leveling requires a nuanced understanding of substrate conditions, moisture levels, and structural movement. For example, some assume that self-leveling compounds are foolproof, but without proper substrate preparation and correct application techniques, the result can be uneven surfaces or even floor failure. For in-depth strategies, check out this comprehensive guide.
Optimize Your Floor Maintenance with Precision Tools
Maintaining beautiful and durable flooring requires not just skill but the right equipment. I personally swear by an industrial-grade angle grinder fitted with a diamond cup wheel for polishing concrete surfaces before sealing. This tool allows me to achieve a smooth, professional finish, eliminating minor imperfections that could trap moisture or odors. Using a high-quality wet/dry vacuum is essential for cleaning up dust and debris during sanding or grinding, ensuring a pristine surface for subsequent layers. These tools are investments but pay off in longevity and quality of the final result.
For leveling subfloors, I recommend employing a self-leveling compound with a good mechanical bond. Choosing a product like the right primer and water ratio ensures optimal adhesion. When applying, a gauge rake can help distribute the compound evenly, preventing dips or high spots that could compromise the flooring integrity. After curing, a fine sander with a dust collection system helps smooth out any uneven patches, making the surface ready for tile or hardwood installation.
Embrace Digital Tools for Better Planning
Beyond physical equipment, I utilize floor leveling apps that incorporate laser scan data to create precise 3D maps of the subfloor. These digital insights allow me to identify subtle imperfections and plan corrections efficiently. In my experience, tools like these cut down planning time and improve accuracy, leading to fewer surprises during installation. As technology advances, integrating such software into your workflow can significantly enhance your long-term results.
What Techniques Will Future-Proof Your Floors?
Looking ahead, innovations like smart leveling compounds that adapt to environmental changes are on the horizon. These materials facilitate adaptive flooring systems that maintain flatness despite humidity or temperature shifts, extending their lifespan.
How do I Maintain Flooring Over Time?
Regularly inspect for areas where wear or moisture might compromise the sealant or finish. Use specialized tools like a grout rake to keep joints clean or a vinegar-based cleaner for gentle maintenance. Periodic resealing of hardwood floors with a high-quality finish—like those discussed in this guide—can prevent moisture intrusion and odor absorption. Consistent care not only preserves appearance but also strengthens the flooring’s resistance to damage.
Remember, the key to enduring flooring lies in meticulous prep work, choosing the right tools, and proactive maintenance. Don’t shy away from trying advanced techniques like performing a precision floor leveling with a gauge rake—it’s a game changer that elevates your project from amateur to professional quality.
Lessons from the Trenches: What I Wish I Knew About Floor Leveling and Odor Prevention
- I discovered early on that rushing through subfloor repairs only leads to frustration—taking the time to analyze moisture levels and structural issues pays dividends in durability and smell elimination.
- Understanding the science behind sealants and primers transformed my approach; choosing the right products with deep penetration capabilities prevents pet odors from sneaking back.
- Perfecting the application techniques—like using a gauge rake for self-leveling compounds—can mean the difference between a flawless finish and future problems with uneven surfaces or trapped odors.
My Go-To List for Flooring Success
- Bio-Enzymatic Cleaners: I trust brands like Biokleen or Nature’s Miracle for breaking down organic residues—essential for odor removal from deep within the subfloor.
- High-Quality Odor Sealants: Products like epoxy sealers from trusted manufacturers create an unbeatable barrier against lingering smells, simplifying the sealing process.
- Professional-Grade Leveling Tools: Laser levels, gauge rakes, and fine sanders—they streamline the prep work and ensure a super smooth surface, saving time and headaches.
- Digital Planning Software: Modern tools help me identify subtle imperfections and plan corrections accurately, ensuring precision every time.
Keep the Momentum Alive and Your Floors Fresh
Taking the plunge into detailed floor leveling and odor eradication might seem daunting at first, but with patience, proper tools, and a proactive mindset, you can achieve professional results that last for years. Each successful project energizes me to push the boundaries of what’s possible in flooring upgrades. Remember, your home deserves this level of care—your future self will thank you for the effort you invest today.
Are you ready to tackle your own deep-floor projects and banish pet odors for good? Share your experiences or questions below—I love hearing about your journey toward a fresher, more beautiful home!
,