
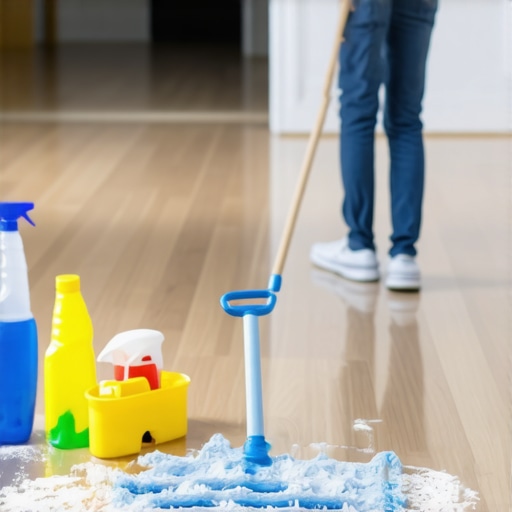
I vividly remember the moment I realized my new hardwood floors looked like they’d been caught in a sanding frenzy—not because of the finish, but because of drywall dust that had decided to settle deep into every grain. It was a rookie mistake: thinking that sweeping alone would do the trick. The dust clung stubbornly, turning my pristine floors into a gritty nightmare that no mop could handle. If you’ve faced this chaos, you know exactly what I mean. Today, I want to share the real, no-nonsense approach I developed after that frustrating day. We’ll uncover proven methods to restore your hardwood’s beauty after a drywall dust disaster, avoiding the fainting spell-inducing pitfalls many fall into. So, if your floors are coated in a fine, stubborn layer of drywall debris, stay tuned. You’re about to learn how to reclaim that flawless, glossy finish that initially made you fall in love with your space.
Why Leftover Dust Is a Big Deal (And How to Fight It)
Prepare Your Workspace and Gather Tools
Before diving into cleaning, clear the area of all furniture and rugs to access every inch of your hardwood. Grab a durable vacuum with a soft brush attachment, a microfiber mop, a bucket of warm water, mild hardwood floor cleaner, and a dust mask to prevent inhaling drywall particles. During my last drywall renovation, I made sure to wear a mask and laid down plastic sheeting to contain the dust, which saved me from tracking debris through the house.
Careful Dry Sweeping to Remove Loose Dust
Start with a gentle sweep using a soft-bristled broom or a push broom designed for delicate surfaces. Think of it like removing loose snow from a car—gentle strokes prevent pushing dust further into the grain. I remember meticulously sweeping the edges first, then progressing to the center, ensuring I didn’t scratch the finish. This step loosens large drywall dust clumps, making the wet cleaning easier and more effective.
Vacuum with Precision and Attention to Detail
Use a vacuum equipped with a soft brush or floor attachment to pick up remaining dust. Pay special attention to grout lines, baseboards, and corners where dust tends to settle. During a project, I used a handheld vacuum for tight spots and a wide nozzle for open areas, systematically covering the entire floor. This method prevents dust from being pushed into the grain, much like using a gentle blow-dryer instead of a harsh jet to clear debris.
Damp Mopping for Deep Cleaning
Prepare a cleaning solution with a few drops of mild hardwood cleaner in warm water. Dampen your microfiber mop—avoid soaking it—to prevent excess water from seeping into seams. Mop in straight, overlapping strokes, maintaining a consistent moisture level. I avoided the temptation to drench the mop; instead, I combined light pressure with careful strokes, similar to a gentle massage. This step lifts residual dust particles embedded in the finish, restoring your floors’ luster.
Dry and Inspect the Surface
After mopping, allow the floor to air dry or use a clean, dry microfiber cloth to wipe down high-traffic areas. Examine your floors for any remaining dust or streaks. If any persist, repeat the damp mopping process. During my last cleaning, a thorough inspection revealed stubborn dust in the grain—so I went over these spots twice, focusing on light, deliberate strokes to avoid damaging the finish.
Protect and Maintain Your Floors
Once clean, consider applying a fresh coat of hardwood polish or protective finish to enhance shine and set the clean look. Regular maintenance—sweeping and damp mopping every few weeks—keeps drywall dust at bay. Remember, patience and gentle cleaning are key; aggressive scrubbing can peel or scratch your hardwood. Implementing these steps, I successfully restored my floor’s beauty without costly refinishing, proving that a methodical approach makes all the difference.
Many DIY enthusiasts and even some seasoned pros often believe that installing new floors or leveling surfaces boils down to simply following a set of basic steps. However, **there are subtle nuances and myths** that can lead to costly mistakes if overlooked. For instance, a widespread misconception is that using excess thinset or leveling compound guarantees a perfectly flat surface. In reality, over-application often results in uneven curing and unpredictable final results. I recommend checking out [the ultimate guide to floor leveling for a perfect finish](https://tiletrendshop.com/floor-leveling-challenges-common-mistakes-and-how-to-avoid-them) which dives into these intricacies.
Another misconception pertains to flooring adhesives, particularly in hardwood installation. Many assume that any adhesive suitable for tile will work equally well for wood. But hardwood subfloors and planks require specific adhesives designed to accommodate wood’s movement and prevent gaps or buckling. Remember, choosing the wrong adhesive can lead to issues down the line, like squeaking or detachment. For detailed insight, see [flooring installation fundamentals and leveling tips](https://tiletrendshop.com/flooring-installation-fundamentals-leveling-for-a-seamless-look).
**The ‘Oops’ trap** that many fall into involves not properly preparing the subfloor before installation. Moisture, debris, or uneven surfaces can sabotage an otherwise flawless installation. For example, neglecting to properly sand a concrete slab before applying self-leveler can cause cracking or delamination. These mistakes are commonly overlooked but can be preventable by following proper preparation protocols.
Now, for a question that often stumps even experienced installers:
What advanced techniques can ensure flawless integration of tile and hardwood transitions without creating an eyesore?
Achieving seamless transitions is more than just meeting in the middle. It involves precise measurements, the right use of transition strips, and understanding the materials’ expansion and contraction behaviors. For those interested in elevating their craftsmanship, [transform your space with expert hardwood floor tile combinations](https://tiletrendshop.com/transform-your-space-with-expert-hardwood-floor-tile-combinations) offers valuable tips.
By digging into these nuanced aspects, you avoid pitfalls that can turn your flooring project into a disaster. Remember, proper planning, understanding material behavior, and attention to detail are key. Have you ever fallen into this trap? Let me know in the comments or explore more expert tips at [revamp your home with flooring installation tips](https://tiletrendshop.com/revamp-your-home-with-expert-flooring-installation-tips).**
Keep It Working: Essential Tools for Durable Flooring
Maintaining beautiful floors over time requires more than just routine cleaning; it demands the right tools that can withstand the test of longevity. I personally swear by a high-quality orbital floor buffer equipped with a terrycloth pad for polishing hardwoods—it’s gentle yet effective at removing minor scratches and restoring shine without damaging the finish. For tile, a grout haze remover sprayer paired with a scrub brush attachment saves hours over traditional scrubbing methods, ensuring that grout lines stay crisp and clean. Investing in a moisture meter is crucial when dealing with waterproofing or moisture-sensitive installations; it helps prevent future buckling or mold growth by monitoring subfloor conditions over years.
Software That Streamlines Long-Term Planning
Keeping track of maintenance schedules, material inventories, and project timelines becomes manageable with advanced software solutions. I rely on project management tools like Trello combined with custom spreadsheets to schedule bi-annual refinishing for hardwoods and periodic resealing of tiles. For more comprehensive tracking, specialized flooring management software like FloorForce offers inventory control and maintenance alerts that help prevent issues before they become costly repairs. As the industry evolves, integrating IoT sensors into flooring—monitoring humidity, temperature, and even wear—seems like the future, providing real-time data to anticipate problems before they escalate.
Scaling Your Project: From DIY to Renovation Expert
Growing from a DIY enthusiast to a professional involves understanding scalable methods. When expanding your flooring projects, modular tools like extendable pole sander attachments and adjustable tile wet saws allow for larger areas to be tackled efficiently. Carefully calibrated self-leveling compounds and precise flooring adhesives also enable you to handle bigger, more complex jobs. My tip? Practice the step-by-step technique for flawless floor leveling on small patches before moving to large spaces—it’s a game-changer in quality and speed.
How do I maintain my floors over time?
Regular inspections are vital. Check for signs of wear, damage, or moisture infiltration, and address issues promptly. Schedule professional refinishing for hardwoods every 7-10 years to revive their appearance, and regrout tile lines as needed. Using dedicated cleaning tools and proper sealants extends the lifespan of your flooring, saving money in the long run. Remember, the key to long-term success is consistency—set reminders for periodic upkeep, and don’t wait until problems become visible to act.
If you’re ready to elevate your maintenance game, try implementing an orbital buffer for your hardwoods or investing in humidity sensors. These advanced tips ensure your floors look stunning and perform flawlessly for years to come. For more expert advice on flooring upkeep, explore professional maintenance strategies.
Lessons from the Trenches: Hard-Earned Wisdom on Floor Perfection
One of the sharpest lessons I learned was never to underestimate the subtle power of preparation. Skipping detailed subfloor checks or rushing the cleaning process can turn an initially promising project into a disaster that haunts you long after completion. Embracing patience and attention to small details, like verifying moisture levels or thoroughly cleaning dust, truly makes the difference between a floor that lasts and one that needs costly redo.
Another insight I wish I had grasped earlier involves choosing the right materials upfront. Whether it’s selecting adhesives that accommodate wood movement or primers that prevent adhesion failures, investing time in research and consulting experts can save hundreds of dollars and headaches later. For complex transitions, like blending hardwood and tile seamlessly, understanding the nuances of expansion and contraction is essential — simple tricks like flexible transition strips can save your project from future cracking or buckling.
Finally, I realized that embracing a proactive mindset—regular inspections, maintenance, and updates—is key to preserving the beauty of your floors over time. Adopting tools like moisture meters or investing in quality sealants isn’t just about immediate results; it’s about safeguarding your investment for years to come. Remember, the perfect floor isn’t a one-time achievement but a journey of ongoing care and refinement.
Tools and Resources That Elevate My Craft
There’s no substitute for trusted tools when it comes to achieving flawless flooring. My go-to resource for mastering floor leveling is the step-by-step guide on flawless floor leveling. It’s packed with actionable tips and common pitfalls to avoid. For tips on mixing and applying self-leveling compounds effectively, I recommend precision techniques for perfect surfaces.
When it’s time to select the right transition strips or adhesives, I rely on expert advice on floor transitions and material compatibility. These resources have helped me understand the subtle science behind durable, seamless installs, turning novices into confident DIYers.
Additionally, tools like moisture meters and high-quality microfiber mops streamline my maintenance routine. They may seem minor investments, but their impact on the longevity and appearance of my floors is undeniable. For long-term planning and tracking maintenance schedules, I now use software like FloorForce, which offers tailored alerts and detailed inventory control—a game changer for those serious about preserving their investment.
Becoming the Artist of Your Living Space
Embarking on a flooring project is more than just a technical task—it’s an opportunity to craft a living space that reflects your personality and dedication. Every detail, from meticulous subfloor prep to choosing the perfect transition method, contributes to a space that feels both functional and inspiring. Remember, each successful project boosts your confidence and skill, paving the way for more ambitious renovations.
So, are you ready to take the next step toward perfect floors? With patience, the right tools, and a growth mindset, you can turn your vision into reality. Keep learning, experimenting, and sharing your experiences—your beautiful, durable floors await.
Have you ever faced a surprising flooring challenge that taught you a vital lesson? Share your story below and help others navigate their own journeys to flawless floors.