
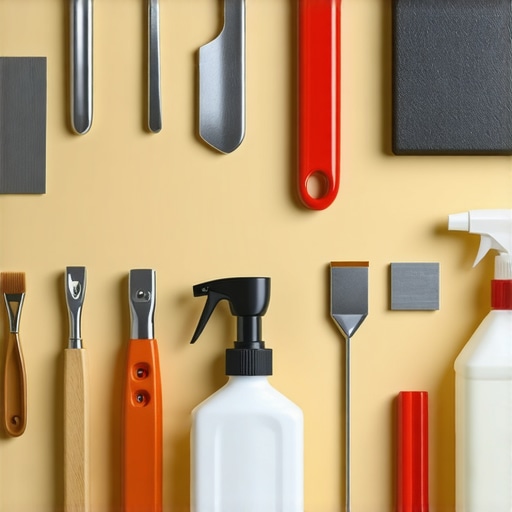
Ever found yourself midway through a flooring project, only to realize that dried floor leveler has turned your tools into stubborn, cement-like blocks? I remember the frantic scramble in my garage, trying to chip away hardened self-leveling compound without damaging my favorite trowel. That moment of frustration was a lightbulb for me—there had to be a better way.
Why Scrubbing Old-School Just Doesn’t Make the Cut
Let’s face it—scrubbing dried floor leveler is a nightmare. It eats up your time, dulls your tools, and often, still doesn’t clear everything away. Plus, the risk of damaging your blades or leaving behind residue can lead to future problems with your flooring. According to flooring experts, avoiding aggressive scrubbing not only preserves the integrity of your tools but also ensures the finish on your floor remains flawless. In fact, skimping on proper cleanup might even cause uneven surfaces or bonding issues down the line.
Is It Really Worth Trying to Remove Leveler Without Scrubbing?
Initially, I thought the scrubbing method was my only option—biting the bullet and spending hours with a wire brush or heavy-duty scraper. But I soon found that damaging my tools wasn’t worth it, especially when I discovered more effective, less laborious techniques. This mistake—thinking that brute force was the only way—cost me both time and money. Trust me, if you’ve faced similar struggles, you’ll want to hear about the tricks that don’t involve aggressive scrubbing.
Ready to learn these practical, gentle methods? Stay with me, because next we’ll delve into tried-and-true techniques for removing dried floor leveler that will save your tools and your patience.
,
Prep Your Workspace for Gentle Removal
Start by scraping off as much of the hardened leveler as possible with a plastic putty knife. Think of it like peeling dried glue—careful and steady motions prevent gouging your subfloor. Use the plastic tool instead of metal to avoid scratching delicate surfaces. When I faced my stubborn spills, I first loosened the crust with gentle prying, which minimized residue and kept my tools sharp for future projects. Afterward, vacuum the area thoroughly to remove loose debris because a clean surface prevents abrasion during the next steps.
Dampening for Softening
Next, lightly dampen the remaining dried leveler with a sponge soaked in warm water. Think of it like watering a crusted cake—moisture softens the hardened layer, making it easier to lift. Don’t over-soak; just dampen enough to penetrate the surface without flooding. I learned this trick when I had a tough spot near the doorway; I kept adding small amounts of water until the stubborn patch softened, turning my effort into a quick clean-up instead of a tiring scrape. This process also reduces dust and minimizes the risk of damage, aligning with expert advice on proper floor leveling techniques.
Use Heat to Loosen Adhesion
Apply heat with a heat gun or a hairdryer set on high. The heat helps expand and weaken the bonds of the dried leveler, making it easier to remove. Imagine softening glue with a warm blow; it’s the same principle. I once used a heat gun on a particularly stubborn patch, and the softened leveler peeled away effortlessly, saving me hours of manual scraping. Be cautious to keep the tool moving to avoid overheating or damaging the substrate. This technique enhances safety and preserves your tools, echoing advice from primer application tips.
Employ a Solvent for Sticky Residue
If residue persists, apply a suitable solvent such as a commercial adhesive remover or diluted vinegar solution. Think of it as dissolving stubborn grime—soaking the area allows the solvent to break down the bond quickly. Remember to test the solvent on a small patch first to prevent damage to your subfloor or adhesive finishes. When I encountered a leftover patch that refused to budge, I gently brushed on the solvent and waited a few minutes before wiping it away. The chemical reaction loosened the dried leveler further, making removal seamless. This step, when used carefully, complements heat application and reduces unnecessary physical effort.
Final Cleanup and Inspection
Once the leveler is removed, vacuum again to clear all dust and debris, ensuring a pristine surface for your subsequent flooring installation. Use a damp cloth to wipe the area and check for smoothness, akin to the mirror test. If you spot uneven patches, lightly sand the surface, always following precise leveling techniques to ensure a perfect finish. My experience with meticulous cleanup resulted in a flawless floor that required minimal correction, emphasizing the importance of patience and detail at this stage.Many homeowners and even some contractors fall prey to the misconception that following standard procedures guarantees a flawless finish. However, expertise reveals that understanding the subtle nuances—such as substrate preparation and material compatibility—can make all the difference in long-term durability and aesthetic appeal. For instance, insisting on a uniform thickness of self-leveling compounds without considering substrate porosity often leads to cracking or peeling over time. This is supported by research indicating that tailored surface preparation enhances adhesion strength, minimizing future failures. A common myth is that the cheapest underlayment suffices; in reality, investing in quality materials and proper techniques prevents costly repairs later. Additionally, advanced installers often avoid the trap of overly aggressive sanding, which can weaken the substrate and compromise leveling accuracy. Instead, gentle, targeted smoothing preserves the integrity of the subfloor while achieving the desired flatness. When executing complex patterns or large-format tiles, the precise calculation of subfloor flatness becomes crucial. Using laser-guided leveling tools and adhering to expertfloor leveling standards significantly reduces lippage and grout line inconsistencies. Remember, subtle differences in these practices are what elevate a good installation to a professional-grade result. To deepen your understanding, I recommend reviewing the comprehensive guidelines outlined in the ultimate floor leveling guide. Recognizing and addressing these hidden aspects helps avoid common pitfalls and ensures a stunning, long-lasting floor—because excellence lies in the details. Have you ever fallen into this trap? Let me know in the comments.
Invest in Quality Tools for Durable Results
When it comes to installing or repairing tile, hardwood, or levelers, your tools are your best allies. I swear by a high-quality notched trowel like the Marshalltown 10720 series because it consistently delivers uniform thinset application — critical for a flat, long-lasting surface. Cheap trowels often have inconsistent notches, leading to uneven coverage, which can cause lippage or bonding issues. For floor leveling, I prefer a self-leveling pump such as the Pumper Master, which ensures consistent flow and helps avoid air bubbles that could compromise your substrate. Investing in such equipment upfront saves you time and prevents costly rework later, aligning with expert advice on long-term results.
Regular Maintenance to Extend Flooring Lifespan
Long-term flooring health hinges on proper upkeep. Hardwood floors, for example, benefit from routine refinishing—using a high-quality microfiber mop and pH-neutral cleaner like Bona Hardwood Floor Cleaner helps preserve their shine and prevents dirt buildup that can cause scratches. For tiles and grout, sealing is paramount; I recommend performing a grout sealer application every two years using a penetrating enhancer such as Aqua Mix Sealer’s Choice to prevent staining and moisture ingress. Additionally, monitoring expansion gaps and using foam shims during seasonal shifts maintain the integrity of large installations. Maintenance isn’t just routine; it’s an investment in your home’s aesthetic and structural health, supported by reputable sources on flooring care.
Planning for Future Expansion and Repairs
The trend in flooring is moving toward systems that accommodate expansion and insulation, especially with fluctuating humidity levels. Installing flexible transition strips, as explained in our detailed transitional installation guide, helps prevent buckling or cracking over time. I also add expansion joints in large areas—these are tiny gaps filled with slip strips that allow floors to move naturally without damage. Moreover, having a dedicated toolkit for repairs—like a set of professional-grade wood fillers and epoxy adhesives—makes touch-ups more manageable, ensuring your flooring remains flawless for years. These proactive steps are aligned with modern practices that prioritize durability.
How do I maintain my flooring tools to ensure they last?
To keep your tools in top shape, clean them immediately after use. For example, wiping down notched trowels and applying a light coating of oil helps prevent rust. Store tools in a dry, organized space to avoid warping and corrosion, which could compromise precision during your next installation. Regularly inspecting blades and notches for wear allows early replacement, maintaining consistent application thickness. Remember, well-maintained tools not only give you better results but also save money on replacements over time. For comprehensive guidance on tool care, check out our floor leveling techniques.
Looking ahead, automation and smart tools are beginning to revolutionize flooring installation. Power-assisted laser leveling systems are becoming more affordable, offering higher precision and reducing human error. This trend suggests that investing in such innovative equipment now will pay dividends in future projects, elevating your craftsmanship to professional standards. Don’t overlook the importance of training on these advanced tools—upskilling today ensures you stay competitive tomorrow.
Ready to take your flooring projects to the next level? Try incorporating a precision laser level for your next big job. It’s a game-changer for achieving perfectly flat surfaces with minimal effort. For more insights into the latest equipment, visit our installing tiles in 2025 guide.
What I Wish I Knew When I Started Leveling Floors
One of the most valuable lessons I learned was that rushing the preparatory steps often led to more work later. Proper substrate cleaning and moisture testing saved me from unexpected cracks and unevenness. I also realized that investing in quality tools, like a laser level or a good trowel, dramatically improved my results, saving time and headaches down the line. These insights came from hours of trial, error, and paying close attention to the details that make a difference.
Top Tools and Resources That Changed My Approach
I turned to essential tools such as the precise floor leveling techniques guide, which helped me understand the nuances of application thickness and substrate prep. My trusted notched trowel from Marshalltown ensures uniform thinset application, preventing lippage. For stubborn patches, a quality heat gun made softening dried leveler effortless. Additionally, the comprehensive tutorials on floor leveling standards have become my go-to references, guiding each project with confidence.
Take Confidence and Elevate Your Skills
Remember, every successful flooring project begins with a mindset open to learning and patience. Embrace the process, invest in the right tools, and don’t hesitate to consult expert resources. Your dedication to understanding the subtleties of floor leveling will translate into a durable, flawless finish that transforms your space. If you’re wondering where to start, exploring the latest techniques and tools will set you apart as your own handyman or woman, capable of achieving professional results.