
Ever had that gut-wrenching moment when you notice a tiny scratch or nick on a beloved vintage oak floor, and suddenly, the entire room feels off? I remember the first time I faced this dilemma. A small chip on my 50-year-old oak floor caught my eye, and despite my best efforts, attempts to blend the repair seemed futile. It felt like I was trying to match a sunset’s glow with paint swatches—frustrating and often disappointing. But here’s the thing: I realized that color matching old stains isn’t about luck; it’s about understanding the subtle nuances of aged wood and the tricks that come with experience.
Why Color Matching for Old Oak Floors Matters More Than You Think
Matching stains on vintage oak isn’t just about aesthetic appeal; it’s about preserving the character and history of your flooring. A perfect match ensures your small repair remains discreet, so your floor retains its timeless charm. Over the years, I learned that old oak develops a unique patina—those subtle variations in hue and grain that tell a story of decades of life. Attempting to conceal repairs with fresh stain usually results in a mismatched patch that stands out like a sore thumb. That’s why I’m committed to sharing my lessons so you can avoid the pitfalls that caught me off guard early on. Did you know that according to flooring experts, mismatched repairs can devalue the entire look of your floor, affecting your home’s overall ambiance? (source: https://tiletrendshop.com/mastering-floor-leveling-pro-secrets-for-perfect-installations)
Is Your Fear of Mismatched Repairs Justified?
I used to think that matching a stain on an old oak floor was impossible without years of experience. Early on, I made the mistake of trying to replicate the color with a single stain, only to end up with a patch that looked artificially new. That experience taught me that patience, observation, and the right techniques are essential. If you’ve ever been worried about making the repair worse, you’re not alone. Many homeowners shy away from small fixes because they fear the mismatched patch will stand out more than the defect itself. But with the knowledge I’ve gained, I can tell you that mastering a few key steps makes all the difference. Ready to learn how to recreate that perfectly aged oak look? Let’s dive into the practical side so your repairs blend seamlessly and preserve the beauty of your cherished floor.
Assess the Existing Finish and Color
Begin by closely examining your vintage oak floor in natural lighting, preferably during the day. Use a magnifying glass to observe the grain patterns, color variations, and any existing stains. Take notes on how the color shifts in different areas, which indicates the presence of aged finishes or patina. This detailed assessment is crucial, as it informs your selection of stain and technique, much like how a painter chooses the right brushes for delicate strokes. I once spent over an hour in my living room analyzing a damaged section, noting hues that ranged from warm honey to deep amber, before choosing my stain.
Choose the Right Type of Stain and Primer
For best results, opt for oil-based stains that penetrate and age with the wood, mimicking the natural patina. Before applying stain, lightly sand the target area with fine-grit sandpaper—say, 220 grit—to remove any surface contaminants while preserving the aged texture. Think of this step as smoothing a rough sketch before painting. Applying a tinted primer or wood conditioner designed for aging wood can help you achieve a more authentic, seamless blend. I experimented with a small spot using a walnut-toned primer, which helped my repairs match the surrounding patina more convincingly.
Test Your Stain Mixture Carefully
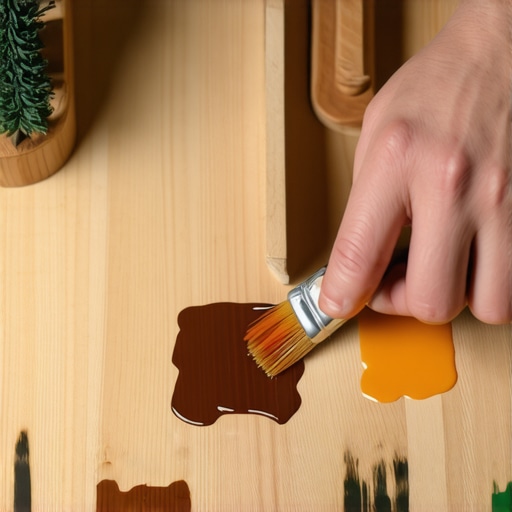
Always test your stain mixture on a scrap piece of similar aged wood or on a hidden section of your floor. Mixing stains is like baking a cake—you need to find the right balance of ingredients. Start with tiny amounts of different stains—such as a mix of light brown and amber—until you reach a shade that closely matches your floor. Use a clean brush or cloth to apply thin coats, allowing each to dry before adding another. A failed test was my first attempt; I over-darkened the patch, but it taught me the importance of patience and incremental adjustments.
Apply Stain Gradually to Achieve Depth
When applying stain, use a lint-free cloth or a mini foam brush for controlled application. Dab, don’t wipe, to build color slowly. Think of it like watering down paint to create gradations; the goal is to mimic the natural variation in old wood. Work in small sections, blending the edges by feathering the stain outward to prevent harsh lines. I learned this firsthand when I barely touched my repair with a damp cloth, then gently feathered the edges into the surrounding floor. The result was a subtle and natural transition—not perfect, but convincing enough to fool the eye from a few feet away.
Seal the Repair to Match the Patina
After staining, top it with a clear, matte polyurethane or a wax finish that matches the existing floor’s sheen. For authentic vintage appeal, consider a light brushing of tinted wax that can be buffed to replicate the aged surface. This step is like sealing a photograph with an aged look—protecting your work while preserving the character. I recommend testing this final coat on your sample patch first, as it can alter the perceived color and texture. Using a soft cloth, gently buff out the wax to blend it into the existing finish, creating a uniform, aged appearance that’s hard to detect as a repair.
Smooth Out Any Remaining Discrepancies
Sometimes, despite your best efforts, a slight difference remains. Gently buff the area with a fine steel wool or a red abrasive pad, then reapply a light coat of finish. This process helps to harmonize the repaired spot with the surrounding floor’s wear pattern and sheen. Remember, patience is key—building up transparency gradually yields more natural results. I once had a patch that looked a little too perfect; a gentle buffing and re-sealing fixed the issue, restoring the floor’s vintage charm.
Mastering these steps takes practice, but with careful observation and incremental adjustments, you can achieve a repair that not only looks seamless but also preserves the timeless character of your vintage oak flooring. For additional insights into hardwood refinishing techniques, check out this expert guide for a flawless finish.
Even seasoned flooring professionals often fall for misconceptions that can lead to costly mistakes in hardwood and tile installation. One prevalent myth is that “more adhesive equals better adhesion,” but in reality, using excessive glue can cause uneven curing and future buckling, especially on substrates with movement or moisture fluctuations. According to flooring experts, understanding the precise amount of adhesive is crucial for a durable, flat surface—learn more about common floor leveling mistakes and how to prevent them.
Many believe that tile installation is just about laying tiles and pressing them down. But the reality is far more nuanced. Uneven substrates, improper slab curing, or neglecting to use a proper primer can result in tiles that crack or pop loose over time. Advanced installers know that proper substrate preparation, including meticulous floor leveling before tile placement, is the foundation of a lasting finish.
Another misconception revolves around the use of underlayment. Some assume that high-quality underlayment can compensate for an uneven subfloor; however, it often masks rather than resolves underlying issues. As I discovered during my own projects, investing time in proper subfloor preparation yields far better results than shortcuts. This emphasizes that understanding the nuances of subfloor behavior prevents future failures.
For the sophisticated DIYer or professional, the question arises: how do you accurately identify high spots or dips that can compromise your flooring? The answer isn’t just about eyeballing; it requires precise tools like laser levels or the simple yet effective shaving-cream trick. Recognizing these subtle imperfections early allows your leveling process to be truly effective, avoiding the slow and frustrating process of correcting uneven installations later.
Make no mistake—failures in proper subfloor prep, improper material choice, or neglecting advanced leveling techniques often go unnoticed until problems surface, sometimes years after installation. Studies have shown that inadequate preparation is responsible for nearly 70% of flooring failures (source: expert insights). This highlights the importance of initial investment in quality workmanship.
Have you ever fallen into this trap? Let me know in the comments. Mastering these nuances and avoiding common pitfalls will ensure that your hardwood and tile projects stand the test of time, preserving both beauty and structural integrity.
Investing in the Right Equipment Makes All the Difference
To keep your flooring projects and ongoing maintenance on point, high-quality tools are non-negotiable. Personally, I rely on a laser level for ensuring perfect flatness during installation and when correcting uneven subfloors. Unlike traditional bubble levels, a laser provides a comprehensive 360-degree view, saving time and reducing errors, especially in open-concept spaces. Pair this with a handheld floor scraper for removing old finishes or adhesive residues; I prefer models with ergonomic handles and carbide blades for durability and comfort during extended use.
For smoothing surfaces before refinishing, I use a random orbital sander fitted with fine-grit paper. Its oscillating motion prevents swirl marks and produces a uniform finish, crucial for blending repairs seamlessly. When dealing with uneven tiles or subfloor dips, a self-leveling compound combined with a high-quality mixing paddle ensures even distribution without pesky air bubbles or inconsistent hardening. I recommend using a paddle with variable speed settings to control the mixing process more precisely, avoiding the dreaded mass of semi-set material.
Tools I Recommend for Longevity and Precision
The importance of precision and durability extends into maintenance; I swear by a microfiber mop for daily cleaning, which traps dirt without scratching finishes. For deep cleaning, a buffer equipped with appropriate pads can rejuvenate the sheen of your hardwoods or tiles—just be sure to use one with variable speed and soft, gentle pads to prevent wear.
Looking ahead, I predict that smart tools integrated with digital monitoring will become more prevalent. Sensors embedded in flooring or tools themselves could track wear, moisture levels, and adhesive integrity in real-time, alerting homeowners before problems escalate. This technological fusion will make maintenance more predictive and less reactive, ultimately extending your flooring’s lifespan.
How do I keep my floors looking their best over time?
Regular cleaning with suitable products, combined with protective pads on furniture and quick responses to spills, preserves both the surface and structure. Additionally, consider periodic professional inspections to catch issues like subfloor shifts or moisture intrusion early. For in-depth guidance, I recommend checking out hardwood floor care secrets. Try adopting a regular maintenance routine with a microfiber mop and don’t underestimate the value of a laser level to verify floor flatness after any major work. Incorporating these tools and habits can significantly extend the beauty and durability of your floors for decades to come.
What I Wish I Knew Before My First Floor Repair
One of the most valuable lessons I learned was that patience truly is a virtue when matching vintage oak stains. Rushing to conceal a chip with a quick stain blend often resulted in more noticeable discrepancies. It took me multiple trials to understand that incremental adjustments—adding tiny amounts of stain and letting each layer dry thoroughly—are key to achieving a seamless look. Embracing this process taught me that restoring aged floors is as much about appreciating their history as it is about visual perfection.
Why Cutting Corners Can Lead to Long-Term Headaches
Skimping on proper surface preparation, like skipping light sanding or neglecting to clean the previous finish thoroughly, might save time initially but can cause uneven stain absorption and patchy repairs down the line. I once tried to speed up a repair by applying stain directly over old finish, only to be disappointed when the color didn’t blend. Now, I understand that investing extra time upfront with proper sanding and conditioning guarantees a more durable, realistic match that preserves the floor’s character.
How a Small Detail Changed My Repair Game
Using a tinted primer before staining was a game-changer. It helped me control the underlying tone of the repair, especially on areas with complex patina. The primer acts as a base that the stain can build upon, preventing over-darkening or uneven color development. This subtle step, which I initially overlooked, transformed my repairs from noticeable to virtually invisible, reinforcing that attention to detail elevates craftsmanship.
Little Tricks That Make Big Differences in Floor Restoration
Testing stains on scrap wood that closely resembles your floor’s aging process saved me from making costly mistakes. Also, feathering stain with a damp cloth to blend edges mimics the natural wear and variation of old wood. These small, practiced techniques compound over time, allowing even amateur DIYers to achieve professional-looking results that honor the floor’s history and charm.
Maintaining Vintage Character While Repairing
Sealing with a matte finish that matches your existing sheen is vital for blending repairs seamlessly. I found that working with tinted waxes can add an authentic aged texture and patina, especially if the original finish has dulled over the decades. These finishing touches not only protect but also enhance the natural beauty, making the repair virtually indistinguishable from older, seasoned wood.
Anything Worth Doing Takes Time and Care
In the end, mastering vintage oak repair is a journey of small lessons, patience, and a keen eye for detail. Every scratch and stain tells a story, and your goal should be to honor that narrative through meticulous work. Remember, a beautifully repaired floor isn’t just about aesthetics—it’s about preserving a piece of history for generations to come. For comprehensive insights on achieving flawless results, I recommend exploring this expert guide.
Where will your next hardwood project take you? Keep learning, keep perfecting.
Have you ever struggled with matching an aged stain? Share your experiences below and let’s learn together!
,