
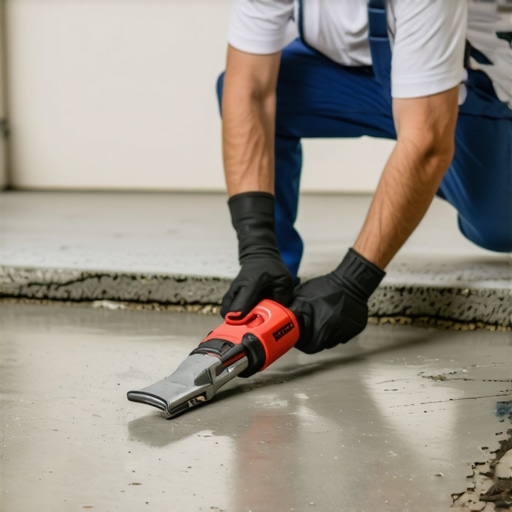
I’ll never forget the moment I stepped onto my newly laid hardwood floor and felt an uneven, bumpy surface underfoot. It was a sharp jolt of disappointment—after all, I thought I had done everything right. The subfloor was supposed to be a smooth foundation, but instead, it was an obstacle course of high spots and dips. That lightbulb moment made me realize: dealing with a lumpy concrete subfloor isn’t uncommon, and the worst part? You don’t always need heavy equipment like a grinder to fix it.
Why Fixing a Lumpy Subfloor Matters More Than You Think
Uneven subfloors can cause a cascade of problems—cracked tiles, squeaky floors, and a finish that just doesn’t sit right. If you’re planning to install tiles, hardwood, or laminate, a smooth base isn’t optional; it’s essential. But the good news is, you don’t have to invest in expensive, dusty machinery. Instead, I found simple techniques that deliver professional results, saving time and money.
Are You Wasting Money on Overkill Solutions?
Early on, I made the mistake of thinking that a powerful grinder was the only way to tackle high spots. I rented one, struggled with it, and felt overwhelmed by the dust and noise. Believe me, I learned the hard way that it’s far better to assess your situation carefully and choose the right approach. Sometimes, a few strategic steps without heavy tools can do the trick. Leveling with the right compound can save you from headaches later. According to experts, proper preparation and correct application are key to a flawless finish, regardless of the tools used.
So, if you’ve faced that frustrating bumpiness underfoot or worried about the mess and expense of grinding, you’re in the right place. Today, I’ll share proven methods to level your concrete subfloor without a grinder, making the process approachable, efficient, and even enjoyable. Ready to transform your uneven base into a perfect foundation? Let’s dive in.
Assess the High and Low Spots Precisely
Start by thoroughly inspecting your subfloor using a long straightedge or a level. Place it on various sections to spot high points. I once used a 6-foot level on my basement floor, finding several uneven spots that needed attention. Mark these areas clearly with a pencil. This step is crucial because it directs your efforts precisely where needed, avoiding unnecessary work or overcorrection.
Prepare Your Materials and Workspace
Gather a high-quality self-leveling compound, a clean mixing bucket, a drill with a mixing paddle, and a trowel. Keep your workspace clean by sweeping debris—dirt and dust can prevent proper bonding. I recommend covering nearby surfaces to catch any splashes. Proper preparation ensures your leveling solution adheres well and cures evenly, reducing the risk of future cracks or dips.
Mix the Leveling Compound Correctly
Follow the manufacturer’s instructions meticulously. Typically, you’ll add clean water to the compound and mix until you achieve a smooth, pourable consistency similar to pancake batter. During my first attempt, I overmixed, creating a runny mixture that sloshed everywhere. Consistent mixing avoids air bubbles and ensures uniform flow. Use a drill with a paddle to prevent lumps, and only mix enough for 15-20 minutes of work.
Apply the Leveling Compound with Precision
Pour the mixture onto the high spots, working quickly. Use a trowel or a squeegee to spread the compound in the dips, gently pushing it into low areas. Think of it like spreading frosting evenly on a cake—smooth, controlled movements make all the difference. In my case, I worked in small sections, ensuring each area was filled without pooling excess. This step levels the surface, creating a uniform base for your finished flooring.
Use a Straightedge or Squeegee for a Flawless Finish
Drag a long straightedge or a squeegee across the surface to flatten the compound, removing any excess, and making it level with surrounding areas. This process is akin to shaving off uneven icing on a cake—careful, gentle strokes get the job done. During my project, I used a 4-foot level as a guide, ensuring the surface was flat within a millimeter. This extra step guarantees a smooth foundation that prevents future unevenness or cracking when installing your flooring.
Allow Proper Curing Time Before Proceeding
Most compounds require at least 24 hours to cure before placing any weight or installing flooring. Avoid walking or placing furniture on the fresh surface during this period. I once rushed to install hardwood after only 12 hours, which caused slight surface imperfections. Patience here secures a stable, long-lasting base and saves you from costly corrections later. Always check the product instructions and ensure the compound has fully set before moving forward.
Final Inspection and Touch-Ups
Once cured, inspect the floor using a level or straightedge. If minor imperfections remain, apply another thin layer of leveling compound. My experience shows that slight dips can be easily fixed with targeted application, improving the overall smoothness. This meticulous approach ensures your subfloor will provide a perfect surface for tiles, hardwood, or laminate, significantly reducing issues like squeaks or cracks in your finished floor. For detailed guidance on achieving professional results, explore this comprehensive guide.
While many DIY enthusiasts or even seasoned contractors focus on top-layer aesthetics, there’s a quiet undercurrent of nuance that often gets overlooked—especially regarding **flooring leveling and proper substrate preparation**. One common myth is that if the surface looks flat at first glance, it’s ready for the final layer. However, subtle imperfections beneath can cause long-term issues, including cracking, squeaking, or uneven wear.
Are Your Assumptions About Subfloor Integrity Misplaced?
Many believe that a concrete slab, once cured, is inherently stable. But in reality, **subtle shifts or moisture variations**—especially in older structures—can compromise your flooring’s foundation. Ignoring these nuances can lead to costly repairs down the line. For instance, a study by flooring expert Mark Clement highlights that even minor differences in subfloor moisture content can dramatically affect installation outcomes (source).
Another misconception is that high-traffic areas require more aggressive preparation. On the contrary, these zones demand even greater precision in leveling to prevent premature wear and tile cracking. Skipping thorough inspections—like the ‘blue tape’ test or the ‘water drop’ method—can result in undetected high spots or dips, which manifest as trip hazards or uneven surfaces over time.
Identifying the Common Myths and Their Fallacies
One prevalent myth is that floors need to be perfectly level to look good. But in many cases, slight slopes—up to 1/8 inch over several feet—are visually acceptable and don’t affect performance. Over-leveling, however, can lead to unnecessary material use and frustration. The key lies in understanding the tolerances for your specific flooring type. Hardwoods, for example, are more forgiving of minor imperfections than tiles, which demand strict flatness (more on this).
Additionally, some installers rely solely on mechanical tools like lasers or straightedges, assuming they’re foolproof. In practice, combining these with manual assessments—such as probing for hidden voids or moisture pockets—is essential for a comprehensive evaluation.
Mastering the Nuance: Don’t Overlook the Details
One advanced mistake involves neglecting temperature and humidity fluctuations during the curing process. These factors can induce expansion or contraction in the substrate or leveling compounds, leading to future cracks or dips. Experts suggest controlling environmental conditions during installation—a step often skipped in DIY projects. Regular inspections and proper sequencing, as outlined in this guide, help mitigate these risks.
To truly master flooring installation, understanding and respecting these nuances is crucial. Proper substrate assessment and preparation serve as the backbone for a durable, seamless finish. Remember, a flawless floor isn’t just about the visible surface; it’s about the foundation beneath. For an in-depth exploration of leveling techniques, see this resource.
Have you ever fallen into this trap? Let me know in the comments.
Maintaining the integrity of your flooring after installation is as crucial as the initial setup. To ensure your hardwood floors, tiles, or leveled subfloors remain pristine and durable, investing in the right tools and adopting disciplined routines makes all the difference. From cleaning to inspections and small repairs, having a set of reliable equipment can save you time and preserve your investment for years to come.
How do I maintain my floors over time? Invest in the right tools that stand the test of time. Starting with a high-quality soft-bristle broom is essential; I personally favor the O-Cedar ProMist for its gentle yet thorough cleaning, which prevents scratches on hardwood surfaces. Paired with a microfiber mop, it helps remove dust and debris that can cause surface wear. For deeper cleaning, I recommend a pH-balanced hardwood floor cleaner—regular use of specialized cleaning solutions maintains shine without damaging finishes.
For periodic inspections, a moisture meter like the Tramex CME4 is invaluable. It helps detect hidden moisture issues that can lead to warping or mold growth, especially in basements or bathrooms. Regularly checking humidity levels and maintaining ambient conditions—ideally between 30-50% humidity—can prevent wood from expanding or contracting unexpectedly. This proactive approach aligns with advice from industry experts.
When it comes to minor repairs or touch-ups, a precision multi-tool such as the Dremel Multi-Max is perfect for delicate tasks like sanding small sections or removing grout haze without risking damage to surrounding areas. I use it extensively because of its controllability and compact design. For addressing scratches or small chips in hardwood, I rely on a touch-up kit that includes matching stains and finishes, allowing quick repairs that blend seamlessly.
Flooring maintenance isn’t just about tools—it’s about routine. Establishing a weekly cleaning schedule coupled with biannual inspections ensures that potential issues are caught early. Using a flashlight during inspections, for instance, can help spot high spots or cracks that may not be visible under regular lighting. This simple hack can be your first line of defense against long-term damage.
Looking ahead, the trend is moving towards smart tools that can connect via Bluetooth or Wi-Fi, providing real-time diagnostics and maintenance alerts. Investing in these emerging technologies will future-proof your flooring care routine and could even extend the lifespan of your investment significantly.
What’s the best way to keep your flooring flawless? Start with a strong maintenance routine supported by precise tools. I encourage you to try integrating a moisture meter into your periodic inspections—it’s a game changer for early detection of issues and can prevent costly repairs down the line. For comprehensive guidance, consider exploring this detailed resource. Consistent upkeep will ensure your floors not only look beautiful but also stand the test of time, preserving their value and style for years to come.What I Wish I Had Known Before Tackling a Lumpy Subfloor
One of my hardest lessons was realizing that perfection doesn’t always require the heaviest tools. Early on, I believed renting a grinder was the only solution, but I quickly learned that careful assessment and smart preparation can save both time and money. Trusting my instincts and questioning conventional methods opened doors to simpler, more effective techniques.
The Importance of Details No One Tells You
It’s easy to overlook the subtlety beneath the surface—moisture variations, tiny shifts in the concrete, and environmental factors all play a role. These little nuances can make or break your project. Paying close attention, like performing the ‘blue tape’ test or monitoring humidity, gave me a clearer picture and helped me avoid costly mistakes down the line.
Books and Resources That Changed My Approach
Sometimes, a good book or trusted online resource becomes your best companion. For me, diving into this comprehensive guide provided clarity on troubleshooting common issues. I’ve also found that industry-specific tools, like moisture meters, are invaluable in real-world applications, giving peace of mind and measurable data.
The Power of Patience and Precision
Rushing a project rarely leads to good results. Waiting for proper curing time and employing precise techniques in spreading, leveling, and inspecting made a noticeable difference. Those small but deliberate actions turned an ordinary job into a professional finish that lasts. I encourage embracing patience—your future self will thank you.
Step Forward with Confidence
Every project I finish reinforces the importance of careful prep, attention to detail, and respectful patience. Even in the face of unexpected hurdles, these principles guide me toward success. If I could offer one piece of advice, it would be to trust your assessment, arm yourself with the right tools, and keep learning from each experience. Want to explore more about achieving flawless flooring? Check out this step-by-step guide to take your skill to the next level.
Feeling Inspired? Now It’s Your Turn
Mastering flooring installation without heavy equipment has opened my eyes to the value of strategic thinking and patience. Whether you’re a DIY enthusiast or a seasoned pro, remember that success comes from understanding the nuances beneath the surface. So, what’s your biggest flooring challenge right now? Let’s talk about it below and keep the conversation going!
,