
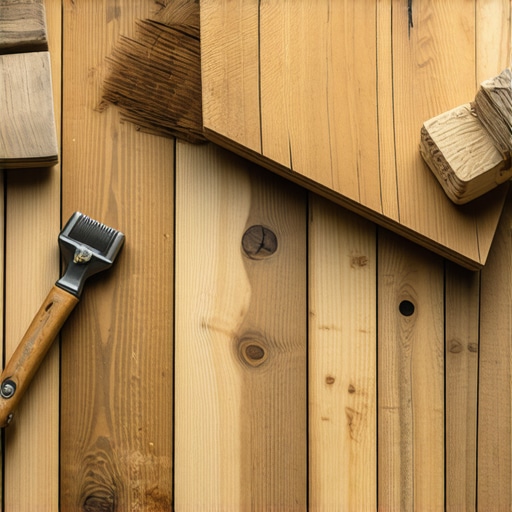
I’ll never forget the day I realized my beautiful new oak planks stuck out like a sore thumb against the worn, vintage floorboards in my living room. It was that moment of utter frustration when I saw how the fresh, gleaming planks clashed with the aged character of the existing floor, making the entire space look mismatched. That ‘lightbulb’ realization hit me—blending old and new isn’t just about laying down planks; it’s about creating harmony, a seamless transition that makes your floor look like one cohesive piece. Have you ever faced similar disappointment after installing new flooring, feeling like the shiny new pieces just didn’t belong? Well, you’re not alone, and I’m here to tell you there’s a way to fix that.
The Key to a Unified Floor: Why Blending Matters
Blending new oak planks into an old floor might sound straightforward, but it’s a nuanced process. A poorly executed blend can turn your beautiful renovation into an eyesore, detracting from your home’s charm. When I first attempted this myself, my biggest mistake was ignoring the importance of matching the tone and finish. It’s a common trap, but one that can be avoided with a little insider knowledge. According to flooring experts, achieving visual harmony requires more than just matching color—it involves considering the age, wear, and finish of your existing floor to create a natural transition. This isn’t just about aesthetics; it’s about preserving the integrity and character of your space while ensuring durability and safety.
Throughout my journey, I discovered that understanding the subtle differences between new and old wood, and how to prepare each properly, is crucial. By doing so, you can prevent problems like mismatched grains, uneven surfaces, or noticeable seams. Here’s the good news: with the right technique, blending new oak planks into an existing floor isn’t just possible—it’s straightforward. And I promise, the result will be a beautiful, cohesive surface that elevates your entire home.
Is it Really Worth the Effort to Blend New and Old Floors?
Many homeowners wonder if the hassle is justified—or if they should just replace the entire floor for a uniform look. I get it. But trust me, with the right approach, blending can be cost-effective and preserve the unique history your old floor imparts. Early on, I made the mistake of skipping the acclimation process—an essential step to prevent future issues—and it cost me time and extra work. Proper preparation and patience are your best friends in this project. If you’re curious about the finer points, I highly recommend checking out expert tips on floor leveling. It’s a game-changer.
So, are you ready to learn the specific steps to successfully blend those new oak planks with your existing flooring? Let’s dive into the practical side of making your floors look flawless and unified, no matter their age or style.
Prep the Surface for Success
Start by thoroughly cleaning your existing floor to remove dust, dirt, and any residues that could interfere with adhesion or finish. Use a vacuum and a damp cloth, then allow the surface to dry completely. Next, assess the levelness of your floor by placing a straightedge across different areas. If you notice uneven spots, these must be fixed before laying new planks. For minor dips, apply self-leveling compound, following the instructions on this comprehensive leveling guide. Correctly preparing the surface prevents future cracking, squeaking, or uneven appearance.
Match the New and Old Wood Carefully
Identify the tone and finish of your existing floor by placing a small sample of your new oak planks in a hidden spot. When I faced this, I realized my new planks were slightly darker and more glossy than the vintage boards. To harmonize them, I used a wood stain to deepen the color and applied a matte finish to the new planks, mimicking the aged look. This step is crucial—poor color matching will make the transition obvious. Consider testing your stain and finish in an inconspicuous corner first, perhaps using this tile and hardwood finishing tips. It’s worth investing time here to ensure a seamless blend.
Plane and Sand for a Smooth Transition
Once the color is matched, check the height difference at the seam between new and old boards. If the new planks sit slightly higher or lower, use a hand sander or a fine-grit (220) sanding pad to level the surface gently. Think of this as smoothing out ripples on a pond’s surface—your goal is a flat, flush appearance. I once accidentally over-sanded, creating a depression, so I recommend sanding conservatively. After sanding, vacuum thoroughly to remove dust, then wipe with a tack cloth to prepare for finishing.
Apply a Protective Finish with Care
Finish your new planks with a durable sealant that matches the existing floor’s sheen—whether matte, satin, or gloss. Use a high-quality brush or roller for even application, avoiding streaks or drips. When I did this, I made sure to work in small sections and feather the edges into the old finish to prevent noticeable borders. Remember, the finish not only provides protection but also influences the visual integration between new and old surfaces. For comprehensive insight, see this hardwood refinishing resource.
Final Checks and Adjustments
After drying, inspect the transition zone closely. Use a flashlight held at low angle to highlight any unevenness, small gaps, or color discrepancies. If needed, lightly sand or reapply finish to perfect the blend. Your goal is a floor that looks as if the new planks have always belonged there, not just patched in. With patience and attention to detail, you’ll create a cohesive floor that enhances your space’s charm and personality.
Even seasoned homeowners often fall prey to widespread misconceptions about flooring installation, hardwood floors, and leveling. One prevalent myth is that all subfloors are ready for quick installation. In reality, many overlook the importance of proper surface preparation, which can lead to uneven floors, cracking, or squeaking later on. Skipping detailed inspection and correction, like using effective leveling techniques mentioned here, often results in costly remedial work. Another misconception is that matching new hardwood to existing floors is straightforward—many believe staining alone solves color discrepancies. However, expert tips reveal that understanding the nuances of wood aging, grain, and finish are critical for seamless blending, as detailed in this guide.
A common oversight involves the assumption that tile and grout are entirely maintenance-free. Please don’t make that mistake; grout often needs regular sealing and attention to prevent staining or cracking, especially in wet areas. Advanced installers know that using the right grout finish, such as epoxy or sanded varieties, alongside proper sealing, dramatically extends durability. Curious about choosing the right tile trends? Explore latest styles here.
One critical nuance often ignored is the impact of environmental conditions on flooring materials. Many underestimate humidity and temperature’s effect, leading to wood expansion or contraction. This is especially true for engineered wood, which requires longer acclimation periods—sometimes twice as long as oak, according to expert advice. Recognizing this helps prevent issues like cupping or gaps after installation.
Lastly, mastering the art of floor leveling isn’t just about dumping self-leveling compound and hoping for the best. Proper technique involves meticulous preparation—using tools such as the leveler dam strategy or precise measurement methods. As shared in comprehensive tutorials, understanding the limitations of products and the right application process leads to flawless results.
Let’s face it—assuming you know everything about flooring can set you up for costly mistakes. Let this serve as a reminder that the real key to success always lies in understanding the subtle, often overlooked details. Have you ever fallen into this trap? Let me know in the comments. Remember, investing time in learning these nuances pays off with a durable, beautiful finish that stands the test of time.
Keeping It Working: Essential Tools and Maintenance Strategies
To ensure your flooring remains beautiful and functional over the years, investing in the right tools and adopting a consistent maintenance routine is crucial. I personally favor a high-quality belt sander with a variable speed control when refinishing hardwood floors—this gives me precise control over the finish and helps avoid undesirable gouges. For cleaning, a microfiber dust mop paired with a gentle wood floor cleaner, like those recommended in hardwood floor care secrets, keeps dust and dirt at bay without scratching the surface.
Regarding tile maintenance, a grout cleaning regimen utilizing a pH-neutral cleaner prevents staining and degradation. I also use a grout sealer annually, which preserves the grout’s appearance and prevents moisture infiltration. For leveling or repairs, a vibratory plate compactor helps in compacting subsoil or leveling base layers evenly, ensuring a stable foundation for tile installation, as detailed in precise leveling techniques.
Looking ahead, automation and smart tools are set to revolutionize flooring maintenance. Devices with IoT capabilities will monitor humidity levels, detect surface wear, and even alert you when refinishing becomes necessary, reducing guesswork and extending your floor’s lifespan.
How do I keep my floors in top shape over time?
One game-changing tip I recommend is using a damp microfiber cloth with a dash of mineral spirits to clean stubborn stains on hardwood, which helps lift grime without damaging the finish. Also, regular inspections for scratches, chips, and grout cracks allow for early repairs that prevent more extensive damage. Remember, consistency in care, combined with well-chosen tools, is the best way to protect your investment.
For large projects or long-term upkeep, I suggest creating a maintenance calendar that aligns with seasonal changes—humidity and temperature fluctuations can cause wood to expand or contract, making preventive tending even more important. As technology advances, I believe the industry will see more integrated, app-controlled maintenance systems that communicate directly with homeowners about necessary repairs or cleaning schedules.
If you haven’t already, try applying a quality sealant like professional-grade finish to your hardwood floors this season. It’s an added layer of protection that ensures longevity and eases future cleaning efforts. Staying proactive with these tools and routines truly makes all the difference in maintaining the beauty and durability of your floors for years to come.
Lesson on Matching Age, Finish, and Grain
One of the most overlooked aspects in blending floors is understanding the natural aging process of wood. With time, wood changes color and develops unique character, which cannot be mimicked with stain alone. Recognizing this helped me see that embracing subtle imperfections of vintage floors creates more authenticity than attempting a perfect replica of the new material.
Why Patience is a Hidden Asset in Floor Refinishing
Rushing through the acclimation and finishing processes often results in visible flaws or damage later. Waiting for the right environmental conditions, like stable humidity, ensures the materials perform optimally. I learned that a little extra patience in preparation makes for a much smoother final result that truly integrates the old and new seamlessly.
The Value of Continuous Learning in Flooring Projects
Every project taught me something new, from picking the right tools to understanding wood grain directions. Staying curious and seeking expert advice—like investing time in guides on floor leveling or tile installation—continually elevates the quality of work. It’s a reminder that mastery in flooring blending isn’t just about hardware; it’s about embracing ongoing education.
Curated Gems: Tools and Resources That Elevate Your Flooring Skills
My toolbox wouldn’t be complete without essential items like a fine-grit sander and a quality stain-matching kit. For learning deeper, I rely on trusted resources such as expert refinishing tips and comprehensive installation guides. These sources have consistently helped me navigate complex projects with confidence and finesse.
Let Your Flooring Journey Spark Confidence
You possess the ability to transform your space into a harmonious blend of the old and new. Embracing the nuances, taking the time to prepare, and continually seeking knowledge are the true keys to success. Your perfect floor is within reach—trust the process, enjoy each step, and take pride in your craftsmanship.