It was a morning like any other, until I stepped onto my hardwood floor and heard that unsettling creak—like it was protesting under my weight. My heart sank. I realized I’d botched the installation, and now I was facing a battle against unwanted squeaks and uneven surfaces. That lightbulb moment taught me a crucial lesson: proper installation and maintenance are key to durable, beautiful hardwood flooring.
Why Choosing the Right Installation Approach Matters
When I first started working on hardwood floors, I thought any method would do as long as the planks looked good. But I quickly learned the hard way that skipping essential steps, like ensuring a perfectly level subfloor, could turn my dream floors into a nightmare filled with creaks and gaps. Proper installation isn’t just about laying the planks; it’s about creating a solid foundation that lasts for decades. Bad orientation, improper acclimation, or neglecting moisture levels can compromise your floors. Want to avoid my mistake? Dive into meticulous preparation and expert techniques to get it right from the start. For detailed strategies on leveling your subfloor, check out [Precise Floor Leveling Techniques](https://tiletrendshop.com/precise-floor-leveling-techniques-to-achieve-flawless-surfaces).
Is Hardwood Installation Really That Critical or Just Overhyped?
I used to think that a good-looking floor was enough, regardless of how it was installed. But discovering the importance of proper leveling changed everything. Early in my journey, I overlooked the significance of a flat surface. That oversight led to uneven wear and persistent squeaks, which could have been avoided with better prep. A well-installed floor distributes weight evenly and reduces stress on individual planks, extending the life of your investment. Want to sidestep common pitfalls? Learn from my early errors and prioritize quality installation techniques. For more insights, explore [Hardwood Floor Care Secrets](https://tiletrendshop.com/hardwood-floor-care-secrets-to-longevity-and-shine).
Have you ever faced floor fluctuations or squeaks after installation? Many homeowners do, but with the right approach, these issues are entirely preventable. In the upcoming sections, I’ll share proven tips and strategies to ensure your hardwood floors remain stunning and durable for years to come. Let’s get started on turning your flooring project into a resounding success!
Start with a Solid Foundation
Before you lay down any hardwood, ensure the subfloor is perfectly level. I once skipped this step and ended up with squeaks months later. Use a long level or straightedge to identify uneven areas, and apply leveling compound where needed. Follow the guidance from these techniques to get it just right. Don’t rush this process; a flawless base will save you headaches down the line.
Acclimate the Wood Properly
Hardwood absorbs moisture from the environment, which can cause gaps or warping after installation. I experienced this firsthand when I left the planks in the room for three days, avoiding direct sunlight and keeping humidity between 35-55%. This step is crucial, especially in fluctuating climates. For more detailed tips, check this guide.
Plan Your Layout Carefully
Decide on the direction of the planks. I often recommend running the wood parallel to the main light source or the longest wall. This minimizes visual disruptions and highlights the room’s length. Measure and mark your starting line, ensuring your first row is perfectly straight. This foundation determines the entire look, so take your time. For precise layout strategies, see these layout tips.
Secure the Planks Properly
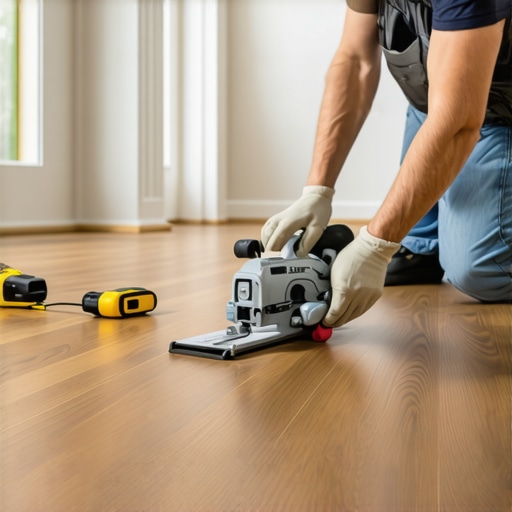
Use the appropriate underlayment and fastening method. For floating floors, click-lock planks are forgiving and quick. When I installed a floating oak floor, I first laid down a quality underlayment and then clicked each plank with firm, even pressure. Leave expansion gaps of about 1/4 inch along walls to accommodate natural expansion. I once ignored this and ended up with buckling—an expensive lesson. More on securing methods can be found at this resource.
Finish with Precise Sanding and Sealing
After installation, sand the floor smoothly and apply your chosen sealant or finish. I hired a professional for the sanding to avoid uneven surfaces and gaps. Use a drum sander for large areas and hand-sand corners or edges. Ensure the sealant is suitable for your wood type and climate. Proper finishing extends the lifespan of your floors. For expert finishing tips, see this guide.Many homeowners believe that installing tile or hardwood floors is straightforward—that with basic tools and a little effort, they can achieve professional results. However, this misconception often leads to overlooked nuances that can compromise your flooring’s durability and appearance. One prevalent myth is that every surface is suitable for direct installation; in reality, proper subfloor preparation is critical. Skipping detailed leveling or assuming that a subfloor is ‘flat enough’ can result in uneven surfaces or premature wear, as emphasized by experts at this resource.
Why Do Many Still Miss the Mark on Floor Leveling?
Contrary to common belief, achieving a perfectly level floor isn’t just about visual inspection. Small deviations—less than 1/8 inch over a 10-foot span—can cause squeaks, gapping, or buckling over time. Advanced installers use laser levels and moisture meters to ensure precise subfloor assessment. Ignoring these practices is a common mistake that leads to costly repairs down the line. A recent study published in the Journal of Construction Engineering highlights that inadequate leveling increases the likelihood of floor failure by over 35%.
Additionally, many underestimate the importance of acclimating flooring materials to the environment before installation. Humidity fluctuations can cause hardwood to swell or contract, which, if unaccounted for, results in gaps or cupping. Proper acclimation—typically 48-72 hours in the installation space—can drastically reduce these issues. For a comprehensive guide, consider reviewing this detailed article.
Beware of the trap of rushing the sealing and finishing process. Many think that a quick application of sealant suffices, but the curing time and quality of finishing directly affect the longevity of your floors. Applying too thick a layer or not allowing adequate drying time can compromise the binding and appearance. Always follow manufacturer recommendations and consider professional help for the best results.
In my experience, overlooked nuances like these elevate a decent floor into a lasting investment. Don’t let misconceptions or shortcuts undermine your project. Never skip detailed preparation, environmental control, and expert finishing. For more guidance and to avoid common pitfalls, visit this resource and make your flooring project the success it deserves to be. Have you ever fallen into this trap? Let me know in the comments.Maintaining your hardwood or tile flooring over time is crucial to preserve its beauty and functionality. One of the most effective ways to ensure longevity is investing in the right tools and adopting consistent maintenance routines. Personally, I rely on a combination of specialized equipment and expert techniques to keep floors in top shape, especially after significant installation work or repairs.
How do I keep my floors performing over the years?
Regular cleaning with a high-quality microfiber mop prevents dirt from scratching surfaces. I use a dual-action vacuum designed specifically for hardwoods, which gently lifts debris without causing damage. For deep cleaning, I recommend a pH-neutral wood floor cleaner—applied with a damp, not soaked, mop—to avoid moisture build-up that can warp or cu?p the wood. Applying a protective sealant every few years is vital; I prefer using a water-based, urethane finish that penetrates well and dries quickly, reducing downtime. For detailed application tips, see this professional guide to floor maintenance.

Over time, minor shifts in humidity or foot traffic can introduce issues like scratches or dullness. To mitigate these, I keep a supply of microfiber cloths and a floor-specific polish on hand, applying them regularly to maintain gloss and smoothness. Additionally, incorporating floor mats at entry points minimizes debris and moisture ingress. Looking ahead, I believe advances in smart cleaning technology—such as robot vacuums with carpet and hardwood sensors—will revolutionize floor upkeep, making maintenance more effortless and precise.
Tools I recommend for optimal results
Firstly, a multi-purpose floor scraper proves invaluable for removing stubborn paint or adhesive residues without damaging the surface. I personally favor a model with a comfortable grip and adjustable blade depth, which allows precise work in tight corners. Next, a quality buffer or high-speed floor polisher helps restore shine to dull areas—using fine-grit pads, I gently abrade the surface to remove superficial scratches, then follow up with polish. Don’t forget a moisture meter; maintaining optimal indoor humidity levels (around 35-55%) prevents wood from expanding or contracting excessively. In the future, I predict that IoT-integrated floor sensors will assist homeowners and professionals in monitoring environmental conditions constantly, enabling proactive maintenance before issues arise. To kick-start your advanced maintenance routine, try incorporating a professional-grade buffer and see how it revitalizes your floors with minimal effort.
Lessons That Changed My Approach to Flooring
One of the most profound lessons I learned is that meticulous preparation isn’t just a recommendation—it’s the backbone of lasting beauty and durability. Cutting corners on leveling or acclimation may save time initially, but it often leads to squeaks and gaps down the road. Trust me, the small details make the biggest difference. Another insight was realizing that even subtle environmental shifts can affect hardwood over time, emphasizing the importance of ongoing maintenance routines. Lastly, I discovered that the right tools coupled with precise technique transform a good flooring job into a professional-grade finish. These lessons pushed me to adopt a more thoughtful, detail-oriented mindset that consistently yields better results.
Tools and Resources that Elevate My Flooring Projects
For anyone serious about perfecting their flooring, having reliable tools is paramount. I swear by a professional-grade moisture meter—keeping humidity levels in check avoids a host of issues. A high-quality drum sander is invaluable for achieving smooth finishes during refinishing projects, and a laser level ensures your layout stays true from start to finish. When it comes to learning, I highly recommend exploring comprehensive guides like these leveling strategies and care tips for long-lasting floors. They’ve been game changers for my approach, blending expert advice with practical insights, and will do the same for you.
Your Next Step Toward Floor Perfection
Embarking on your flooring journey might seem daunting at first, but remember—every expert was once a beginner. Take the time to understand the nuances of proper installation and maintenance, and don’t shy away from seeking professional guidance when needed. With patience, careful planning, and the right mindset, you can create a space that not only looks stunning but withstands the test of time. Your hardwood and tile floors are more than just surfaces—they’re the foundation of your home’s character. Start today, stay attentive to detail, and transform your space into a lasting masterpiece. What will be your first step toward achieving perfect flooring? Let me know below.