Ever stepped onto a seemingly stable hardwood floor only to feel a sudden wobble or hear a unsettling creak? I’ve been there. The moment your beautiful floors start showing signs of unevenness or warping, you realize that cutting corners in installation or neglecting proper leveling can turn your dream home into an ongoing maintenance nightmare. That lightbulb moment hit me hard when I watched my own investment warp after just a few months because I skipped the crucial step of floor leveling. Since then, I’ve learned that lasting durability isn’t just about choosing the right wood—it’s about mastering the art of proper installation and leveling techniques. If you’re tired of battling uneven floors, this guide is for you. Today, I’ll walk you through proven strategies for floor leveling and installation that will keep your hardwood floors looking gorgeous and performing well for years to come. Ready to ditch the uneven surface frustrations? Let’s dive into the essentials that will transform your space.
Why Proper Floor Leveling Is Your Best Defense Against Future Repairs
When I first started my home renovation, I underestimated how vital a perfectly leveled subfloor really is. I thought that laying the hardwood over a slightly uneven surface wouldn’t matter much. Spoiler alert: it does. An uneven subfloor leads to squeaks, gaps, and even buckling, which can ruin the aesthetic and structural integrity of your floors. According to flooring experts, improper leveling is one of the leading causes of premature flooring failure. It’s like building a house on a shaky foundation—eventually, everything suffers. That’s why investing time in the right leveling techniques can save you thousands down the road. If you’ve ever faced the headache of uneven flooring, you know how frustrating it can be. But don’t worry—by applying the right methods, you can avoid these pitfalls and ensure your hardwood lasts well into 2025 and beyond. Curious about what mistakes to avoid? Keep reading. For a comprehensive understanding, check out our detailed guide on floor leveling essentials.
Is Floor Leveling Overhyped or Actually Worth It?
I used to think that a quick fix or rushing the leveling process would be enough. My early mistake was ignoring the importance of precise techniques, which led to uneven surfaces and extra work later. Trust me, I’ve learned the hard way that proper leveling isn’t just a luxury; it’s the foundation of durable flooring. Cutting corners might seem like a time-saver now, but it’s a false economy. When you invest in expert-level floor leveling techniques, you’re setting yourself up for a smoother installation and a more resilient finish. Want to avoid the same mistakes I made? Reach out to a professional or review our floor leveling tips and get your project on the right track from the start. Your future self will thank you.
Start with a Solid Foundation
My first experience with floor leveling was a messy one. I decided to skip the meticulous step of measuring the subfloor and jumped straight into laying the underlayment. The result? An uneven surface that caused squeaks and gaps within months. To avoid this, always begin by thoroughly assessing your subfloor with a long level or laser tool. If you notice dips or humps, plan to use a self-leveling compound or floor patches to create a flat surface. This initial step is crucial because it sets the stage for the entire project, much like laying a strong foundation for a building. For detailed guidance, check out our floor leveling guide.
Prepare the Subfloor Correctly
Once you’ve identified uneven areas, mark them clearly. Use a chalk line or masking tape to visualize high and low spots. If the dips are minor, a good quality floor patch or leveling compound can fill these imperfections. I remember applying a self-leveling compound on a particularly uneven corner of my living room. I poured it slowly, watching it spread out and fill the gaps. The key here is to work swiftly but carefully to avoid creating new unevenness. Remember, the goal is a flat, stable surface that supports your hardwood without shifting or creaking later. For expert tips on applying leveling compounds, visit precise leveling techniques.
Use the Right Tools and Materials
Investing in quality tools makes all the difference. A professional-grade trowel, a notched spreader, and a long, straightedge are essential. I once tried to cut corners with cheaper tools, which led to uneven application and more sanding later. When applying leveling compounds, follow the manufacturer’s instructions precisely—mix to the right consistency, pour in sections, and use a gauge rake to spread evenly. For the actual installation, use a laser level or a long spirit level across the entire surface to confirm flatness. Remember, patience and accuracy during this phase prevent headaches down the line. For recommended tools, explore expert-level tools.
Allow Proper Drying and Curing
One mistake I made was rushing the drying process. I was eager to lay my hardwood before the leveling compound fully cured, which caused slight shifts and unevenness. Always give sufficient time for the compound or patch to dry and cure completely—at least 24 hours, or as specified on the product. During this period, keep the area free of foot traffic and vibrations. This patience ensures that the surface remains perfectly flat and stable for the next steps. For additional insights, review our care tips.
Double-Check Before Installation
Before you start laying the hardwood, perform a final check with a long level or laser. Place it across different sections of the floor to spot any deviations. I found a slight dip in one corner that I missed initially; fixing it now saved me from future squeaks. If you detect unevenness, patch or re-level as needed. Remember, a flawless subfloor is the secret to durable, beautiful hardwood floors that last for decades. For comprehensive techniques, visit expert-level leveling.
Many homeowners and even some DIY enthusiasts believe they can cut corners when it comes to floor leveling, thinking it’s a minor step or something that can be fixed later. However, this misconception often leads to costly mistakes and subpar results. Let’s dig deeper into some of the most common myths about floor leveling and why they’re dangerously misleading.
Is Skipping Floor Leveling Just a Cosmetic Issue?
Some assume that an uneven floor only affects the appearance and that it’s okay to ignore minor dips or humps. In reality, improper leveling can cause structural issues over time, like squeaks, gaps, and even buckling of your hardwood. The durability of your floors depends heavily on a perfectly flat foundation. Experts emphasize that poor initial leveling can lead to premature wear and tear, which is why thorough assessment and correction are essential. For a detailed understanding, review our floor leveling guide.
Why Rushing the Leveling Process Is a Recipe for Disaster
Many believe that applying leveling compounds quickly and then rushing to install floors saves time. This is a trap. Proper drying and curing time are critical for ensuring the compound remains stable and flat. Rushing this step can lead to shifting, cracks, or unevenness that defeats the purpose of leveling in the first place. Always follow the manufacturer’s instructions and be patient; your future self will thank you. Check out our expert tips for best practices.
Advanced Question: How Do Subtle Variations in Subfloor Composition Affect Leveling?
Many overlook how different subfloor materials—such as plywood, concrete, or OSB—affect the leveling process. Each material has unique properties, expansion rates, and susceptibilities to moisture, which can influence how leveling compounds bond and cure. For example, concrete tends to be more stable but also more prone to moisture issues, which can cause unevenness over time. Understanding these nuances is crucial for professional-level results. According to a study by the National Association of Home Builders, tailored preparation based on subfloor material significantly improves the longevity of the installation. For expert guidance, consider consulting our comprehensive leveling strategies.
Have you ever fallen into this trap? Let me know in the comments. Remember, skipping or rushing the floor leveling process might seem like a time-saver, but it often results in headaches down the line. Proper assessment, patience, and understanding the nuances of your subfloor material are the keys to a lasting, beautiful hardwood floor.
Keep It Running Smoothly with the Right Tools
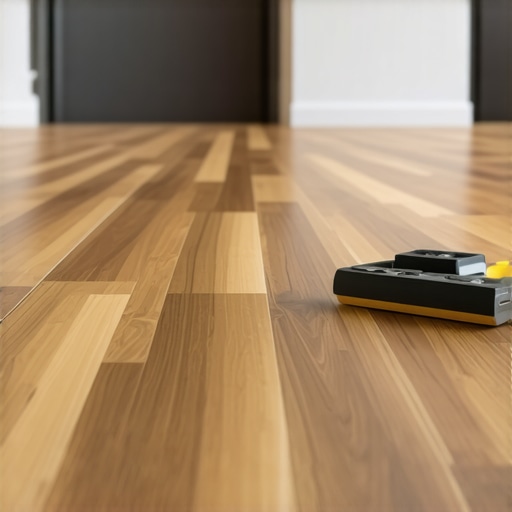
Maintaining hardwood floors over time requires more than just regular sweeping; it demands the right tools that ensure durability and a flawless finish. One of my favorites is the digital moisture meter. I personally rely on the General Tools MM520 because it provides accurate readings of moisture levels in wood and subflooring, preventing issues like warping or buckling caused by excess moisture. Using this device regularly, especially before refinishing or installing new flooring, helps identify hidden problems early and avoids costly repairs. For routine maintenance, I recommend a high-quality microfiber mop, which is gentle yet effective at removing dust without scratching the surface. Investing in the right tools not only prolongs the life of your floors but also makes ongoing maintenance more manageable and efficient.
Investing in Quality Materials for Longevity
When it comes to long-term results, the materials you choose matter. For example, I prefer using hardwood floor cleaners that are specifically formulated for durability, like the ones available through our recommended brands. These cleaners help maintain the finish and prevent buildup that can dull the surface over time. Additionally, applying a hard wax oil finish periodically can rejuvenate the wood’s appearance and provide an extra layer of protection. Keep in mind that proper sealing and finishing techniques are essential for resisting wear and tear, especially in high-traffic areas. As technology advances, I predict that future treatments will incorporate nanotechnology to create even more resilient surfaces, making maintenance easier and floors more resistant to damage.
How do I maintain hardwood floors over time?
Regular maintenance is the key to keeping your floors looking stunning for decades. Start with a consistent cleaning routine—using a microfiber mop and avoiding harsh chemicals. Schedule professional refinishing every few years, especially in areas subject to heavy use. Protect your floors from furniture scratches by using felt pads and avoid dragging heavy objects. Additionally, control indoor humidity levels to prevent wood expansion or contraction, which can cause warping. For deep cleaning and refinishing tips, explore our expert flooring advice. Don’t forget, investing in a quality vacuum with a soft brush attachment preserves your finish without damage. As I look ahead, innovative cleaning technologies and smarter maintenance routines will make caring for hardwood floors even more effortless, giving homeowners peace of mind and beautiful results for years to come.
Scaling Up Your Flooring Maintenance Routine
If you’re managing multiple properties or large spaces, automation and professional services can streamline the process. Consider installing a smart humidity control system that maintains optimal moisture levels automatically. For larger projects, hiring professional maintenance teams equipped with advanced tools like infrared moisture sensors and industrial buffing machines ensures consistent quality. Staying proactive about maintenance not only extends the lifespan of your floors but also enhances the overall value of your property. To learn more about professional installation and maintenance strategies, visit our comprehensive guide. As the industry evolves, expect to see AI-driven diagnostics and IoT-enabled maintenance tools becoming standard, making the upkeep of hardwood floors more precise and less demanding for homeowners.
Ready to Take Your Floor Care to the Next Level?
Try investing in a high-quality moisture meter and establish a regular cleaning schedule with gentle, specialized products. These small steps can significantly impact the durability and beauty of your hardwood floors. For expert advice tailored to your specific situation, contact us through our support page. Remember, proper maintenance is an ongoing process—stay ahead of issues before they escalate, and your floors will reward you with decades of stunning performance.
The Hardest Lesson I Learned About Floor Leveling
One of my biggest surprises was realizing how much a seemingly minor unevenness could compromise an entire flooring project. I once skipped thorough subfloor assessment, thinking I could fix imperfections later, only to face squeaks, gaps, and buckling within months. That taught me that precision during initial leveling isn’t just a detail—it’s the backbone of a lasting hardwood floor. Now, I always double-check with a laser level and take the time to fix every dip and hump, understanding that patience here pays off immensely.
Where to Go from Here
For those eager to elevate their flooring game, I recommend investing in a high-quality moisture meter like the General Tools MM520. It’s a game-changer for pre-installation checks, helping you prevent future warping caused by unseen moisture. Also, explore expert tips on professional-level leveling techniques—these insights will make your project smoother and more durable. Lastly, don’t underestimate the value of quality leveling compounds; they’re your best allies against uneven surfaces that threaten your floors’ longevity.
Your Turn to Try
Remember, the secret to beautiful, long-lasting hardwood floors isn’t just in picking the right wood but in mastering the art of proper leveling. With patience, the right tools, and attention to detail, you can create a foundation that stands the test of time. Are you ready to tackle your next flooring project with confidence? Share your thoughts or questions below, and let’s build something that lasts!
This article really hits home for me because I recently had my hardwood floors installed and initially thought a quick leveling would suffice. However, I noticed some squeaking and slight unevenness after a few months, which made me realize how critical proper leveling is right from the start. I appreciate the detailed steps on assessing and preparing the subfloor because these are often overlooked by DIYers like myself. One thing I’ve found helpful is investing in a good laser level for accuracy during the process—makes a huge difference. Have any of you used infrared moisture meters before? I’ve read they can prevent a lot of issues by detecting hidden moisture that might cause warping over time. Would love to hear tips from anyone who’s gone through the same experience or has recommendations for tools that worked well for them.