
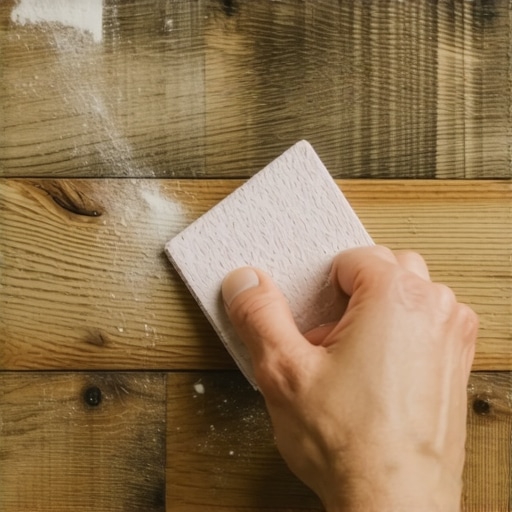
I remember the moment clearly—freshly installed hardwood floors, gleaming in the sunlight, promising a warm welcome to my home. But as I ran my hand over the surface, I was met with an unexpected gritty texture. It wasn’t the smooth, polished finish I had envisioned. That lightbulb moment made me realize I wasn’t alone; many homeowners and DIY enthusiasts face this frustrating issue.
Feeling the Gritty Stubbornness Tackle Your Hardwood Finish
It’s baffling—why does that glossy hardwood suddenly feel like sandpaper? I’ve learned through personal trial, a bit of learning, and plenty of mistakes that this isn’t just a cosmetic problem. The gritty texture can indicate underlying issues with the finishing process, moisture content, or even the type of finish used. The good news is, with the right approach, you can banish that roughness and restore your floors’ silky sheen.
Whether you’re just noticing the gritty feel after a recent refinishing or it’s been bothering you for years, I promise we’ll dive into practical, proven tips to smooth out that finish. From proper cleaning techniques to expert refinishing hacks, I’ll guide you through each step to help your hardwood floors feel as good as they look.
Is Gritty Hardwood Finish Just a Myth?
Many skeptics dismiss this problem as a minor aesthetic issue, or worse, ignore it altogether. But I’ve seen firsthand that a gritty surface can accelerate wear, trap dirt, and diminish your flooring’s beauty. Early mistakes I made included neglecting surface prep—skipping light sanding and not using the right products—which only worsened the problem. I learned that addressing the grit early can save a lot of frustration later.
Understanding the root causes of that rough texture is crucial. Sometimes, it’s a simple matter of [poor application techniques](https://tiletrendshop.com/mastering-hardwood-floor-refinishing-expert-tips-for-2025) or using subpar finishing products. Other times, it might be moisture trapped in the wood or uneven sanding. Recognizing these factors can be the difference between a simple fix and a costly re-do.
So, have you ever experienced a gritty feeling after finishing your hardwood floors? If so, you’re not alone—and the good news is, solutions are well within reach. Let’s explore how to diagnose and fix that rough surface, starting with understanding your flooring’s specific needs and avoiding common pitfalls that can make things worse. Keep reading, and I’ll show you step-by-step how to bring back that smooth, lustrous finish your floors deserve.
Start with a Thorough Surface Inspection
Before tackling the gritty finish, inspect your floors carefully. Wear gloves and run your hand over the surface to identify areas with excessive roughness. Use a bright flashlight to highlight uneven spots. This exam helps determine whether the grit is surface-level or embedded deeper, guiding your next steps effectively. I once found a small section where the finish was particularly rough due to debris trapped under the coat, which I fixed by targeted cleaning and light sanding.
Deep Clean to Remove Surface Particles
Begin with a comprehensive cleaning using a damp microfiber mop and a gentle hardwood floor cleaner. Avoid harsh chemicals that can damage the finish. For stubborn grit, mix a water-vinegar solution—one part vinegar to ten parts water—and mop thoroughly. After cleaning, ensure the surface dries completely. I once missed this step and noticed the grit reappearing after applying a new coat; proper cleaning prevented that reoccurrence.
Light Sanding to Smooth Out Roughness
Sand the floor lightly using fine-grit (220) sandpaper or a synthetic sanding screen. Attach the sandpaper to a pole sander or orbital sander to reach all areas uniformly. Think of this step as sanding a rough piece of wood to avoid splinters—the goal is to remove the rough, uneven top layer without damaging the existing finish. I once used a hand block sander for a small area, which gave me more control and prevented over-sanding in delicate zones.
Use a Tack Cloth for Dust Removal
After sanding, wipe the surface with a tack cloth to remove all dust particles. Dust can create new gritty textures or prevent finishes from adhering properly. I learned this the hard way when leftover dust caused a dull, uneven look on a fresh coat. Ensuring a dust-free surface is critical for a smooth final finish.
Apply a Refinishing Coat with Proper Technique
Choose a high-quality polyurethane or finish suitable for hardwood floors. Use a high-quality brush or roller designed for smooth application. Apply thin coats, following the grain of the wood, and avoid overloading the applicator, which can cause thick, uneven layers. Allow each coat to dry fully and lightly sand between coats with 220-grit paper for extra smoothness. During my last project, meticulous application and sanding between coats transformed a rough floor into a mirror-smooth surface.
Address Moisture Issues Before Recoating
Excess moisture can cause finish problems, including roughness. Use a moisture meter to ensure wood and subfloor humidity levels are within recommended ranges—typically below 12%. If moisture is high, improve ventilation and allow the floor to dry thoroughly before proceeding. I once rushed into refinishing during a humid spell, which resulted in a tacky, uneven finish, easily remedied by waiting for dry conditions.
Use Professional Techniques for Large Floors
For extensive hardwood surfaces, consider renting professional-grade equipment such as a buffer or drum sander for a more uniform finish. Maintain consistent speed and pressure to avoid gouging or uneven textures. Think of it like polishing a car—slow, even motions produce the best shine. During a large residential project, I used a random orbital sander with a dust collection system to minimize dust and achieve an ultra-smooth surface.
Consult Expert Resources and Avoid Common Mistakes
If uncertain, consult detailed guides like this comprehensive refinishing guide to prevent pitfalls. Common mistakes include skipping surface preparation, applying too thick a coat, or rushing drying times, all of which can lead to a gritty finish. Sharing my experience, I once applied a second coat too early, trapping solvent residues that caused roughness, which I fixed by sanding lightly and resealing.
When it comes to flooring installation, many homeowners believe they know the essentials, but a closer look reveals widespread misconceptions that can sabotage your project. Contrary to popular belief, the biggest mistake isn’t just neglecting proper surface prep—it’s underestimating the subtle nuances that determine a flawless finish. For example, a common myth is that a level subfloor isn’t critical; however, even minor unevenness can lead to tile lippage or cracked hardwood. Don’t fall into the trap of rushing through leveling—mastering precise techniques can save you headaches later. Experts emphasize that understanding the material-specific needs, such as moisture barriers for hardwood or self-leveling compounds for tiles, plays a vital role in durable results according to industry leaders. Many overlook the importance of ambient conditions, like temperature and humidity, which directly influence adhesive curing and finish adhesion. Attempting to cut corners here often results in bubbles, gaps, or peeling—mistakes costly to fix. A well-prepared subfloor combined with proper environmental controls is the backbone of a lasting install. Advanced practitioners also focus on the sequencing of tasks; for instance, installing the underlayment before fixing uneven areas ensures a smoother surface and prevents future problems expert tips. Sometimes, the most overlooked aspect is choosing the right adhesive or primer, tailored for your specific flooring material to optimize bonding and prevent issues like cupping or delamination. If you want your project to stand the test of time, paying attention to these nuanced details makes all the difference. It’s tempting to follow generic tutorials, but real mastery involves understanding material behaviors, environmental factors, and precise application techniques. Have you ever fallen into this trap? Let me know in the comments. If you’re ready to get your hands dirty with expert strategies, dive into our {relevant guide} for selecting the best products and techniques for your flooring type, and avoid common pitfalls along the way.Maintaining your flooring, whether it’s hardwood, tile, or level surfaces, is key to long-term beauty and durability. Investing in the right tools makes all the difference, allowing you to perform routine upkeep and tackle repairs with confidence. For instance, I personally rely on a high-quality microfiber mop paired with a pH-neutral cleaner, which effectively removes dirt without harming the finish, as recommended by industry experts. Regular inspection and gentle cleaning help prevent the buildup of debris that can scratch or dull your floors over time.
When it comes to floor leveling, a precision self-leveling compound can save days of frustration. I prefer rapid-dry formulas, like the one discussed in this guide, which provide a smooth surface in just a few hours. These tools are especially valuable for large projects or when you’re working against tight schedules.
For tile installation or repair, a good rubber grout float and a consistent trowel are your best friends. They help in applying materials evenly and avoiding lippage or uneven joints. I often use a notched trowel with the appropriate notch size—usually 1/4 inch for most floor tiles—to ensure proper adhesion while preventing excess mortar.
Looking ahead, the trend is moving towards smart tools that integrate with home automation systems for real-time monitoring of moisture levels and subfloor conditions. This technological shift promises to make flooring maintenance more proactive than ever. I predict that in the near future, AI-powered sensors will alert homeowners to issues before they become visible or cause damage.
**How do I keep my floors in top shape over time?** Regular maintenance is about more than just cleaning—it’s about prevention. Scheduling periodic inspections, using recommended cleaning products, and addressing issues immediately extend the life of your flooring. For example, applying a protective floor finish periodically can guard against scratches and stains—see this expert guide for detailed techniques.
Don’t forget to verify subfloor integrity before starting any major installation or repair. A moisture meter, like the Extech MO290, provides precise readings to prevent future issues such as buckling or mold growth. Use this tool regularly to keep tabs, especially in basements or humid climates.
I highly recommend trying out a portable orbital sander for small refinishing jobs—it’s much easier to control than bulky equipment and minimizes dust, which is crucial for maintaining a clean environment. Matching your tools to the task not only saves time but also guarantees a professional finish.
Looking to upgrade your maintenance game? Consider incorporating technology-enabled tools into your routine. For example, moisture sensors connected to your smartphone can alert you if moisture levels exceed safe thresholds. This proactive approach helps you avoid costly repairs and preserves your investment in quality flooring.
By choosing the right equipment and adopting consistent maintenance practices, you ensure your floors remain stunning and functional for years to come. Want to delve deeper into expert techniques? Check out this comprehensive resource and elevate your flooring care routine today.
Lessons the Hard Way That Cemented My Flooring Philosophy
One of the most eye-opening lessons I learned was the importance of thorough surface prep—skimping on light sanding and moisture checks can turn a promising project into a gritty nightmare. Another revelation was understanding that even the smallest debris trapped beneath the finish can compromise the entire look—reminding me always to inspect meticulously. Lastly, I discovered that patience during curing and drying phases isn’t just a virtue but a necessity; rushing can trap moisture or solvents, leaving a rough, uneven texture that’s tougher to fix down the line.
Tools and Resources That Elevate My Flooring Game
- Extech MO290 Moisture Meter: This device has been a game-changer for assessing drying times and ensuring substrates are ready, preventing future issues like buckling. I trust it implicitly.
- Fine Grit Sandpaper (220 grit): Light sanding with quality abrasives smooths out rough patches effortlessly. It’s my go-to for prepping surfaces before applying finish coats.
- Professional-grade Polyurethane: A high-quality finish not only provides durability but also results in a beautiful, even gloss. Selecting the right product has prevented many frustrations with peeling or dullness.
- Expert guides have been invaluable in refining my technique and avoiding common pitfalls.
Seize Your Flooring Future Today
Every successful flooring project begins with the willingness to learn from missteps and invest in quality tools and knowledge. Remember, your floors aren’t just surfaces—they’re a foundation for your home’s beauty and comfort. With patience, practice, and the right resources, you can achieve the smooth, stunning finish you envision. Are you ready to take your flooring skills to the next level? Dive deeper into our detailed guides and start transforming your space today. Sharing your experiences or questions below can also inspire others on the same journey—let’s build better floors, together!