I vividly remember the moment I stepped onto my newly installed tile floor and immediately noticed that unsightly lippage—those tiny height differences that make tiles look uneven and unprofessional. It was a lightbulb moment for me, realizing that despite following all the traditional installation guidelines, my floors still had that uneven, wavy appearance. Frustration set in because I knew that if I didn’t address this issue, it would compromise the entire look and longevity of my space.
Why Precision in Leveling Matters More Than Ever
The truth is, in 2026, the bar for flooring perfection has skyrocketed. Homeowners and professionals alike are demanding smoother, more durable surfaces, and tile lippage remains the biggest hurdle. It’s not just about aesthetics—uneven floors can lead to cracked tiles, grout failure, and even safety hazards. The good news? More trusted than ever before, advanced **Leveling Systems** have become the secret weapon in achieving flawless results. These systems help distribute weight evenly and prevent tiles from sinking or shifting during curing, ultimately saving time and reducing costly mistakes.
According to recent industry reports, improper leveling costs the flooring industry millions annually, with lippage being the primary culprit. Early in my projects, I made a common mistake—skipping a thorough subfloor prep—which amplified lippage and necessitated costly fixes later. Trust me, I learned that taking the time to invest in proper leveling techniques pays off greatly in the long run.
If you’ve ever faced uneven tiles or worried about the potential for future cracks, you’re not alone. But fear not—today, I’ll walk you through proven leveling systems and techniques that pros trust to deliver perfect, long-lasting floors. Ready to ditch the unevenness and elevate your craftsmanship? Let’s dive into the core solutions that will make your 2026 flooring projects stand out.
Is Tile Lippage Actually Worth the Hype?
Many skeptics believe that slapping tiles down quickly is enough or think that slight imperfections aren’t a big deal. I used to believe that too—until I experienced how even a small discrepancy can turn into a big problem later. A mistake I made early on was underestimating the importance of subfloor prep, which made my tiles prone to lippage. That misstep taught me that investing in the right leveling systems is crucial for flawless results.
For comprehensive strategies, I recommend checking out guides on [precise floor leveling techniques](https://tiletrendshop.com/precise-floor-leveling-techniques-to-achieve-flawless-surfaces), which have been game-changers in my projects. Next, I’ll explore the top leveling systems trusted by professionals and share how they can transform your installation process—because perfect floors aren’t just a dream, they’re achievable with the right tools.
Prep the Subfloor Like a Pro
Begin by thoroughly inspecting your subfloor. Use a long straightedge or a laser level to identify high or low spots. When I faced a particularly uneven concrete slab, I first marked the dips with chalk, then used a grinder to smooth out high spots, ensuring the surface was as flat as possible. Think of it like leveling a bumpy road before laying asphalt—skipping this step leads to uneven tiles later.
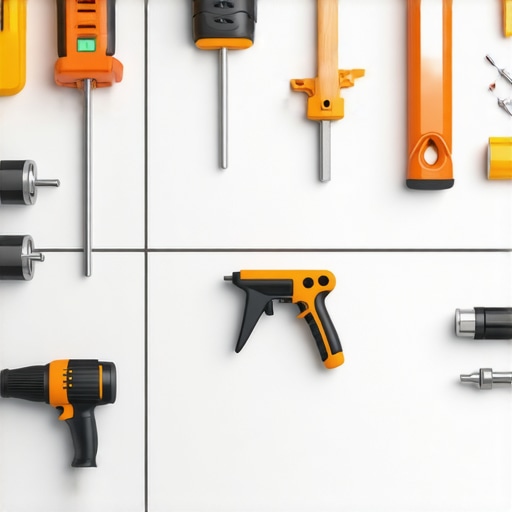
Choose the Right Leveling System for Your Project
Select a system tailored to your tile size and subfloor condition. For small bathrooms, thinset mortars with gradual shims might suffice, but for large-format tiles or commercial spaces, a more robust system like a polypropylene leveling clip combined with wedges is essential. I once tried only adhesive wedge spacers on a large commercial lobby, and I ended up with noticeable lippage which required rework. Proper tools save time and money in the long run.
Utilize a Primer to Enhance Adhesion
Before applying leveling compounds, ensure your subfloor is clean and porous enough. Use a primer designed for your substrate; this prevents air pockets that can cause pinholes or cracking in the leveling layer. I learned this the hard way when my first pour developed holes and uneven spots, undermining the entire installation. Check out [how to fix pinholes in self-leveling pours](https://tiletrendshop.com/why-your-2026-self-leveling-pour-has-pinholes-the-fix) for detailed tips.
Apply Leveling Compound Strategically
Mix your leveling compound precisely according to the manufacturer’s instructions. When applying, use a gauge rake to spread the compound evenly, working from low to high spots. For narrow trenches, a small trowel works better; for large expanses, a squeegee ensures consistency. Once I poured a leveling layer over a kitchen area, I used a long, straight screed to pull the compound into a flat surface, which dramatically reduced the time needed for finishing.
Use Foam Dams to Maintain Consistency
In large pours, incorporate foam dams at boundaries to prevent seepage and maintain level consistency. These help contain the liquid and prevent shrinkage cracks. I also used foam dams to create a seamless transition between old and new floor sections, avoiding uneven edges. For complex jobs, consider [using foam dams for a cleaner leveling pour](https://tiletrendshop.com/how-to-use-foam-dams-for-a-cleaner-2026-floor-leveling-pour).
Verify Flatness Before Tile Installation
After curing, inspect with a 10-foot straightedge or a precision level. Any high or low points should be addressed immediately—re-level if necessary. When I found a minor dip, I used a self-leveling patch to fill the imperfection, ensuring no future lippage. This step is crucial, as neglecting this can lead to uneven tile surfaces that are difficult to correct later. Check [the secret tests to prove your subfloor is ready](https://tiletrendshop.com/4-secret-tests-for-subfloor-flatness-before-2026-tiling) to confirm perfect results.
Many professionals and DIY enthusiasts assume that following basic leveling and installation techniques guarantees a perfect floor, but there’s a subtlety often missed: the variability of subfloor conditions.
What Advanced Installers Know That Beginners Don’t
While standard advice emphasizes the importance of flatness and proper tools, expert installers realize that subfloor materials, like OSB or concrete, react differently to moisture, temperature, and load over time, affecting long-term stability. This nuance can cause unexpected lippage or creeping gaps years after installation if not addressed correctly. For instance, concrete’s moisture content fluctuates with weather, making initial leveling insufficient if not properly tested—it’s essential to perform moisture tests like calcium chloride or in-situ probe assessments, as detailed in industry guidelines. Skipping this step leads to future buckling or tile cracking, a mistake I’ve seen repeatedly.
Another common myth is that higher-quality leveling compounds fully compensate for subfloor imperfections. In reality, even premium compounds have drying and curing behaviors that vary with ambient conditions, sometimes leading to a ‘wavy’ finish or pinholes if applied improperly. The real key is to understand your specific subfloor’s properties—porosity, moisture, and rigidity—and tailor your approach accordingly. For comprehensive insight, reviewing the latest expert techniques in [precise floor leveling](https://tiletrendshop.com/precise-floor-leveling-techniques-to-achieve-flawless-surfaces) can significantly elevate your results.
Moreover, many overlook the importance of implementing expansion joints and control membranes in large-format tile and hardwood installations. These features accommodate natural movement caused by thermal expansion or settling, preventing costly damage and visible cracks over time. Neglecting this subtle aspect transforms a seemingly flawless project into an ongoing maintenance challenge. My advice? Always plan for movement—consult industry standards and consider the specific environmental factors like humidity fluctuations or radiant heating systems, which intensify these concerns. For practical tips, check out [hardwood floor care secrets](https://tiletrendshop.com/hardwood-floor-care-secrets-to-longevity-and-shine) to keep your floors beautiful and durable for years.
In essence, a true expert doesn’t just focus on surface-level installation but masters the underlying conditions that influence long-term success. Are you aware of how moisture and material behavior impact your project’s durability? Have you ever fallen into this trap? Let me know in the comments. For more advanced strategies on mastering subfloor evaluations, visit [floor leveling techniques](https://tiletrendshop.com/precise-floor-leveling-techniques-to-achieve-flawless-surfaces) and ensure your next floor exceeds expectations.Maintaining your professionally installed floors requires more than just routine cleaning; it involves leveraging the right equipment and practices to ensure longevity and flawless appearance over time. One essential tool I personally rely on is a high-precision moisture meter, such as the Tramex CM-700, which accurately assesses subfloor moisture levels before and after installation. This device helps me detect issues early, preventing future problems like buckling or tile cracking, especially in hardwood and tile projects. Regularly monitoring moisture content aligns with industry recommendations, like those found in the [perfect floor leveling guide](https://tiletrendshop.com/precise-floor-leveling-techniques-to-achieve-flawless-surfaces), ensuring the environment remains within optimal parameters.
In terms of ongoing care, investing in quality cleaning equipment like microfiber mops and neutral pH cleaners preserves the finish and prevents premature wear. For hardwood floors, I utilize a soft-clip scrubber paired with the recommended sealants from [hardwood floor care secrets](https://tiletrendshop.com/hardwood-floor-care-secrets-to-longevity-and-shine), which helps maintain a lustrous surface without damaging the wood. Applying protective pads on furniture and using area rugs in high-traffic zones also extend the lifespan of your flooring. Keep in mind that environmental controls, such as humidity regulators, are crucial in climates with fluctuating moisture levels; a humidifier or dehumidifier can prevent expansion, contraction, and eventual damage.
Looking ahead, I predict smart flooring sensors will become more prevalent, providing real-time data on moisture, temperature, and wear patterns. Implementing these technologies could revolutionize how we monitor and maintain floors, reducing long-term costs.
How do I keep my floors in top shape over the years?
Consistent inspection and prompt attention to minor issues are key. Regularly check for signs of moisture intrusion, scratches, or creases, and address them immediately with targeted repairs. For example, mini-doses of hardwood touch-up kits can quickly fix superficial damage before it worsens. Remember, proactive maintenance not only preserves the beauty but also significantly prolongs the structural integrity of your floors.
To start implementing these strategies, I recommend trying out a digital moisture meter to monitor environments, combined with a routine cleaning protocol using quality tools and cleaners. Staying ahead of potential issues is easier than fixing serious damage down the line, and the tools you choose are fundamental to this process. For comprehensive guidance, consult resources like the [ultimate floor leveling](https://tiletrendshop.com/the-ultimate-guide-to-floor-leveling-for-a-perfect-finish) guide and consider scheduling regular professional inspections. Proper maintenance is your best investment—don’t wait until problems surface to act. For expert advice tailored to specific flooring types or projects, reach out via [contact us](https://tiletrendshop.com/contact-us).
What My Hasty Installations Cost Me
One of the most valuable lessons I learned was the importance of patience during subfloor preparation. Rushing to lay tiles over an uneven surface not only caused lippage but also led to recurrent cracks that I couldn’t ignore. Taking the time to identify and correct high spots early on made a world of difference, reinforcing that meticulous prep prevents future headaches.
Why Overconfidence Can Sabotage Your Flooring Projects
Early in my career, I believed that knowing the basics was enough. However, I underestimated the subtle behaviors of different substrates under various environmental conditions. For example, not performing moisture tests before installing hardwood caused costly warping down the line. Trusting industry standards and continually updating my knowledge proved essential for success.
When Cutting Corners Backfires
I used to skip the step of priming surfaces for leveling compounds, thinking it was unnecessary. The subsequent pinholes and weak spots compromised the entire overlay, requiring rework. Now, I see priming as the foundation of a durable, flawless finish—a small step with profound impact.
Investing in Quality Tools Comes Back Tenfold
Initially, I tried saving money with cheaper leveling systems, which often failed under pressure, causing uneven tiles. Upgrading to professional-grade equipment, like trusted leveling clips and high-precision moisture meters, not only improved results but also saved me countless hours. High-quality tools are not an expense but an investment in craftsmanship.
Mastering the Finish Line with Ongoing Maintenance
Achieving a perfect floor isn’t a one-and-done task. Regular inspections, moisture monitoring, and timely repairs extend the lifespan of even the most meticulously installed surfaces. I now consider maintenance as crucial as installation itself, ensuring my work continues to impress over years.
Elevate with Trusted Resources
For deepening your understanding, I rely on resources like the guide on precise floor leveling techniques. It offers step-by-step insights that significantly improve installation quality. Additionally, connecting with industry forums and watching tutorials from seasoned pros can accelerate your learning curve. I also recommend investing in a reliable moisture meter like the Tramex CM-700, which has proven invaluable in avoiding moisture-related issues—a sneaky culprit behind lippage and tile cracks.
Your Turn to Elevate Your Craft
Remember, the journey to flawless floors is ongoing. Implementing these lessons and tools can transform your projects from good to exceptional. Keep learning, stay patient, and take pride in every step. Your mastery begins today—don’t let avoidable mistakes hold you back. How have you tackled subfloor challenges in your own projects? Share your experiences below—I’d love to hear your stories and tricks for success.