I remember the exact moment I realized I might be in over my head with my hardwood floor project. It was late one evening, and as I examined the surface, I noticed tiny gaps and areas where the finish was already showing signs of wear. The temptation was strong to just sand and refinish, but then a lightbulb went off: what if my floor was too thin to even sand? That fear is surprisingly common among DIYers and homeowners alike.
Why Checking Your Hardwood Floor Thickness Matters Now
Every year, homeowners face the dilemma of whether to sand or replace compromised hardwood floors. With the advancements in finishing products and the rising costs of replacement, many assume that sanding is always the safest bet. But here’s the catch: if your hardwood isn’t thick enough, sanding can lead to accidental exposure of nails or even damage the structural integrity of the wood. It’s not just about aesthetics; it’s about ensuring your investment is worth it and that your floor remains safe and durable.
From personal experience, I made the mistake early on of skipping the measurement step. I relied on visual cues and guessed my floor’s thickness, which turned out to be a costly error. I learned that ignoring this crucial aspect can result in uneven surfaces, prolonged project timelines, or worse—having to replace the entire flooring. Strengthening this point, a recent expert guide emphasizes the importance of assessing hardwood thickness before any sanding project, stating that floors less than 3/8 inch thick are often unsuitable for sanding without risking damage (source).
Is It Really Worth the Hype? The Risks of Sanding Thin Hardwood
Initially, I thought sandpaper and a good sander could fix everything. Spoiler: it can’t. Sanding thin hardwood is like trying to sculpt a delicate masterpiece without breaking the canvas beneath—it’s a fine line. Many homeowners assume they can just sand a little more to get a flawless finish, but this often results in deep gouges or exposing the nails. The key is knowing your limits beforehand and understanding when to call in professionals or consider alternative options.
If you’ve ever faced the nagging fear that your floor might be too thin, you’re not alone. It’s a common hesitation that can save or ruin a flooring project. The good news is that with the right knowledge and tools, you can make informed decisions—reducing costly mistakes and achieved the look you want without unnecessary headaches.
Now that I’ve shared my initial misstep, let’s explore practical ways to determine your hardwood’s thickness and what steps to follow if it turns out too slim for sanding. Trust me, getting this right will save you time, money, and a lot of frustration.
Measure Your Floor Thickness Accurately
Start by locating an inconspicuous area, like behind a door or under furniture, where you can safely drill or insert a tool without damaging visible surfaces. Use a handheld digital caliper or a nail punch and ruler to measure the thickness of the hardwood from the surface down to the subfloor. I vividly remember my first attempt—using a digital caliper I borrowed from a neighbor—and the reading revealed my floor was only 3/16 inch thick, too thin for sanding. This immediate insight saved me from costly mistakes.
Identify the Layer Structure
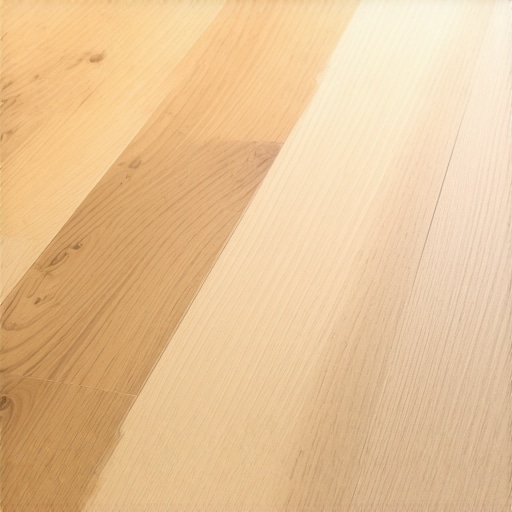
Understanding the composition of your hardwood flooring helps determine if sanding is feasible. Most engineered hardwoods have a thick veneer layer suitable for refinishing, while thin layers aren’t designed for multiple sandings. Carefully examine the edge of a flooring plank where it’s visible; if a wear layer is visible or the total thickness is less than 3/8 inch, reconsider sanding or explore other restoration options. Remember, like sculpting a delicate piece of art, working on thin layers risks breaking through the surface.
Consult Professional Resources or Experts
If you’re unsure after your measurements, reach out for professional advice. Many flooring specialists can evaluate your floor’s suitability based on measurements and material type. An expert’s opinion can prevent unnecessary damage. You might also compare your findings against established guidelines, such as those referenced in this comprehensive guide, to ensure you’re making an informed decision.
Document and Confirm Your Findings
After measuring, take clear photos or notes of the readings for future reference or if you decide to consult a professional. This documentation confirms your floor’s condition and can influence the choice between refinishing or replacing. When I measured my floor, capturing the reading on my phone’s camera saved me hours later when discussing options with a contractor, ensuring transparency and clarity.
Evaluate Alternatives if Thickness Is Insufficient
If your measurement indicates the floor is thinner than 3/8 inch, avoid sanding to prevent exposing nails or structural damage. Instead, consider options like sanding only the high spots with a disc sander, installing a new hardwood overlay, or replacing damaged sections. For leveling uneven areas, precise floor leveling techniques are crucial—check out these methods to get the best results.
Many homeowners believe that following standard guidelines guarantees perfect results in tile, flooring, and hardwood installations, but the reality is far more nuanced. A prevalent myth is that all subfloors are suitable for any flooring type—this oversimplification ignores key factors like moisture levels, material compatibility, and proper surface preparation. Rushing into a project without understanding these hidden nuances often results in cracked tiles, squeaky floors, or uneven surfaces. For instance, installing tile over a subfloor with excess moisture can lead to substrate failure years down the line, a concern backed by research from industry experts. One critical mistake is neglecting to verify subfloor flatness; even small dips can cause lippage, which not only looks unsightly but can compromise the entire installation’s durability. Advanced techniques, like using a laser level or applying self-leveling compounds correctly, are essential for ensuring a flawless finish, as detailed herehttps://tiletrendshop.com/floor-leveling-experts-achieve-perfect-tile-hardwood-surfaces. Moreover, many installers overlook the importance of proper adhesive choices, which vary significantly for tile versus hardwood, and even within those categories depending on conditions like temperature and humidity. It’s crucial to understand that each material has its unique setup requirements, and ignoring them can lead to costly repairs. A common pitfall is assuming that a standard installation kit suits all projects—this oversimplification can cause unexpected problems down the line. Instead, consulting detailed, expert-approved strategies, such as those in this comprehensive guide, can make all the difference. One subtle mistake often overlooked is failing to account for expansion gaps, which are vital for accommodating material movement over time. Without these, your floors may buckle or develop gaps, diminishing both aesthetic appeal and structural integrity. Have you ever fallen into this trap? Let me know in the comments. Remember, thorough preparation and understanding the complexities behind each step can save you time, money, and frustration in your flooring projects.Maintaining your hardwood floors and tile installations over time requires more than just routine cleaning; it demands precision tools and strategic methods to ensure longevity and flawless appearance. Personally, I rely heavily on a combination of specialty equipment and expert techniques that have proven effective in my projects and for clients. For example, using a **laser level** has revolutionized my approach to floor leveling. It allows me to detect even subtle dips and unevenness, which traditional spirit levels might miss. This precision step is crucial before installing new tiles or refinishing hardwood floors, as it prevents future issues like lippage or squeaking. I recommend investing in a high-quality **digital laser level**, which offers accuracy within millimeters and easy calibration, making long-term maintenance more manageable. Additionally, I always keep a set of **self-leveling compounds** on hand. These help me address minor subfloor irregularities smoothly, ensuring a flat surface that reduces wear and tear over time. When applying these compounds, I follow expert strategies outlined in this guide to achieve professional-level results efficiently. For routine maintenance, I use a **floor buffer with a scrubbing pad** for hardwoods, which helps keep the finish intact while removing grime without damaging the surface. The buffer’s adjustable speed and pad type allow me to tailor the cleaning process, reducing unnecessary wear. Looking ahead, the trend in flooring maintenance is shifting towards **smart monitoring systems** integrated with IoT devices that can alert homeowners to issues like moisture infiltration, which is a leading cause of floor failure. While this technology is still emerging, early adopters report significant savings by catching problems early, preventing costly repairs. Imagine installing a moisture sensor that communicates directly with your smartphone—taking the guesswork out of long-term maintenance. If you’re serious about staying ahead, I suggest trying a **professional-grade digital moisture meter** to regularly test your subfloor and surface conditions. Consistent monitoring combined with the right tools can extend your flooring’s lifespan and keep your space looking its best. Want to take your maintenance game to the next level? Start by integrating a laser level into your routine—it’s a game changer that makes any repair or installation project more predictable and professional. For additional tips on optimizing your flooring upkeep, check out this resource. Remember, investing in quality tools and staying informed about emerging technologies not only saves you money but also preserves the beauty of your floors for years to come.
What I Wish I Didn’t Overlook About Floor Thickness
One of the toughest lessons I learned was how easily homeowners can underestimate the impact of hardwood thickness. Rushing into sanding without proper measurement can cause irreversible damage, like gouging or exposing nails. That experience drove home the importance of thorough inspection before any project—and now I always double-check my floor’s layers to avoid costly mistakes.
Why Missing Subfloor Details Can Sabotage Your Project
I used to assume that a flat subfloor was enough, but I’ve come to realize how critical subfloor quality is. Small dips or moisture issues can turn a flawless finish into a disaster. Understanding the hidden nuances—like material compatibility and moisture levels—has transformed my approach, helping me achieve better, more durable results every time.
The Power of Trusted Tools and Guides in Flooring
Investing in the right tools has been a game changer. From digital calipers to laser levels, these devices helped me assess and prepare accurately. Additionally, trusted resources like expert guides from these detailed strategies have equipped me with techniques that save time and prevent pitfalls, making my work more consistent and professional.
Small Changes Make the Big Difference in Longevity
Finally, I’ve seen firsthand how minor adjustments—like proper expansion gaps and moisture monitoring—extend the lifespan of hardwood floors significantly. Staying proactive with tools like moisture meters or self-leveling compounds keeps my floors looking beautiful and resisting wear longer. It’s these tiny, careful steps that turn a good floor into a great one, and I encourage everyone to embrace them for long-lasting beauty.
Where to Go from Here
If you’re ready to elevate your flooring projects, start by measuring your hardwood’s thickness meticulously and choosing tools that suit your needs. Don’t shy away from consulting professionals or trusted guides; they’re invaluable. Remember, every successful project begins with a solid plan and knowledge, and you can achieve expert-level results with patience and the right approach. Curious about how to take your floor refinishing skills further? Check out this resource for practical tips or reach out anytime for guidance—your perfect floors are within reach!