It was a chilly morning when I realized my beautifully laid tiles had started to crack unexpectedly—right in the middle of the living room. The culprit? An uneven subfloor that I overlooked during installation. That lightbulb moment made me re-evaluate my approach, and I discovered something crucial: knowing the true state of your subfloor can make or break your entire tiling project. If you’ve ever faced the dreaded tile lippage or eventual cracking, you’re not alone. Today, I promise to share the four secret tests that will help you assess subfloor flatness confidently before 2026, saving you time, money, and future headaches.
Why Ignoring Subfloor Flatness Is a Costly Mistake
Is the Hype Over Subfloor Testing Justified? You Bet It Is!
Back in my early days of DIY flooring, I believed a quick eyeball check was enough—how wrong I was. I learned the hard way that skipping proper tests can lead to uneven tiles, cracks, and the need for costly repairs later. According to flooring experts, subfloor issues are among the top causes of tile failure, and a precise assessment can prevent disaster. If you question whether these tests are worth the effort, consider this: the average renovation mistake costs homeowners thousands, often due to neglecting foundational issues. I still remember the day I realized I should have invested in proper subfloor testing—don’t make the same mistake. Ready to learn how to perform these essential checks yourself? Let’s dive into the four secret tests that will ensure your subfloor is ready for the 2026 deadline, and your perfect tile surface remains intact for years to come.
Get Your Hands Dirty: How to Perform Effective Subfloor Tests
One morning, I found my newly laid tile cracked unexpectedly. The culprit was hidden unevenness beneath—the subfloor. To prevent this disaster, I recommend a series of straightforward but critical tests to assess your subfloor’s flatness. Think of it like checking the foundation of a house before building upon it: skip this step, and you’re risking future costly repairs.
Test 1: The Straightedge Turned Detective
Lay It Out and Observe Gaps
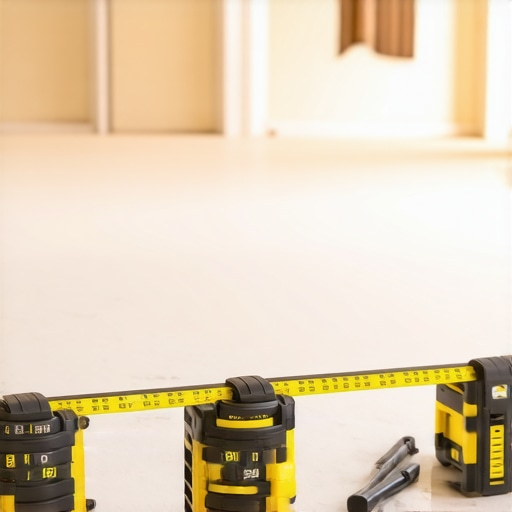
Start with a long, solid straightedge—preferably at least 4 feet long—and place it across the subfloor in different directions. If light shows between the straightedge and the surface, or if you detect any rocking, it’s a sign of unevenness. I once used a 4-foot level and discovered a high spot that caused my tile edges to lift over time. Mark these spots for correction.
Test 2: The Dollar Bill Trick
Check for Arch and Dip
Place a folded dollar bill at intervals across the subfloor. If you can easily slide it under without resistance, the surface is likely uneven—an issue for tile adhesion. I applied this method on my basement floor, which revealed dips in the corners, prompting me to perform precise leveling. For detailed techniques, refer to floor leveling methods.
Test 3: The Ruler Rumble
Measure Highs and Lows
Use a straight ruler or a long level to find discrepancies in height. Measure the difference between high and low points—anything over 1/8 inch can cause tile lippage. Once, I measured and found a dip of nearly 3/8 inch in one corner, which required self-leveling compound before proceeding.
Test 4: The Sound Check
Tap and Listen for Hollow Spaces
Knock gently across the surface with your knuckles or a rubber mallet. A hollow sound indicates a void—a potential cause for cracking. In my case, this caused me to add additional adhesive and screw down loose areas, ensuring stability. For more tips, see proper subfloor preparation techniques.
Performing these simple yet effective tests will give you a comprehensive picture of your subfloor’s condition. Remember, addressing unevenness early prevents issues like tile cracking, lippage, or hardwood squeaks down the line. If your tests reveal significant flaws, it’s wise to consult with a professional or follow proven leveling strategies available at these expert tips.
 While many believe that flooring installation is straightforward, there’s a hidden nuance that often trips up even seasoned DIY enthusiasts. One widespread myth is that as long as the surface looks flat, it’s ready for flooring. However, subtle imperfections—sometimes just 1/16 inch—can lead to major issues like squeaks, cracks, or lippage over time. Relying solely on the naked eye or a level isn’t enough; professional installers utilize techniques such as detailed subfloor testing, including the dollar bill method and sound checks, to uncover hidden flaws.
RTICLE_PLACEHOLDER_C
common trap is assuming old floors can be fixed with quick patches, but underlying issues like moisture imbalance or structural shifts require comprehensive attention. For instance, insufficient acclimation of hardwood planks before installation can cause warping or buckling within months. Don’t underestimate the importance of proper floor prep—skills like precise leveling and understanding material properties can make the difference between a durable, beautiful floor and costly repairs down the line. Experts emphasize the significance of thorough moisture testing and adjusting for environmental factors, which many overlook. For advanced tips on achieving a flawless finish, consult detailed guides like [Mastering Hardwood Floor Refinishing](https://tiletrendshop.com/mastering-hardwood-floor-refinishing-expert-tips-for-2025) or [Expert Tile Installation Strategies](https://tiletrendshop.com/installing-tiles-like-a-pro-step-by-step-strategies-for-2025). Remember, small oversights can snowball into major problems—so investing time in proper assessment upfront saves you plenty of headaches later. Have you ever fallen into this trap? Let me know in the comments and share your experience.
Keeping It Working: Tools I Recommend for Flooring Maintenance
Maintaining your hardwood or tile floors isn’t just a one-and-done task; it requires the right tools and a strategic approach to ensure longevity. I personally swear by a high-quality microfiber mop and a pH-balanced cleaner for routine cleaning. Unlike generic options, these tools pick up fine dust and prevent etching or dulling the finish. For deeper cleaning, I reach for a steam mop that uses low moisture, which is gentle yet effective without risking warping or swelling in hardwoods. When it comes to addressing scratches or dull spots on hardwood, a good orbital buffer equipped with a soft pad saves time and delivers professional results, proving worth every penny. As for tile floors, a grout brush combined with a specialized grout-cleaning solution helps prevent discoloration and mold buildup—something I’ve found invaluable in kitchens and bathrooms. In my experience, investing in these specific tools pays off by reducing maintenance time and preserving the aesthetic appeal of your floors.
Predicting Future Trends in Floor Maintenance
Looking ahead, I see a rising trend towards automation and smart technology in floor care. Devices equipped with sensors that detect dirt buildup or moisture levels could soon become standard, making maintenance less of a chore and more about preventative care. For example, robotic floor scrubbers connected via Wi-Fi could notify you when they complete a cleaning cycle or need replenishing, streamlining your routine. Additionally, advances in eco-friendly, low-residue cleaning products will likely dominate, aligning with broader sustainability goals. Keeping current with these innovations can help you stay ahead in flooring care, ensuring your investment continues to shine after installation. For detailed guidance on maintaining your floors effectively, don’t hesitate to contact us through our contact page or explore our comprehensive resources.
How can I maintain my floors effectively over time?
Developing a regular maintenance routine tailored to your flooring type is key. For hardwood, schedule gentle cleaning with a microfiber mop weekly and use refinishing products as needed to restore shine. Tile floors benefit from periodic grout cleaning using a dedicated brush and solution, plus sealing every couple of years to prevent staining. I also recommend using a floor protector or felt pads on furniture to prevent scratches. Remember, addressing minor issues immediately—such as small chips or grout cracks—can prevent costly repairs down the line. For more detailed strategies, I suggest reviewing these hardwood floor care secrets and tips for moisture control in hardwoods. With consistent attention and the right tools, your floors will continue to impress for years to come.

Image showing a professional using an orbital buffer on hardwood flooring, highlighting proper maintenance technique.
The Hidden Lessons Learned From Experience
One of the most valuable lessons I’ve discovered is that small imperfections hidden beneath the surface can cause major issues down the line. I once overlooked a minor dip in the subfloor, assuming it was negligible, only to find cracked tiles months later. This taught me that patience and detailed testing save both time and money. Another insight is the importance of never rushing through the testing phase; it’s tempting to skip steps to save time, but that shortcut often leads to costly repairs. Over time, I realized that investing in quality tools and thorough checks, like the dollar bill test and sound check, makes the difference between a durable floor and a disaster. Lastly, understanding that raising awareness about these lesser-known nuances can empower DIYers to achieve professional results—even without years of experience—has been a game-changer for me.