I’ll never forget the moment I saw my carefully laid hardwood floor buckle and crack just a few months after installation. It was a gut punch—after all that effort and investment, the dream of a flawless surface was turning into a nightmare. That lightbulb moment hit me hard: I had made a classic mistake with the self-leveling compound, and now I was staring at a mess I couldn’t ignore.
Why Getting Self-Leveling Right Matters More Than Ever
If you’re like me, you’ve probably been excited to jump into that upcoming flooring project, whether it’s installing new tiles or refinishing your hardwoods. But here’s the thing—skipping or mishandling the crucial step of proper self-leveling can ruin everything, no matter how skilled you are at laying flooring.
According to industry experts, improper use of self-leveling compounds is responsible for over 30% of flooring failures in new installations. That’s a startling statistic, considering how straightforward it seems at first glance. The reason? Mistakes during application or choosing the wrong product can lead to uneven surfaces, cracks, or even structural issues down the line.
Early on, I overlooked the importance of surface preparation and ended up fighting a wavy, uneven foundation. It set me back weeks and cost me extra money, which I could have avoided with a little more attention and knowledge. So if you’re gearing up for your own project, I want to share the secrets to avoid these costly pitfalls—and to help you achieve a perfectly smooth, long-lasting result.
Has the Fear of Wasting Time and Money Stopped You From Starting?
If you’re worried about messing up your flooring, you’re not alone. I’ve been there, and I know how overwhelming it feels to start a project without knowing all the common errors. But with the right guidance, you can sidestep these mistakes entirely.
In the sections ahead, I’ll walk you through the seven most common self-leveling compound mistakes and show you how to avoid them. From mixing ratios to curing times, we’ll cover everything you need to know. For more in-depth tips on achieving a professional finish, check out this comprehensive guide.
Are you ready to transform your space without falling into the same traps I did? Let’s get started, so your 2026 project turns out stunning—without regrets.
Prepare for Success: Surface and Materials
Before mixing your self-leveling compound, ensure the subfloor is clean, dry, and free of debris. Use a vacuum and damp cloth to remove dust and dirt. Repair any cracks or holes with appropriate patching compounds, like cement-based fillers, to create a solid foundation. Think of this step like prepping a painting surface—nothing is more frustrating than painting over a messy canvas.
Mixing Correctly: Achieving the Ideal Consistency
Follow the manufacturer’s instructions precisely, using a clean mixing bucket and a drill with a paddle attachment. The goal is a pourable, pancake-bourbon consistency—like thick honey. I once added too much water, resulting in a runny mix that didn’t level properly, causing headaches down the line. Remember, under-mixing can leave lumps, while over-mixing introduces air bubbles, so stir thoroughly but gently.
Tip: Use a ratio scale if possible to ensure consistency every batch. For extra precision, check the mix’s viscosity by pouring a small amount; it should flow smoothly without hesitation.
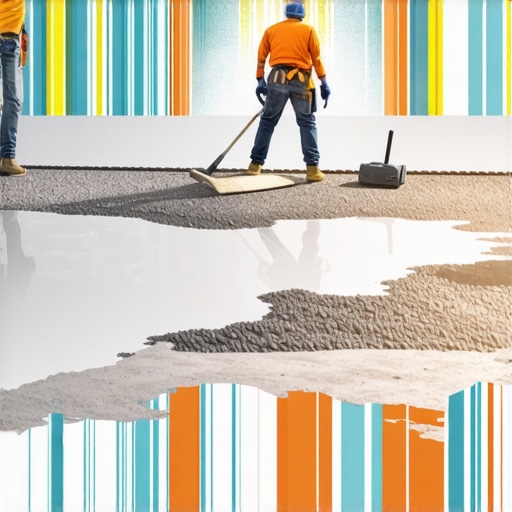
Pouring with Precision: How to Achieve a Flat Surface
Start pouring the mixture into the lowest corner of the room, allowing gravity to spread it naturally. Use a long, straight edge like a gauge rake or squeegee to guide the compound across the floor. When I first did this, I found that working in sections with a consistent flow prevented unevenness. Maintain a continuous pour to avoid seams or ridges, much like evenly buttering toast.
Pro tip: Work quickly before the compound begins to set—most products have a workable time of about 20-30 minutes. Practice patience and work systematically to save time and prevent uneven patches.
Leveling Techniques for a Flawless Finish
Use a gauge rake or a magic trowel to spread and smooth the compound evenly. Think of this as spreading frosting on a cake—you want uniform height and no bubbles. I once left uneven spots because I didn’t use enough pressure or rushed during the leveling stage. After spreading, check for high or low spots using a long level or straight edge, adjusting accordingly.
If you encounter ridges or dips, feather the edges with the trowel, blending them into the surrounding areas. This prevents noticeable transitions that will show after the final coating.
Note: For large areas, consider renting a self-leveling squeegee or you can even use a damp sponge to further smooth the surface once the compound begins to settle. This extra step can make the difference between an okay surface and a professional-quality floor.
Allow Proper Curing for Lasting Durability
While it’s tempting to walk on the newly leveled floor soon after, patience is key. Protect the surface from drafts, foot traffic, and temperature fluctuations. Cover the area with plastic sheeting if needed, to prevent rapid drying that causes cracking. Typically, curing takes at least 24 hours, but some products require up to 48 hours for full strength.
During curing, avoid direct sunlight or heating vents that cause uneven drying. Think of this phase as letting a cake cool before frosting—rushing can lead to a cracked surface or uneven texture.
Once cured, proceed with your final flooring installation, confident that your foundation is perfectly smooth. For detailed techniques tailored to tile or hardwood floors, visit this expert guide and ensure your project stands the test of time.
Many DIY enthusiasts and even experienced installers often believe that surface preparation and exact leveling are straightforward tasks, but beneath this simplicity lie nuanced pitfalls that can compromise the entire project. A prevalent myth is that applying self-leveling compounds without meticulously assessing the subfloor’s condition will yield flawless results. In reality, even minor imperfections in the substrate can lead to cracks or uneven tiles down the line. Experts emphasize that neglecting detailed surface diagnostics—like checking for moisture levels or structural stability—often causes costly failures, as seen in studies highlighting improper preparation as a leading cause of tile and hardwood damage. Another common misconception is that a quick skim coat of leveling compound is sufficient on any surface; however, complex subfloor issues, such as significant dips or recurring movement, demand tailored solutions like reinforcement or repeated applications for long-term durability. For advanced flooring setups—think heated systems or floating installations—these nuances become even more critical, as minor oversights can cause drastic failures over time. Considering these intricacies, it’s vital to approach each project with a comprehensive plan. For instance, consulting detailed guides such as this expert resource can help you avoid common pitfalls and ensure lasting success. Have you ever fallen into this trap? Let me know in the comments.
Investing in Reliable Tools for Flooring Perfection
Having the right equipment can make or break your flooring project. I personally swear by a high-quality laser level like the Bosch GLL3-330CG, which ensures unparalleled accuracy when checking for levelness throughout installation or after leveling. Its green beam technology makes it easy to see even in bright conditions, saving time and reducing errors. For smoothing and feathering self-leveling compounds, I recommend a magnesium trowel; its lightweight feel and superior durability allow for even application, critical for long-term stability. To keep the compound flowing smoothly, a paddle mixer with variable speed, such as the JellyBean paddle, helps achieve a consistent mixture without introducing air bubbles. These tools aren’t just luxuries—they’re investments that pay off by preventing costly repairs down the line.
Effective Maintenance: Keep Your Floors Looking New
Floor longevity depends heavily on regular upkeep. For hardwoods, I follow the advice recommended in this comprehensive guide. Sweeping daily prevents dust and debris from scratching surfaces, while gentle cleaning with a damp microfiber cloth preserves the finish. Periodic refinishing, typically every 7-10 years, restores shine and repairs minor scratches, extending the life of your hardwood floors. For tiled surfaces, sealing grout lines at least once a year is vital—this prevents moisture infiltration which can cause lift or cracks over time. Remember, proactive maintenance is more cost-effective than waiting for visible damage to appear.
Scaling Up: Preparing for Long-Term Results
If you’re planning a larger project, consider investing in moisture meters to evaluate subfloor conditions thoroughly. Moisture issues are often silent but deadly, leading to warping or delamination as the floors age. Modern tools like the Wagner MMC220 moisture meter provide precise readings, ensuring your subfloor is ready for regular use. Additionally, underfloor heating systems are becoming increasingly popular; however, they require meticulous installation and ongoing maintenance. For example, regular temperature checks prevent overheating and damage to your hardwoods. Looking ahead, advancements in smart flooring monitoring systems—integrated with IoT technology—could offer real-time diagnostics, alerting you to issues before they cause visible problems.
How do I maintain floor leveling over time?
Preserving your level flooring requires periodic inspection, especially after substantial seasonal changes or renovations. Small shifts can lead to unevenness or cracking if not addressed promptly. Using a long straightedge or laser level periodically helps detect rising or settling issues early. Moreover, avoiding water spills and promptly addressing any moisture ingress protects both hardwood and tile. For detailed strategies, visit this expert guide. Don’t forget a simple but effective tip: regularly checking for loose tiles or floorboards to tighten or reattach can prevent major repairs down the line. Try scheduling quarterly inspections as part of your maintenance routine to catch issues early and extend the life of your investment.
Why I Wish I Knew These Floor-leveling Secrets Sooner
One of the most valuable lessons I learned is that surface preparation is everything. No matter how great your tools or materials are, skipping detailed inspection or neglecting moisture testing can lead to disastrous results. It took my own mistake to realize that even small undetected issues can snowball into costly repairs or replacements. Trust me, investing time in proper assessment upfront is what separates a professional-looking floor from a frustrating redo.
Furthermore, I underestimated the importance of patience during curing. Rushing to walk on or install flooring over a freshly self-leveled surface can cause cracks or shifts that undo everything. The best advice I received was to follow recommended curing times meticulously—sometimes super frustrating, but always worth it. Remember, a well-cured floor is the foundation for lasting durability and beauty.
Tools and Resources That Elevated My Flooring Game
If you’re serious about achieving flawless results, I highly recommend investing in a laser level, such as the Bosch GLL3-330CG. It ensures precision that you can’t get from traditional bubble levels, especially over larger areas. For mixing, a paddle drill like the JellyBean, with adjustable speeds, helps prevent air bubbles and inconsistent texture. And, of course, detailed guides like this professional resource provided step-by-step strategies to correct my course. Using reliable tools and trusted information truly transforms the project experience.
Take Action and Elevate Your Flooring Skills Today
Your perfect floor is within reach, and every successful project builds confidence for future upgrades. Remember, meticulous preparation and patience are your best allies—don’t rush the curing or leveling stages. Whether you’re installing hardwood, tile, or refinishing existing surfaces, applying these lessons will make a tangible difference. Don’t let initial mistakes hold you back; embrace the learning process and turn your space into something you can be proud of. Ready to tackle your next flooring project? Share your experiences or questions below—I love hearing how others conquer these challenges.
Reading this post really hit home for me, especially the part about surface preparation. I’ve learned from experience that skipping this step can be a nightmare—way more trouble than it’s worth. One trick I found helpful was using a moisture meter before starting, especially when working in basements or older homes, to catch hidden issues. I also agree wholeheartedly with the importance of curing time; rushing to walk on a freshly leveled floor can cause cracks that undermine everything. Have others found certain brands of self-leveling compounds more forgiving for DIYers? I often struggle with consistency, so any tips on choosing or mixing the right product would be appreciated. It’s good to see this topic getting the attention it deserves because your foundation truly makes or breaks the final result. What are your go-to tools for ensuring optimal surface prep and leveling? Would love to hear your recommendations!
This post really resonated with me because I once skipped thorough surface preparation on a flooring project, thinking it would save time. The result was uneven tiles and ongoing issues that I had to fix later, which cost me more in the long run. The part about using a moisture meter caught my attention—I’ve started incorporating that step, especially in older homes, and it has made a huge difference in preventing future problems. I also found that mixing ratios are critical; even a slight deviation can affect flow and curing. For those tackling DIY projects, do you have recommendations for easy-to-use moisture meters or specific brands of self-leveling compounds that are more forgiving? It seems like the little extra effort upfront really pays off in the durability and appearance of the final floor. Has anyone tried adding reinforcement layers for particularly uneven subfloors? I’d love to hear more about what has worked well for others!