I remember the moment vividly—a deep gouge in my hardwood floor from a careless move with a heavy chair. It was a sharp, undeniable scar that instantly diminished the room’s charm. Frustration set in because I had invested so much into selecting a beautiful, durable finish, only to see it marred so easily. That lightbulb moment made me realize that even with the best floors, accidents happen, and knowing how to fix those deep gouges is essential for maintaining their beauty and value.
Why Deep Gouges Can Feel Like a Hardwood Floor’s Worst Nightmare
Deep gouges aren’t just superficial scratches—they cut deep into the wood, often jeopardizing the entire look of your floor. Left unattended, they can trap dirt, cause uneven wear, and even compromise the structural integrity over time. But here’s the good news: with some straightforward techniques, you can restore your floors and keep them looking stunning for years to come.
Could You Be Falling Into Common Restoration Traps?
Early in my DIY journey, I made the mistake of using products that seemed promising but actually worsened the damage. For instance, applying over-the-counter wood fillers without proper preparation or choosing fillers incompatible with my finish. These missteps can lead to uneven surfaces or noticeable mismatches. According to experts, proper preparation and understanding your flooring’s finish are crucial for seamless repairs (learn more about expert refinishing tips here). So, if you’re tired of hiding those unsightly gouges or just want to restore your investment smoothly, you’re in the right place.
Let’s dive into four simple yet effective fixes that will help you tackle those deep gouges head-on. Whether you’re a seasoned DIYer or just starting, these tips will make your floors look flawless again—no expert skills required. Ready to roll up your sleeves and bring your hardwoods back to life? Great! Because the next steps are easier than you think—let’s get started.
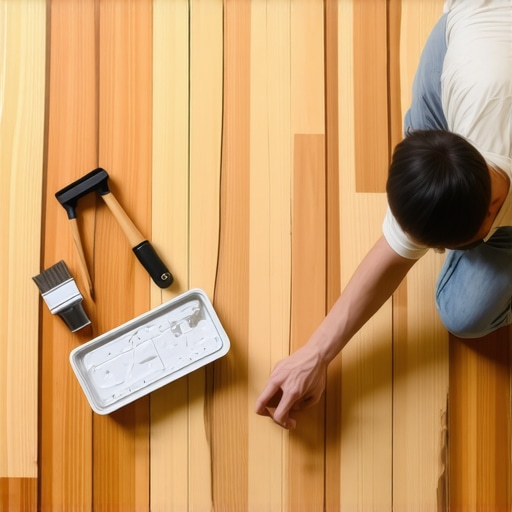
Assess the Damage Carefully
Start by inspecting the gouge thoroughly to determine its depth. For this, use a flat edge, like a putty knife, to gently feel the bottom of the gouge. If you notice jagged edges or splinters, prepare to sand and smooth the area first. During my first attempt, I used a flashlight at an angle to better see the depth, which helped me decide whether to fill or sand down the area. This initial step ensures you choose the right repair method and avoid making the damage worse.
Choose the Correct Repair Material
Pick a wood filler or epoxy resin that matches your floor’s color and finish. For deeper gouges, epoxy is more durable and can fill large voids effectively. I remember selecting a high-quality epoxy in a shade close to my floor and mixing it according to the manufacturer’s instructions. This process is similar to mixing cement for a small patch—you want it to be uniform without lumps. Apply the filler with a putty knife, pressing it into the gouge, and smoothing it flush with the surrounding surface. Allow it to cure fully before proceeding to the next step.
Details About Applying Filler
When applying, work in thin layers if needed, especially for large gouges. Overfilling can cause uneven surfaces that are harder to sand. Use a damp cloth to wipe away excess filler immediately for a smooth finish. During my repair, I overfilled initially, which resulted in a lumpy surface, so I learned to work patiently with thin layers and proper tools.
Sand and Level the Repaired Area
Once the filler has cured, lightly sand the area with fine-grit sandpaper (180-220 grit). Think of this step as sanding a piece of woodworking to achieve a smooth surface—it’s crucial for blending the repair seamlessly. I used a sanding block for better control, being careful not to damage the surrounding finish. After sanding, wipe the area clean with a tack cloth to remove dust. If the surface isn’t perfectly smooth, repeat the filling and sanding process until it matches the surrounding area.
Refinish to Match the Original Floor
To blend the repair with the rest of your floor, use a matching stain or finish. Lightly touch up with a small brush, feathering the edges to ensure a seamless transition. For my floor, I dabbed a matching finish using a fine brush, blending it into the existing coating. After the stain dries, apply a clear polyurethane topcoat for protection and shine. This extra step restores the floor’s original luster and ensures durability against future wear.
Level the Floor for Stability
If the gouge has caused a slight unevenness, consider floor leveling techniques. Use a self-leveling compound if necessary, especially in cases where the damage affects flooring stability or if you’re preparing for new flooring installation. I applied a small amount of leveling compound in a thin layer, following precise instructions from a flooring expert. This step prevents trip hazards and ensures a solid, even surface before installing new material or applying finish coats.
Tip on Maintaining Your Floor Post-Repair
Once repaired, avoid dragging furniture across the area and use pads under heavy items. Regular cleaning with soft brushes or vacuum helps prevent dirt buildup that can cause scratches. For holistic floor care, check out these hardwood floor care secrets for long-term beauty and preservation.
When it comes to hardwood floors, many homeowners fall prey to misconceptions that can compromise the longevity and beauty of their investment. For instance, there’s a widespread belief that all hardwood flooring will age gracefully without much maintenance, but in my experience, understanding the specific nuances of your wood type and installation technique dramatically impacts the outcome. Many assume that a perfect floor is merely a matter of choosing the right finish, but advanced mistakes like improper acclimation or ignoring subfloor considerations can lead to costly repairs down the line.
Why Do Some Flooring Tips Fail in Practice?
A common trap is over-relying on DIY videos that promote a one-size-fits-all approach. For example, some tutorials suggest sanding and refinishing floors without considering underlying issues such as moisture imbalance or subfloor instability. These overlooked factors can cause uneven finishes, bubbling, or even delamination over time. According to flooring experts, addressing these hidden variables with proper assessment ensures that your installation withstands daily wear and tear (learn about expert-level installation strategies here). This is especially crucial when aiming for a flawless, long-lasting result.
Furthermore, many people underestimate the importance of precise floor leveling before installation. Skimping on this step can lead to misaligned planks, lippage, and uneven surfaces that are not immediately visible but degrade over time. Investing in professional-level leveling techniques pays off by preventing these silent failures and maintaining aesthetic appeal. For in-depth guidance, check the comprehensive floor leveling guide.
Another often-missed nuance is the impact of environmental factors. Variations in humidity and temperature influence wood’s behavior post-installation. Many assume that the finish alone will seal in moisture, but in reality, proper acclimation of hardwood planks and controlled climate conditions during and after installation are crucial. Neglecting this can cause gaps, cupping, or buckling, undermining your flooring’s integrity over time. Expert insights emphasize the importance of assessing and adjusting your environment before beginning work (discover expert installation tips here). Understanding this hidden nuance can save you significant headaches and expenses.
Have you ever fallen into this trap? Let me know in the comments! Remember, mastering flooring isn’t just about the visible layers but understanding and managing the underlying complexities that ensure durability, beauty, and value for years to come.
Maintaining Your Floors with Precision Tools
Keeping hardwood, tile, or leveled flooring looking their best requires more than just regular cleaning; it demands the right tools and methods to ensure long-term durability. As someone who’s navigated both DIY repairs and professional projects, I’ve found specific equipment invaluable for effective maintenance. For instance, a high-quality microfiber mop combined with a microfiber pad ensures gentle yet thorough cleaning, preventing scratches on delicate finishes. Similarly, a detailed digital moisture meter helps monitor humidity levels, which is critical for hardwoods—excess moisture can cause cupping or warping over time. Personally, I rely on a **laser level** for ongoing inspections; it provides precise readings of any subtle shifts in floor flatness, allowing early intervention before issues escalate.
Another tool I recommend is a **power sander** with fine-grit sandpaper for touch-up maintenance. Regular light sanding accompanied by a fresh coat of finish can rejuvenate dull areas, keeping your floor looking vibrant. For delicate refinishing or spot repairs, a handheld orbital sander offers control and minimizes damage. Additionally, a **dust extraction vacuum** is essential during sanding to keep dust particles at bay, which prolongs the life of the finish and improves indoor air quality. Having the right set of brushes and applicators—like high-quality, natural-bristle brushes—also makes a significant difference when applying stains or finishes, ensuring seamless coverage without streaks.
Looking ahead, innovations in smart home technology suggest that floor maintenance might soon integrate with automation systems. Imagine a floor that alerts you when humidity or wear reaches problematic levels, prompting preemptive maintenance. I predict that advancements like automated floor cleaners equipped with sensors will become standard for busy households seeking hassle-free upkeep.
How do I maintain my flooring over time?
Consistent, proactive care is the key. Regularly check for early signs of wear or moisture issues using tools like moisture meters and laser levels. Schedule periodic touch-ups with fine sanding and recoating to preserve the finish. Furthermore, utilizing protective pads under furniture and employing controlled climate conditions helps prevent deep scratches or warping. For precise instructions tailored to your specific floor type, reviewing professional guides—such as these expert refinishing tips—can provide invaluable insight.
Don’t wait for visible damage to act—early detection with the right equipment saves you time and money. I encourage you to try using a moisture meter during your next seasonal change, as controlling humidity is one of the most effective ways to extend your floor’s lifespan and keep its visual appeal for years. Remember, investing in quality tools and regular maintenance routines is the best way to make your floors truly last.
Lessons From My Deepest Flooring Mistakes
One of the most valuable lessons I learned was the importance of careful inspection before starting any repair. Rushing into fixes without assessing the depth or damage can lead to mismatched finishes or uneven surfaces. Additionally, I discovered that selecting the right filler—like high-quality epoxy for deep gouges—makes all the difference in achieving a seamless look. Over-filling or rushing the drying process only added to my frustration, teaching me patience and precision are key.
Another insight was understanding the significance of proper sanding and finishing to blend repairs naturally. Skipping these steps or using coarse grit abrasives resulted in noticeable patches, reminding me that meticulous surface prep is essential for a flawless restoration. Lastly, I realized that environmental factors such as humidity can impact the longevity of repairs, emphasizing the need for controlled conditions during and after the process.
Tools and Resources That Elevated My Floor Revival
Having the right tools transformed my approach from guesswork to confidence. A high-quality microfiber mop and dust extraction vacuum ensured my floors stayed dust-free during sanding and cleaning, which is crucial for a durable finish. I also rely on a digital moisture meter to monitor humidity levels, preventing future warping. For expert guidance, I turn to resources like these professional-level flooring strategies, which provide step-by-step advice and troubleshooting tips that save time and hassle.
Additionally, I keep a set of fine-grit sandpapers and natural-bristle brushes handy for touch-ups, ensuring my repairs hold up over years. For more comprehensive knowledge, the design inspiration and installation tips help me plan future projects with confidence. Staying equipped and educated empowers you to maintain the beauty and durability of your flooring long-term.
Keep Your Floors Beautiful — Your Turn to Shine
Remember, mastering hardwood floor repairs is less about perfection and more about perseverance. Every scratch and gouge offers an opportunity to learn and improve. By applying these lessons, investing in quality tools, and tapping into expert resources, you set yourself up for success. Your floors are a reflection of your care and dedication, and with patience, you’ll preserve their charm for years to come.
Now, I invite you to take the next step—what’s one repair you’ve been hesitant to try? Share your experience or questions below, and let’s grow together in our flooring journey!
,