
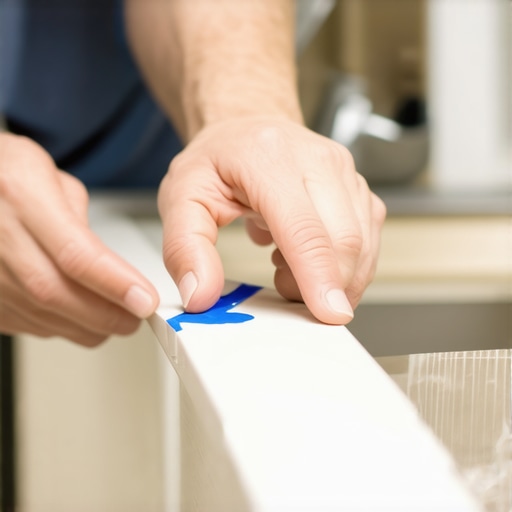
I will never forget the sinking feeling in my chest during my first major bathroom remodel. I had just spent three days laboring over a beautiful ceramic tile layout, and it was finally time for the finishing touch: caulking the transition where the tile met the tub. Armed with a standard squeeze tube, I figured it would take five minutes. Instead, I ended up with a smeary, jagged mess that looked like a toddler had decorated the joint with vanilla frosting. I tried wiping it with my finger, which only spread the gooey silicone three inches up the wall. It was a disaster, and I ended up scraping it off with a razor blade until my hands bled. That was the day I swore to find a better way, and a seasoned contractor friend introduced me to the blue painter’s tape trick.
The Simple Trick That Spares You from Caulk-Induced Headaches
Whether you are sealing a brand new bathtub or finishing off a flawless flooring installation, caulking is the final boundary line that either makes your hard work shine or completely ruins the aesthetic. It is the bridge between different materials. When you have worked so hard on achieving flawless surfaces—perhaps even agonizing over how to achieve flawless floor leveling before laying your tile—you cannot afford to let a messy bead of caulk drag down the entire project. The painter’s tape trick creates a physical barrier that guarantees a razor-sharp edge, allowing even first-timers to mimic the steady hand of a master craftsman.
Is the tape method actually worth the extra prep work?
I know what you are thinking because I said the exact same thing: “Doesn’t laying down two parallel lines of tape take twice as long?” Yes, pulling the tape takes an extra five minutes of prep. But I promise you, it saves you thirty minutes of cleanup, scrubbing, and potentially restarting from scratch. In fact, professional builders often emphasize that proper preparation is 90% of any successful build. According to the Chicago Tribune’s home improvement archives, improper caulking is one of the top ten reasons DIY wet-area projects fail prematurely due to water intrusion. When you skip tape, you often wipe too much caulk out of the joint in an effort to clean up the messy edges, leaving the seam under-filled and prone to splitting. Have you ever ended up with a sticky, smeared mess on your tiles because you tried to freehand a silicone bead?
Early in my DIY journey, I assumed taping was a crutch for beginners. I was stubborn. I tried to freehand everything, which often resulted in uneven gaps that caught dirt and turned yellow. If you want a finished look that blends seamlessly, especially when working around complex transitions like wood-to-tile combinations, this method is your ultimate safety net. It protects your expensive materials from accidental silicone smears, which are notoriously difficult to clean up once they cure.
Step-by-Step Blueprint for Flawless Caulking Borders
To pull off this trick like a professional, you need to understand that painter’s tape is not just a shield; it is a precision stencil. The secret is to think of your caulk joint as a tiny channel. If the channel is too wide, the bead sag; if it is too narrow, the caulk will peel out when you remove the tape. I learned this the hard way while finishing a high-end step-by-step guide to flooring installation and leveling success in my guest bath. I rushed the tape placement, spaced the lines too far apart, and ended up with a giant, sloppy gray snake of silicone that looked terrible next to the tile.
Prepping the Surface to Prevent Early Peeling
Before you even touch your roll of tape, the surface must be surgically clean. Any leftover soap scum, dust, or moisture will ruin your bond. Wipe down the area with denatured alcohol—never water or household cleaners, which leave behind soapy films. This is especially true when working near transitions like tile-to-wood boundaries where dust from sanding might still settle in the cracks. Once dry, place your first line of tape precisely one-sixteenth of an inch away from the joint on the wall, and the second line of tape one-sixteenth of an inch away on the tub or floor surface. Press the edges of the tape down firmly with your thumbnail or a plastic putty knife to seal the adhesive completely.
Applying the Bead and the One-Swipe Technique
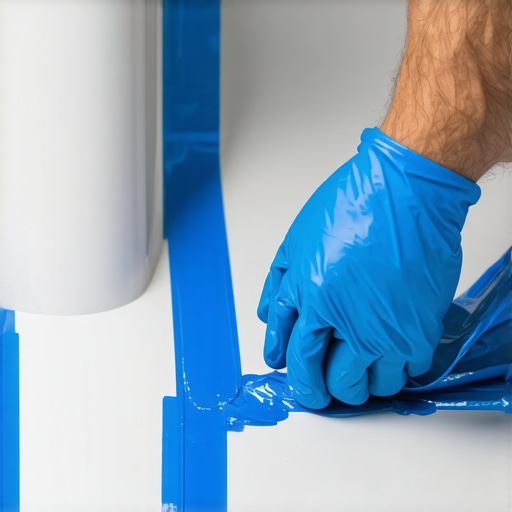
Cut your caulk tube nozzle at a 45-degree angle, keeping the opening relatively small—about the size of a match head. When applying the bead, hold the gun at a consistent angle and pull it toward you in one continuous motion. Do not stop and start, or you will create thick deposits. Now, here is where most DIYers fail: they try to tool the joint with dry fingers or complex scraping tools. Instead, mist the wet caulk lightly with soapy water or window cleaner, dip your gloved index finger into the same solution, and glide over the joint in one smooth swipe. The soapy water acts as a lubricant, stopping the excess silicone from sticking to your skin or spreading beyond the tape borders.
The Critical Pull Technique While the Caulk is Wet
You must remove the painter’s tape immediately while the caulk is still completely wet and workable. If you wait even ten minutes for the silicone to skim over, the tape will pull the cured edges of your new bead right off the wall, leaving a jagged, ruinous mess. Grab the end of the tape and pull it away from the joint at a sharp 45-degree angle. This slicing action creates a razor-sharp, clean border. Just like when you are applying the painters tape secret for perfectly straight grout lines during a tricky splashback install, timing is everything. Pull the tape slowly, roll it into a neat ball as you go, and immediately discard it in a nearby trash bin to avoid dragging wet silicone across your freshly laid flooring.
When we dive deeper into home renovations, we often focus so heavily on the big-ticket items like choosing materials or getting our cuts right that we overlook the microscopic details. It is easy to assume that if your tile layout is straight or your hardwood looks beautiful, the job is a masterclass. But professional builders notice the subtle transitions and structural prep that DIYers routinely skip. Let’s dig deeper into what separates a passable weekend warrior project from a high-end, lifelong architectural feature.
Why does your self-leveling compound keep cracking over plywood?
Many homeowners believe that pouring self-leveler is as simple as mixing a bucket of liquid cement and letting gravity do the work. The common belief is that the thick mixture will naturally settle and bond to any wooden subfloor. In my experience, this is the quickest route to a crumbling disaster. Wood and cementitious leveler have completely different rates of expansion and contraction. According to a structural engineering bulletin from the Chicago Tribune’s home resources, failing to prime wood subfloors before leveling is the primary driver of premature mortar failure in residential remodels.
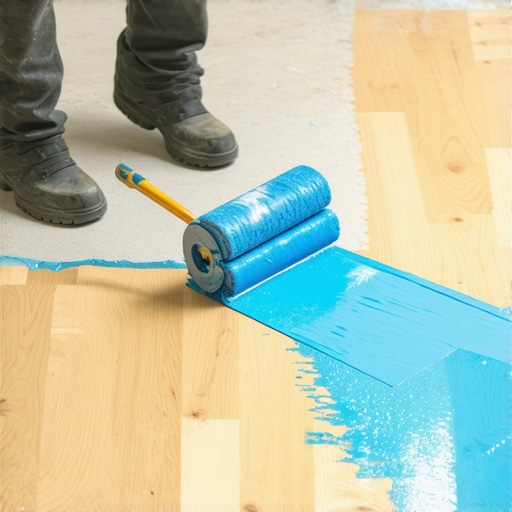
If you do not seal the wood first, the porous plywood will instantly suck all the moisture out of the wet leveler. This causes the compound to cure far too fast, leading to cracking, shrinking, and eventually pulling away from the subfloor entirely. To avoid this costly trap, always apply the best primer for installing leveler over plywood. It acts as a physical barrier that keeps the moisture inside the leveling compound where it belongs, ensuring a perfect chemical cure. Have you ever fallen into this trap? Let me know in the comments.
Another invisible culprit that ruins high-end installations is neglecting the subfloor flatness before tiling. Many DIYers assume that applying extra thinset mortar will easily compensate for a dipped floor. This is a massive mistake. As thick mortar dries, it shrinks at a different rate than thin spots, which pulls the tiles downward and creates dangerous lip hazards. Before you mix your first batch of thinset, you must systematically check your surface. To do this correctly over long spans, I highly recommend using the string line method for checking floor flatness over 20 feet to locate dips and crowns that a standard four-foot level will miss entirely.
By taking the time to address these deep structural requirements—whether it is perfecting your underlayments, using how to use a spiked roller for the perfect leveling pour to release trapped air, or carefully setting up expansion joints—your final caulking lines will look clean because they are resting on a stable, movement-free foundation.
Once you have conquered the high-stakes phase of prep work and laying your materials down, you are left with the reality of living with your creation. A flawless floor is not a monument frozen in time; it is a dynamic system. To keep your wood and ceramic tile performing at their peak, you must approach maintenance with the same level of mechanical precision you used during the installation itself. I learned early on that using the wrong maintenance tools can destroy months of hard work in a single afternoon.
How do I maintain my floor leveling and installation over time?
The secret to keeping your floors stable lies in protecting them from structural movement and moisture abuse. For hardwood, the greatest threat is seasonal humidity shifts that cause wood cells to swell and shrink. If you want to protect your investment, I highly recommend learning how to keep your hardwood floors from gapping in the winter by maintaining a stable indoor environment. For tiled areas, protection is all about avoiding moisture-related degradation. Never use aggressive chemicals or saturating cleaning tools. I always advise homeowners that moisture is the silent killer of modern subfloors, which is exactly why you should never use a steam mop on click-lock floors or nearby transitions. The high-pressure steam forces vapor deep into the joints, swelling the core and forcing the protective top layers to peel.
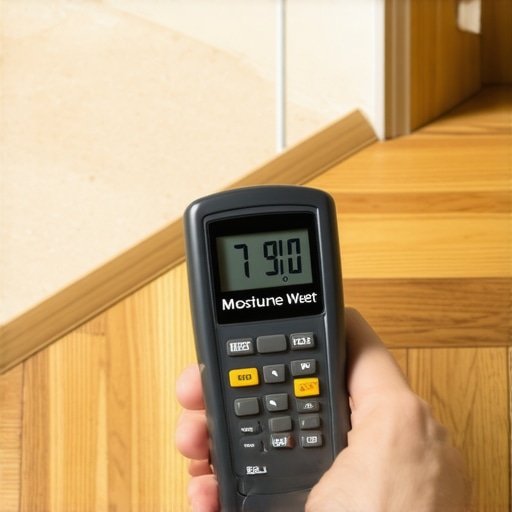
When it comes to tools, throw away the cheap plastic multi-tools and invest in a high-accuracy digital moisture meter and a professional-grade 10-foot straightedge. These are the exact instruments specified in the National Wood Flooring Association (NWFA) technical guidelines to verify structural integrity over time. Looking ahead, the future of floor leveling and diagnostics is moving rapidly toward integrated smart-sensor technology. Within the next decade, we will likely see underlayments embedded with continuous moisture and deflection sensors that alert your smartphone before a crack even has the chance to propagate through your expensive porcelain tiles. For now, we must rely on our own vigilance and precise craftsmanship to ensure our installations stand the test of time. I challenge you to grab a straightedge this weekend, map your high spots, and finally tackle that transition you have been putting off.
I will never forget the sinking feeling in my chest during my first major bathroom remodel. I had just spent three days laboring over a beautiful ceramic tile layout, and it was finally time for the finishing touch: caulking the transition where the tile met the tub. Armed with a standard squeeze tube, I figured it would take five minutes. Instead, I ended up with a smeary, jagged mess that looked like a toddler had decorated the joint with vanilla frosting. I tried wiping it with my finger, which only spread the gooey silicone three inches up the wall. It was a disaster, and I ended up scraping it off with a razor blade until my hands bled. That was the day I swore to find a better way, and a seasoned contractor friend introduced me to the blue painter’s tape trick.
The Simple Trick That Spares You from Caulk-Induced Headaches
Whether you are sealing a brand new bathtub or finishing off a flawless flooring installation, caulking is the final boundary line that either makes your hard work shine or completely ruins the aesthetic. It is the bridge between different materials. When you have worked so hard on achieving flawless surfaces—perhaps even agonizing over how to achieve flawless floor leveling before laying your tile—you cannot afford to let a messy bead of caulk drag down the entire project. The painter’s tape trick creates a physical barrier that guarantees a razor-sharp edge, allowing even first-timers to mimic the steady hand of a master craftsman.
Is the tape method actually worth the extra prep work?
I know what you are thinking because I said the exact same thing: “Doesn’t laying down two parallel lines of tape take twice as long?” Yes, pulling the tape takes an extra five minutes of prep. But I promise you, it saves you thirty minutes of cleanup, scrubbing, and potentially restarting from scratch. In fact, professional builders often emphasize that proper preparation is 90% of any successful build. According to the Chicago Tribune’s home improvement archives, improper caulking is one of the top ten reasons DIY wet-area projects fail prematurely due to water intrusion. When you skip tape, you often wipe too much caulk out of the joint in an effort to clean up the messy edges, leaving the seam under-filled and prone to splitting. Have you ever ended up with a sticky, smeared mess on your tiles because you tried to freehand a silicone bead?
Early in my DIY journey, I assumed taping was a crutch for beginners. I was stubborn. I tried to freehand everything, which often resulted in uneven gaps that caught dirt and turned yellow. If you want a finished look that blends seamlessly, especially when working around complex transitions like wood-to-tile combinations, this method is your ultimate safety net. It protects your expensive materials from accidental silicone smears, which are notoriously difficult to clean up once they cure.
Step-by-Step Blueprint for Flawless Caulking Borders
To pull off this trick like a professional, you need to understand that painter’s tape is not just a shield; it is a precision stencil. The secret is to think of your caulk joint as a tiny channel. If the channel is too wide, the bead sag; if it is too narrow, the caulk will peel out when you remove the tape. I learned this the hard way while finishing a high-end step-by-step guide to flooring installation and leveling success in my guest bath. I rushed the tape placement, spaced the lines too far apart, and ended up with a giant, sloppy gray snake of silicone that looked terrible next to the tile.
Prepping the Surface to Prevent Early Peeling
Before you even touch your roll of tape, the surface must be surgically clean. Any leftover soap scum, dust, or moisture will ruin your bond. Wipe down the area with denatured alcohol—never water or household cleaners, which leave behind soapy films. This is especially true when working near transitions like tile-to-wood boundaries where dust from sanding might still settle in the cracks. Once dry, place your first line of tape precisely one-sixteenth of an inch away from the joint on the wall, and the second line of tape one-sixteenth of an inch away on the tub or floor surface. Press the edges of the tape down firmly with your thumbnail or a plastic putty knife to seal the adhesive completely.
Applying the Bead and the One-Swipe Technique
Cut your caulk tube nozzle at a 45-degree angle, keeping the opening relatively small—about the size of a match head. When applying the bead, hold the gun at a consistent angle and pull it toward you in one continuous motion. Do not stop and start, or you will create thick deposits. Now, here is where most DIYers fail: they try to tool the joint with dry fingers or complex scraping tools. Instead, mist the wet caulk lightly with soapy water or window cleaner, dip your gloved index finger into the same solution, and glide over the joint in one smooth swipe. The soapy water acts as a lubricant, stopping the excess silicone from sticking to your skin or spreading beyond the tape borders.
The Critical Pull Technique While the Caulk is Wet
You must remove the painter’s tape immediately while the caulk is still completely wet and workable. If you wait even ten minutes for the silicone to skim over, the tape will pull the cured edges of your new bead right off the wall, leaving a jagged, ruinous mess. Grab the end of the tape and pull it away from the joint at a sharp 45-degree angle. This slicing action creates a razor-sharp, clean border. Just like when you are applying the painters tape secret for perfectly straight grout lines during a tricky splashback install, timing is everything. Pull the tape slowly, roll it into a neat ball as you go, and immediately discard it in a nearby trash bin to avoid dragging wet silicone across your freshly laid flooring.
When we dive deeper into home renovations, we often focus so heavily on the big-ticket items like choosing materials or getting our cuts right that we overlook the microscopic details. It is easy to assume that if your tile layout is straight or your hardwood looks beautiful, the job is a masterclass. But professional builders notice the subtle transitions and structural prep that DIYers routinely skip. Let’s dig deeper into what separates a passable weekend warrior project from a high-end, lifelong architectural feature.
Why does your self-leveling compound keep cracking over plywood?
Many homeowners believe that pouring self-leveler is as simple as mixing a bucket of liquid cement and letting gravity do the work. The common belief is that the thick mixture will naturally settle and bond to any wooden subfloor. In my experience, this is the quickest route to a crumbling disaster. Wood and cementitious leveler have completely different rates of expansion and contraction. According to a structural engineering bulletin from the Chicago Tribune’s home resources, failing to prime wood subfloors before leveling is the primary driver of premature mortar failure in residential remodels.
If you do not seal the wood first, the porous plywood will instantly suck all the moisture out of the wet leveler. This causes the compound to cure far too fast, leading to cracking, shrinking, and eventually pulling away from the subfloor entirely. To avoid this costly trap, always apply the best primer for installing leveler over plywood. It acts as a physical barrier that keeps the moisture inside the leveling compound where it belongs, ensuring a perfect chemical cure. Have you ever fallen into this trap? Let me know in the comments.
Another invisible culprit that ruins high-end installations is neglecting the subfloor flatness before tiling. Many DIYers assume that applying extra thinset mortar will easily compensate for a dipped floor. This is a massive mistake. As thick mortar dries, it shrinks at a different rate than thin spots, which pulls the tiles downward and creates dangerous lip hazards. Before you mix your first batch of thinset, you must systematically check your surface. To do this correctly over long spans, I highly recommend using the string line method for checking floor flatness over 20 feet to locate dips and crowns that a standard four-foot level will miss entirely.
By taking the time to address these deep structural requirements—whether it is perfecting your underlayments, using how to use a spiked roller for the perfect leveling pour to release trapped air, or carefully setting up expansion joints—your final caulking lines will look clean because they are resting on a stable, movement-free foundation.
Once you have conquered the high-stakes phase of prep work and laying your materials down, you are left with the reality of living with your creation. A flawless floor is not a monument frozen in time; it is a dynamic system. To keep your wood and ceramic tile performing at their peak, you must approach maintenance with the same level of mechanical precision you used during the installation itself. I learned early on that using the wrong maintenance tools can destroy months of hard work in a single afternoon.
How do I maintain my floor leveling and installation over time?
The secret to keeping your floors stable lies in protecting them from structural movement and moisture abuse. For hardwood, the greatest threat is seasonal humidity shifts that cause wood cells to swell and shrink. If you want to protect your investment, I highly recommend learning how to keep your hardwood floors from gapping in the winter by maintaining a stable indoor environment. For tiled areas, protection is all about avoiding moisture-related degradation. Never use aggressive chemicals or saturating cleaning tools. I always advise homeowners that moisture is the silent killer of modern subfloors, which is exactly why you should never use a steam mop on click-lock floors or nearby transitions. The high-pressure steam forces vapor deep into the joints, swelling the core and forcing the protective top layers to peel.
When it comes to tools, throw away the cheap plastic multi-tools and invest in a high-accuracy digital moisture meter and a professional-grade 10-foot straightedge. These are the exact instruments specified in the National Wood Flooring Association (NWFA) technical guidelines to verify structural integrity over time. Looking ahead, the future of floor leveling and diagnostics is moving rapidly toward integrated smart-sensor technology. Within the next decade, we will likely see underlayments embedded with continuous moisture and deflection sensors that alert your smartphone before a crack even has the chance to propagate through your expensive porcelain tiles. For now, we must rely on our own vigilance and precise craftsmanship to ensure our installations stand the test of time. I challenge you to grab a straightedge this weekend, map your high spots, and finally tackle that transition you have been putting off.
Three Hard Truths About Tile and Wood Transitions That Changed My Perspective
Over the course of dozens of floor installations, I have had my fair share of humbling moments. The first major lesson I learned is that wood and tile are not static materials; they represent a marriage of shifting systems. You cannot force them to behave with brute force or excessive adhesive. If you do not account for their unique seasonal expansions, your grout lines and caulking beads will split, no matter how carefully you laid them down.
Secondly, a flat subfloor is not a luxury, it is the absolute foundation of your entire design. Skipping the preparation stage to save a few dollars on leveling compound or primer always results in dynamic bouncing, squeaking, and eventually fractured tiles. Lastly, I realized that the tiny transitions—how a tile meets a baseboard or how a hardwood plank matches up to a door threshold—will always show off the true quality of your craftsmanship far more than the center of the room. True luxury is in the details, not just the material cost.
My Go-To Kit for Flawless Layouts and Sealing
Achieving pristine lines requires more than just patience; it requires tools designed for physical accuracy. Here is the exact toolkit I rely on to eliminate the guesswork on my home projects:
- A High-Accuracy Digital Moisture Meter: This tool is non-negotiable for checking subfloor conditions. It ensures you never lay down wood over damp plywood or concrete, protecting against eventual cupping and warping.
- Premium Grade Blue Painter’s Tape: Do not cheap out here. Quality tape prevents adhesive bleed-through and ensures you get that crisp, clean edge during the critical peel phase.
- A 10-Foot Professional Aluminum Straightedge: Essential for mapping out subfloor flatness and preventing painful lippage issues before mixing your thinset.
Make Your Mark with Uncompromising Precision
It is incredibly satisfying to step back and look at a floor transition that looks absolutely perfect. Armed with the right preparation strategies and the painter’s tape trick, you no longer have to dread that final sealing phase. Taking the extra time to plan, prep, and execute these small boundaries turns your DIY dreams into professional-grade realities. It is time to stop avoiding those tricky expansion gaps and start installing with ultimate confidence.
Have you ever struggled with getting a clean caulk line around your bathtub or tile transitions? Let me know your experiences and questions in the comments below!