There was that one weekend when I finally decided to upgrade my living room floors. I started with high hopes, but within hours, I faced uneven surfaces, frustrating dips, and warped boards. It was a total mess—a nightmare I didn’t see coming. That lightbulb moment made me realize how crucial proper floor leveling actually is, especially when installing hardwood that boasts lasting beauty. If you’re like me, eager to handle your flooring project but unsure where to start, you’re in the right place. Today, I promise to share proven expert tips to help you achieve a perfectly leveled floor that not only looks great but stands the test of time.
Why Proper Floor Leveling Can Make or Break Your Hardwood Project
Hardwood floors are gorgeous when installed right. But the truth is, even the most beautiful planks can look terrible if the subfloor isn’t properly prepared. I learned this the hard way early on—making a common mistake of rushing through leveling without understanding its importance. I skipped some crucial steps, and my floors ended up creaking, uneven, and in some spots, warped beyond repair. A notable study by flooring experts confirms that poorly leveled surfaces significantly reduce the lifespan and aesthetic appeal of hardwood installations. This experience taught me that investing time in precise floor leveling is the key to lasting results.
Ever Wonder How Much a Floor Leveling Mistake Costs You?
Many DIY enthusiasts underestimate the critical nature of proper leveling, thinking a little wobble isn’t a big deal. But uneven floors can lead to gaps, creaky boards, and even damage to the floor layers over time. If you’re concerned about whether your approach is sound, consider these common pitfalls—like using the wrong tools or skipping the necessary curing time—that can sabotage your project before it even starts.
If you’ve faced a similar situation or worry about making these mistakes, don’t hesitate to reach out for expert guidance. Whether you want to learn more about mastering your flooring or need hands-on advice, I recommend checking out resources like [the ultimate guide to floor leveling](https://tiletrendshop.com/the-ultimate-guide-to-floor-leveling-for-a-perfect-finish). These insights can make all the difference in your project’s success.
Next, we’ll walk through the essential steps to achieve a perfectly level subfloor, setting the foundation for a stunning hardwood finish that lasts. Let’s get started!
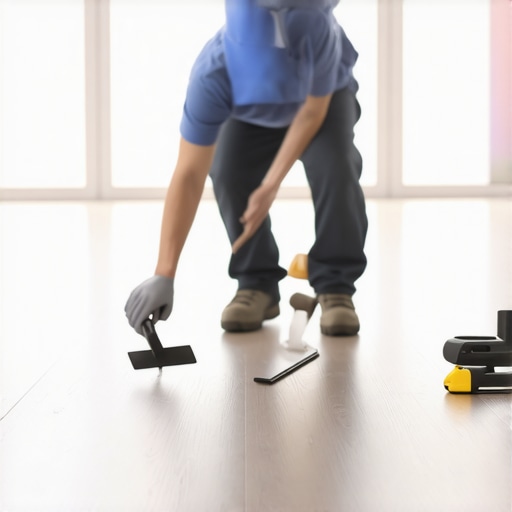
Assess the Surface Before You Begin
Start by inspecting your subfloor thoroughly. Use a long leveling tool or a straightedge across multiple sections to identify dips or high spots. For instance, I once skipped this step and only checked the obvious areas—resulting in uneven floors that caused squeaking and gaps later. Always mark problem areas for targeted correction.
Prepare the Tools and Materials Needed
Gather a high-quality self-leveling compound, a drill with mixing paddle, trowels, a notched trowel for adhesives, and safety gear. Think of leveling compound as a liquid pancake batter—it needs to be mixed precisely to achieve the right consistency. Having your tools ready prevents delays and mishaps during application.
Apply Primer to the Subfloor
Before pouring the leveling compound, coat the surface with a primer. This step improves adhesion and prevents future cracking. During my project, skipping primer caused the compound to lift over time, ruining the level. Follow the manufacturer’s instructions carefully for best results.
Mix and Pour the Leveling Compound
Mix the compound in batches, ensuring a smooth, pourable consistency—like thick syrup. Pour it into the lowest spots, starting from one end and moving toward the exit to prevent trapping air. I once poured too quickly, creating bubbles that left imperfections—so take your time and work systematically.
Spread and Smooth the Surface
Use a trowel or a long straightedge to spread the compound evenly, feathering the edges into the existing surface. Think of this step as smoothing out a pancake; the goal is a flat, seamless surface. Allow the compound to cure fully, typically 24 hours, before moving on. During a past project, rushing cure time resulted in slight dips, compromising the final floor’s flatness.
Address Persistent High Spots or Dips
If after curing, irregularities remain, lightly sand high spots and re-apply a thin layer of leveling compound to low areas. This two-step approach ensures a truly flat surface, providing a perfect base for your flooring. For detailed techniques, you can explore precise leveling methods.
Verify the Flatness
Once dried, re-inspect with your straightedge and a level. In my experience, double-checking prevents surprises during flooring installation. If necessary, repeat the process until the surface is pristine. Remember, patience here saves time and reduces costly adjustments later.
Prepare for Flooring Installation
Clean the surface thoroughly, removing dust and debris. Apply a suitable primer if needed, especially for tile adhesives or hardwood finishes. With a perfectly leveled subfloor, your flooring materials will lay flat and stay durable over time. For tips on choosing the right flooring, see hardwood selection tips.
Many homeowners assume that a straightforward approach to floor leveling and installation is enough to guarantee professional results. However, what most people overlook are the nuanced intricacies that can make or break your project’s longevity and visual appeal. One common myth is that using a self-leveling compound alone will fix all unevenness—this is misleading. In reality, subtle irregularities in substrate preparation, moisture content, and material compatibility play vital roles in the final outcome. For example, neglecting to properly inspect the subfloor for moisture problems can lead to adhesive failure and warping over time. As expert technicians emphasize, understanding these subtleties prevents costly mistakes and ensures your investment endures.
Why Do Many Fall for Simplified Solutions Instead of Expert Techniques?
It’s tempting to believe that quick fixes or shortcuts can replace meticulous craftsmanship. Yet, flooring assembly involves complex interactions between materials, environment, and installation methods. Skipping steps like priming or underlayment application, or misjudging the curing time of leveling compounds, can result in uneven surfaces or ridges that only become apparent after flooring is installed. The key is embracing a detailed approach—such as detailed substrate assessment and precision leveling—supported by studies showing how even minor deviations can accelerate wear and tear (see the [ultimate guide to floor leveling](https://tiletrendshop.com/the-ultimate-guide-to-floor-leveling-for-a-perfect-finish)).
Diving deeper, advanced installers recognize that environmental factors like humidity fluctuations and temperature variations also influence the curing process and material stability. For instance, using a leveling compound in a damp environment without proper curing can trap moisture, leading to future surface bubbles or cracks. This is why ongoing education and attention to material science are crucial; expert-level knowledge helps you navigate these hidden pitfalls. To refine your skills, consult resources such as [mastering hardwood floor refinishing](https://tiletrendshop.com/mastering-hardwood-floor-refinishing-expert-tips-for-2025).
Another common oversight relates to the choice and application of underlayment and subfloor materials. Many skip the necessary surface preparation steps, assuming a clean, dry substrate suffices. However, even minuscule deviations in flatness or cleanliness can cause uneven tile or hardwood installation, leading to squeaks or premature cracking. Remember, the devil is in the details. Double-checking the substrate’s moisture levels, flatness, and cleanliness—using precise tools—is essential. If you’re unsure how to properly evaluate or prepare your subfloor, reaching out for professional guidance is advisable; visit [contact us](https://tiletrendshop.com/contact-us) to learn more.
In conclusion, mastering the nuances of flooring installation involves not just following basic steps but understanding the complex interplay of materials, environment, and technique. By avoiding common myths and recognizing these hidden factors, you can significantly extend your floors’ lifespan and beauty. Have you ever fallen into this trap? Let me know in the comments. For advanced strategies on tile and hardwood installation, check out [expert tips for lasting results](https://tiletrendshop.com/expert-tile-flooring-installation-strategies-for-lasting-results-in-2025). Remember, the secret to a perfect finish lies in the details.Achieving a perfectly leveled and durable floor requires not only technique but also the right tools that make the process efficient and precise. From professional-grade leveling compounds to advanced measurement devices, investing in quality equipment pays off by ensuring long-term performance and reducing rework. I personally rely on a digital laser level for its incredible accuracy, especially when working on large areas. Unlike traditional bubble levels, laser levels project a continuous, adjustable line across the surface, allowing me to identify high and low spots quickly and with unmatched precision, which is crucial when aiming for a seamless finish. For mixing leveling compounds, I prefer a high-torque drill with a mixing paddle attachment. It ensures thorough blending without lumps, providing a smooth application that adheres properly and cures evenly, preventing future cracks or dips.
How do I maintain my tools over time to keep them reliable?
Regular calibration of measurement devices, cleaning tools after each project, and storing them in dry, protected places extend their lifespan and accuracy. For example, a laser level’s batteries should be replaced periodically, and the device itself should be checked against a known level surface to verify its calibration. Reserving dedicated storage space helps prevent damage and contamination, preserving their precision for years. As the trend in flooring installation advances, tools that incorporate smart technology, such as laser levels with Bluetooth connectivity and automatic calibration features, are becoming more prevalent. These innovations can elevate your workflow and give you confidence in your measurements, ultimately translating into floors that truly stand the test of time. Incorporating high-quality, reliable tools is an investment that results in a more efficient process and superior long-term results. For expert advice on selecting and maintaining the best equipment, visit our contact page to get personalized recommendations. Also, don’t hesitate to challenge yourself by trying the laser level for your next project—it’s a game-changer in achieving flawless floors and can significantly reduce installation errors.
The Hardest Lesson I Learned About floor leveling,flooring installation,tile,hardwood floors
My biggest takeaway was the importance of patience and attention to detail. Rushing through the leveling process led to uneven floors that plagued me long after the installation was complete. Taking the time to thoroughly assess and correct imperfections upfront saved me headaches and costly repairs in the future.
3 Myths About floor leveling,flooring installation,tile,hardwood floors That Held Me Back
I used to believe that self-leveling compounds could fix all unevenness, but I learned that proper substrate preparation is key. Also, I thought larger areas didn’t require meticulous measurement — wrong! Precision matters, no matter the size of the space.
What Experts Won’t Tell You About floor leveling,flooring installation,tile,hardwood floors
Many professionals emphasize how subtle irregularities in subfloor moisture content can compromise your entire project. Ignoring environmental factors like humidity can lead to future buckling or warping, undermining your hard work. Doing thorough research and consulting resources like the ultimate guide to floor leveling helped me understand these hidden pitfalls.
Curated Recommendations
For a reliable measurement tool, I rely on a high-quality laser level—it’s indispensable for ensuring perfect flatness across large surfaces. The durable self-leveling compounds from trusted brands give me peace of mind during application, knowing they’ll cure correctly and bond well. I also recommend reading this comprehensive guide to deepen your understanding of professional-level flooring techniques.
Embrace the Challenge and Elevate Your Floors
Remember, mastering floor leveling isn’t just about technical steps—it’s about cultivating patience, precision, and confidence. Your dream floors are within reach, and every careful measurement and correction brings you closer to a stunning, durable finish. Don’t hesitate to start confidently, knowing you’re building a foundation that lasts. What’s been your biggest lesson or challenge with floor leveling? Share below—I’d love to hear your story!
,
This post resonates with me, especially since I recently faced similar challenges when trying to level my own subfloor for a hardwood installation. I didn’t realize how much the curing time and proper surface preparation could impact the final look and durability of my floors. Your tips on thorough inspection and meticulous measurement are so crucial; I wish I had known them earlier! One thing I’ve found effective is using a long, precision laser level to check flatness across large spaces—it saves so much time and gives you confidence in the results. I also learned the hard way that rushing the curing process can lead to dips or bubbles later, so patience truly is key. For others tackling this, what’s your go-to method for ensuring the subfloor stays dry and free of moisture during leveling? Would love to hear everyone’s techniques to avoid moisture issues—it’s such a common trap.