Have you ever stepped into a new home and immediately noticed uneven floors or squeaky tiles? I used to think it was just part of the charm—until I experienced the nightmare of floors that started to show cracks and creaks just a few years after installation. That moment was a lightbulb for me: proper preparation and execution are everything when it comes to durable flooring.
Why Your Floors Fail Before Their Time Matters
In the world of flooring, the difference between lasting beauty and costly repairs often boils down to a few critical steps. I learned this firsthand early on when a hurried job resulted in uneven hardwood, which needed replacing within a decade. It wasn’t just about aesthetic appeal but about long-term investment. If you’ve faced similar frustrations—wasted money, time, and effort—you’re not alone. And the good news? With the right knowledge and techniques, you can avoid these pitfalls entirely.
Today, I’ll share proven strategies to ensure your floors stand the test of time, from proper leveling to choosing the right materials. Whether you’re renovating or building from scratch, mastering these tips will transform your space into a sturdy, beautiful haven you can count on for years.
Is Floor Leveling Really That Critical, or Just a Detail?
Early in my career, I underestimated the importance of a perfectly level surface. I thought minor imperfections wouldn’t matter much. Wrong. A small uneven patch can lead to gaps, squeaks, and even cracks down the line. According to experts, skilled floor leveling is the foundation of a flawless finish and long-lasting durability. Want to see how professionals tackle this challenge? Check out this comprehensive guide on floor leveling. Trust me, neglecting this step was a costly mistake I’ll never repeat.
Now that I’ve set the stage, let’s dive into the essential steps and common pitfalls to watch out for—so your floors not only look fantastic but also stay this way for decades.
Start with a Clear Surface Canvas
Before laying any flooring material, ensure your subfloor is free of debris, dust, and loose particles. During a recent renovation, I used a vacuum and a damp cloth to thoroughly clean the surface, which significantly improved the adhesion of the leveling compound. Think of your subfloor as a canvas; the smoother and cleaner, the better the final artwork.
Assess and Identify Unevenness
Use a long, straightedge or a laser level to detect dips and high spots. For example, I clamped a 6-foot level across different sections of my basement floor and marked areas that showed a gap underneath. This precise assessment guides where to focus your leveling efforts and prevents surprises after installation.
Apply the Right Leveling Material
Select a self-leveling compound or cement-based patch for major bumps, depending on the severity. I mixed the self-leveling compound according to manufacturer instructions, pouring it into low spots like a pancake batter. As I spread it with a trowel, I watched it flow and settle into a perfectly flat surface—this is the key to avoiding uneven floors later.
Use a Trowel or Screed for Precision
Once the leveling compound is poured, use a screed or straightedge to smooth it out. In my experience, running the tool diagonally across the surface eliminates ridges and ensures a level finish. For thin layers or spot repairs, a margin trowel sufficed, giving me fine control over the application.
Patience Is Critical During Drying
Let the compound cure fully, often 24 hours or more, before proceeding. I once rushed the process, and the floor remained uneven, causing problems when installing tiles. Following the drying time recommended not only prevents these issues but also guarantees a solid foundation that lasts.
Double-Check Your Work
After curing, re-assess the surface with a level or straightedge. Spotting minor imperfections allows for touch-ups with additional compound. During my last project, a quick second pass saved me from potential future cracks, reaffirming the importance of thoroughness.
Prepare for Final Flooring Installation
Once your surface is flat and dry, you’re ready for the final layer—be it hardwood, tile, or laminate. Properly leveled floors reduce risk of squeaks, cracks, and shifting down the line. For optimal results, follow industry-specific installation pointers, like those found in tile installation tips or hardwood installation guides.
Quick Tip for Complex Spaces
In tricky corners or uneven joists, consider using shims or adjustable pedestals before applying the leveling compound. I used shims under raised sections in a plywood subfloor, which made the subsequent leveling seamless and gave me a perfectly flat surface for tiles.
Incorporating these concrete actions into your flooring project reduces future repair costs and elevates the overall quality. Mastering proper leveling is the foundation for durable, beautiful floors that stand unwavering over time.
 While many homeowners and even contractors focus on the major steps like applying leveling compounds or choosing durable materials, the real mastery lies in understanding the subtleties that can make or break a flooring project. A common misconception is that once the surface appears flat, the job is complete. However, subtle imperfections—sometimes invisible to the naked eye—can lead to long-term issues such as cracks, squeaks, or tiles popping loose. Expert-level flooring considers not just the visible surface but the microscopic uniformity and stability beneath. For example, surface irregularities may seem minor but can place uneven stress on finishes, accelerating deterioration over time; this echoes findings by flooring experts who emphasize meticulous surface prep as fundamental to durability.
Many assume that any professional-grade leveling compound guarantees success, but choosing the right product based on the subfloor’s composition is crucial. Some compounds may be incompatible with specific substrates, leading to delamination or shrinkage. Moreover, the sequence of application and the curing environment significantly influence the final result. For example, excessive humidity during curing can prevent proper bonding, causing future buckling or cracking. For advanced insights, visit this detailed guide on precise leveling techniques.
A particularly overlooked aspect is the misconception about how imperfections propagate. A tiny dip or bump can serve as a stress concentrator that eventually causes tiles to crack or hardwood planks to buckle. This makes thorough assessment and correction vital—don’t skip rechecking your work after curing, as residual flaws can have compounded effects. When installing hardwood or tile, pay attention to the subtle feedback from the materials; sometimes, a slight adjustment in the leveling process can save you from costly repairs later.
Now, let’s tackle the question that even seasoned professionals might overlook—how do substrate differences influence your leveling strategy? Instead of applying a one-size-fits-all approach, custom techniques tailored to the specific conditions of your subfloor can enhance longevity and aesthetics. For example, porous substrates require different sealing and leveling approaches compared to dense concrete. To refine your skills further, consider consulting this expert resource on advanced leveling strategies.
Remember, the devil is in the details. Overlooking nuanced factors may lead to problems that seem minor initially but escalate over time, diminishing the overall quality of your flooring. By paying close attention to microscopic imperfections, material compatibility, and curing conditions, you’re investing in a truly durable, beautiful finish. And always double-check your assessments before moving forward—trust me, this extra step can prevent surprises down the line.
Have you ever fallen into this trap? Let me know in the comments.
Maintaining the quality of your floors over time requires more than just initial installation skills; it demands the right set of tools that ensure longevity and ease of repair. Because I’ve encountered countless situations where the right toolkit made all the difference, I want to share my top recommendations based on personal experience and industry standards. These tools not only streamline the process but also help prevent common issues like uneven surfaces or loose tiles, significantly extending your floors’ lifespan.
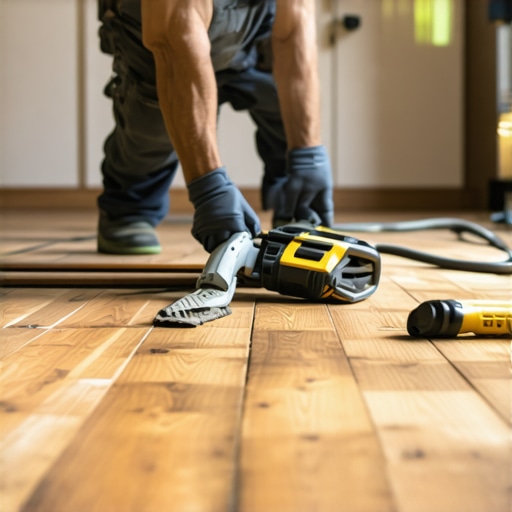
Invest in a Quality Laser Level
Whenever I work on leveling hardwood or tile, I rely heavily on a laser level. Unlike traditional bubble levels, a laser level projects a precise, continuous line across surfaces, making it easier to identify high and low spots accurately. My preferred model is the Bosch GLL3-80 because of its durability, range, and visibility even in bright conditions. Accurate leveling at the start prevents future cracks, squeaks, or loose tiles, which are common pitfalls when surfaces are uneven. For comprehensive methods on surface assessment, check out this guide on floor leveling.
Use a Heavy-Duty Trowel and Screed System
Applying leveling compound or mortar with a high-quality trowel ensures smooth, consistent coverage. I stick to stainless steel, ergonomically designed models that allow for precise control and reduce fatigue during extended use. Pairing this with a long screed bar—often a straight metal or aluminum piece—helps achieve that perfect flat plane. This combination saves time and reduces rework, especially in large areas. Remember, the goal is a surface that is uniformly level before installing your final flooring.
Maintain Your Tools for Peak Performance
Proper maintenance prolongs tool life and guarantees consistent results. Cleaning your trowels, laser level lenses, and screed after each project prevents material build-up that could compromise accuracy. For electronic tools like laser levels, storing them in padded cases and calibrating periodically keeps measurements spot-on. This diligence in maintenance pays off when you tackle future projects, enabling quick, precise work every time.
Incorporate Moisture Meters and Subfloor Detectors
Before installing heavy flooring, I always verify the moisture content of the subfloor with a reliable moisture meter like the Protimeter Surveymaster. Excess moisture can lead to adhesion problems, warping, and long-term damage. I also use subfloor detectors to identify hidden issues beneath surfaces, such as voids or improper insulation. These diagnostic tools help catch potential problems early, saving significant repair costs later on. Visit this resource on floor assessment techniques for more insights.
How do I maintain flooring tools over time?
Regularly inspecting and cleaning tools after each use is critical. For instance, wiping down a laser level’s lenses with a soft cloth prevents dust buildup that could distort readings. Applying rust inhibitors to metal tools helps prevent corrosion. Recalibrating electronic devices annually ensures measurement accuracy, which is vital for long-term success. I also store my tools in climate-controlled environments to avoid humidity-related damage. Developing a routine for tool maintenance guarantees they perform reliably in your next project, reducing frustration and costly errors.
Looking ahead, the trend is moving toward smart, automated tools that integrate with mobile devices for even more precise and efficient flooring work. Investing in such technology now can set you apart as a professional or dedicated DIYer. To get started, try upgrading your leveling setup with a laser level that connects wirelessly to smartphones, offering real-time data and adjustments.
Remember, your floors’ durability depends significantly on the tools you use to maintain and install them. By selecting high-quality equipment and giving it proper care, you ensure that your investment yields beautiful, long-lasting results. If you’re ready to refine your tool kit, visit this contact page for expert advice and product recommendations tailored to your needs.

What I Wish I Knew When I Started
One of the most valuable lessons I learned is that every tiny imperfection in floor leveling can snowball into major problems later. Skipping detailed assessments or rushing the curing process seemed harmless initially, but it cost me dearly in repairs. Trust me, patience and precision during leveling are worth every minute—they’re the secret to floors that stand the test of time.
Tools That Made All the Difference
Investing in a quality laser level and sturdy screed system transformed my approach from guesswork to certainty. These tools ensure your surface is truly flat, reducing the risk of buckles or cracks. I recommend the Bosch GLL3-80 for its reliability, and a stainless steel trowel for smooth application. Proper tools are a small investment with exponential rewards in durability.
Beyond the Surface: Think Underneath
Understanding your subfloor’s unique properties changed how I approach leveling. Moisture meters and subfloor detectors uncovered hidden issues before they could sabotage my project. Addressing these problems early saved me from costly repairs and ensured my floors remained beautiful and functional for years. Don’t overlook what’s beneath—the foundation of your floors matters just as much as the surface finish.
Resources I Trust for Flooring Success
For in-depth guidance, I turn to comprehensive resources like this ultimate guide on floor leveling. It covers everything from assessing unevenness to curing tips. Additionally, this detailed article provides advanced techniques that elevate your craftsmanship. Finally, partnering with trusted suppliers ensures you get quality products for lasting results.
Your Next Step Toward Flawless Floors
Now is the perfect moment to apply these insights and turn your flooring project into a lasting masterpiece. Remember, the key to durable, beautiful floors begins with meticulous leveling and proper preparation. Don’t let small mistakes undermine your hard work—invest in quality, patience, and knowledge. Your future self will thank you for it.
What challenges have you faced when leveling floors? Let me know below, and share your tips or questions—together, we can build better, longer-lasting floors!