I vividly remember the first time I installed hardwood floors in my own home. Excited, confident, I rushed through the job, only to discover weeks later that the floor had started to creak and uneven spots had become glaring eyesores. That lightbulb moment made me realize—without proper leveling and installation strategies, even the most beautiful hardwood can lose its allure prematurely.
Today, I want to share what I’ve learned from countless projects—tips and tricks to ensure your hardwood flooring remains stunning and durable over the years. Whether you’re tackling your first installation or just wanting to refine your technique, understanding the importance of precise leveling and expert installation is your key to lasting beauty.
Why Proper Leveling and Expert Installation Matter More Than You Think
Think about it: a floor that isn’t perfectly level can lead to squeaky boards, uneven surfaces, and a shorter lifespan. It’s like building a house on uneven ground—troubles are bound to surface. Proper leveling isn’t just about aesthetics; it’s essential for the stability and longevity of your flooring.
Early in my career, I underestimated this crucial step. I skipped over some delicate leveling procedures, thinking the flooring would hide minor imperfections. The result? After a few years, the floor was riddled with gaps and dips that no amount of refinishing could fix. That mistake cost me time, money, and credibility. Since then, I’ve dived deep into the best practices, including advanced techniques found in expert floor leveling tips, ensuring every project I undertake is rock solid from the start.
If you’re wondering whether investing in proper leveling and installation is worth it, consider this: according to a study by the National Wood Flooring Association, improperly installed floors can lose up to 30% of their value and durability over time. That’s a staggering number that highlights why rushing or skipping steps can be a false economy.
In the next sections, we’ll explore the specific techniques and tools that give your hardwood floors the foundation they deserve. Ready to transform your space with confidence? Let’s dive into the key strategies that make all the difference.
Is Floor Leveling Really That Important or Just a Cliché?
I know some might think, ‘Isn’t a little unevenness just part of a rustic charm?’ Believe me, I’ve fallen into that trap early on. My biggest mistake was assuming a quick shim here, a nudge there, would suffice. Turns out, that’s a recipe for disaster. Precise leveling creates a smooth, durable surface that’s worth every minute invested. If you’ve faced similar doubts, don’t worry—you’re not alone. The good news is, with the right methods, you can avoid costly mistakes and achieve a flawless finish. Curious about the precise techniques I recommend? Stay tuned, because mastering these will elevate your skills and your home’s value.
Prep the Subfloor with Precision
Start by removing any debris, old adhesive, or uneven patches on the subfloor. Use a pry bar and vacuum to clear loose material. Imagine preparing a foundation; a clean, solid base ensures your hardwood stays level and secure.
Apply a moisture barrier if necessary, especially in basements or humid areas. This prevents uneven expansion or contraction, which can cause warping or gaps over time. Think of it like sealing the foundation of a house—vital for longevity.
Identify and Fix Subfloor Irregularities
Use a long level or a laser level to find dips and humps. A 4-foot or longer level is ideal; place it across the surface in multiple directions. Personally, I once skipped this step and missed a 1/4-inch dip, leading to a noticeable bow in my final floor. Correct these imperfections with a self-leveling compound or add shims under loose areas.
This step is crucial: uneven subfloors are like a bumpy road—driver discomfort and tire wear occur. A smooth, even surface guarantees stability and a polished appearance.
Apply Micro-Levels for Fine-Tuning
For minor irregularities, use a professional-grade floor leveler. Mix and pour the compound following manufacturer instructions, then screed it with a straightedge. I recall my first time using it—clumsy handling resulted in an uneven layer, but patience and repeat applications corrected it. The result was a flat, premium-quality base for the hardwood. Check for levelness again after it dries to ensure perfection.
Set the Correct Underlayment
Choose an appropriate underlayment to further smooth minor imperfections and provide sound dampening. Foam, cork, or rubber can be used depending on your needs. Lay it uniformly, avoiding overlaps or gaps, similar to laying a carpet—smooth and seamless. This layer helps absorb minor subfloor imperfections, preventing them from transmitting to the finished surface. It also acts as a cushion, extending the life of your flooring, which is a common focus in hardwood floor care secrets.
Seamless Installation Techniques
Stagger your boards in a running or brick pattern to distribute any irregularities and enhance stability. Use spacers around the perimeter to maintain expansion gaps, preventing buckling. When nailing or stapling, ensure the fasteners are flush with the surface, avoiding protrusions that could cause squeaks. I once drove a nail too deep, which led to creaking—a mistake I promptly fixed by adjusting subsequent fastenings. This attention to detail prevents future issues and prolongs your floor’s lifespan, aligning with expert tips for long-lasting beauty.
Finishing Touches for Durability
Sand the surface carefully to smooth any uneven spots, then apply a high-quality finish. Proper sealing protects against moisture and wear, especially in high-traffic areas. Remember, a well-finished surface is not just about aesthetics but also about defending your investment over time. Regular maintenance, such as cleaning with pH-neutral products, complements this foundation and sustains the beauty.
By following these detailed steps—thorough prep, precise leveling, strategic underlayment, and seamless installation—you create a durable, flawless hardwood floor that stands the test of time. For more insights into installation pitfalls and how to avoid them, check this comprehensive guide.
Many homeowners and even some professionals believe that laying hardwood floors is simply about matching planks and securing them properly. However, this mindset overlooks the subtle yet vital nuances that determine long-term durability and aesthetic appeal. *Contrary to popular belief, aiming for perfection in the initial installation often requires understanding the intricate details that go beyond surface-level techniques.* For instance, an advanced mistake people make is underestimating the importance of consistent moisture control throughout the process. Fluctuations in moisture can cause hardwood to expand or contract, leading to gaps, buckling, or warping over time, especially in environments with varying humidity levels. According to industry experts, such as those referenced in professional refinishing tips, managing moisture is critical but often overlooked during installation.
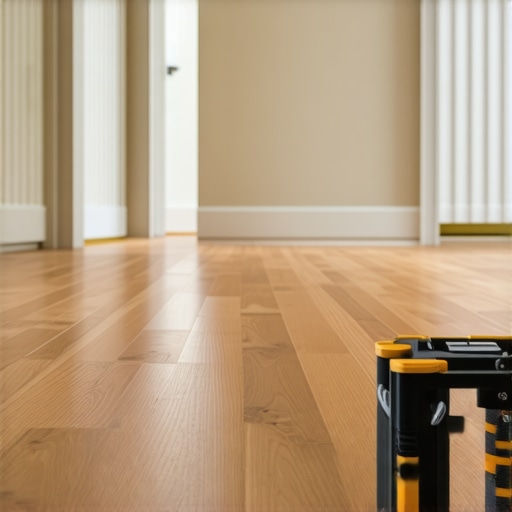
Keep It Running: Tools I Recommend for Hardwood and Tile Projects
As someone who’s spent years installing and maintaining hardwood floors, I can confirm that the right tools make all the difference in ensuring durability and a polished finish. One of my go-to devices is the laser level. I rely on a high-quality, self-leveling laser?like the Bosch GLL 3-330C?to quickly and precisely identify uneven spots during subfloor prep. Its accuracy to within 1/8 inch over 100 feet saves time and ensures that every layer of flooring is laid on a truly level surface. For smoothing out minor imperfections, I favor a power trowel. Despite its common use in concrete finishing, its adjustable speed and size make it ideal for fine-tuning subfloor surfaces in residential projects. Remember, a smooth foundation prevents future issues like squeaks or gaps, aligning with the comprehensive strategies outlined in expert-level floor leveling tips.
When it comes to applying micro-levelers or self-leveling compounds, I prefer a mechanical mixer. Specifically, I use a paddle mixer attached to a drill, which ensures consistent blending without clumps, saving labor time. For larger jobs, a variable-speed compact cement mixer with a tilting drum increases productivity while maintaining high-quality mixes. Once the surface is prepared, I install underlayment with a floor stapler designed for hardwood installation. It provides consistent fastening, reducing the risk of squeaks over time. To keep everything organized and efficient, I utilize a durable digital measuring tape from Stanley, which helps in quick, accurate measurements during layout and spacing. Proper measurement guarantees consistent expansion gaps and board alignment, critical for long-term durability.
Looking ahead, the trend points toward more digital and automated tools. Automated leveling systems integrated with IoT technology are gaining traction, promising even quicker and more precise installation processes. For example, new advancements include smart sensors that communicate with your leveling equipment to automatically adjust and correct irregularities in real-time, as highlighted in expert techniques for flawless surfaces. Embracing these innovations could significantly reduce installation errors and improve long-term results, especially when scaled for larger projects.
Ever Wondered How to Keep Your Flooring Working Fine Over Time?
Regular maintenance is key. I recommend scheduling annual inspections, using a moisture meter like the Fluke 992, to detect early signs of humidity issues that could cause your hardwood or tile to warp or crack. Applying protective finishes once every few years, and cleaning with pH-neutral solutions, will also preserve the integrity of your floors. As an exercise, try using a laser level to check your entire floor’s flatness after a year—it’s a simple yet effective way to catch minor issues early before they become costly repairs. For more insights on maintaining long-lasting floors, consult hardwood floor care secrets specifically tailored for homeowners who want lasting beauty. Investing in these advanced tools and maintenance routines is not just about fixing problems; it’s about building a resilient foundation that retains appeal and value over decades.
Lessons That Changed My Flooring Game Forever
One of the biggest surprises I encountered was the critical role of consistent moisture management. I once skipped detailed moisture testing and faced warping and gaps within a few years—an expensive, frustrating lesson that taught me to prioritize humidity control at every step. Additionally, I underestimated the power of choosing the right tools; investing in a quality laser level and micro-leveler transformed my workflow, yielding flawlessly level floors reliably. I also learned that patience during prep—like meticulous subfloor inspection and thorough cleaning—makes all the difference in achieving professional results. These insights didn’t just improve my installations; they extended the life and beauty of my floors beyond expectations.
Tools and Resources That Keep Me Ahead
For anyone serious about perfecting hardwood or tile installation, I’ve come to rely on a few game-changing resources. A self-leveling laser like the Bosch GLL 3-330C ensures precise leveling, saving countless hours of guesswork. The expert-level floor leveling tips have also been invaluable for refining my technique, especially in tricky subfloor scenarios. When mixing compounds, a paddle mixer attached to my drill guarantees consistency and reduces fatigue. These tools have become my trusted allies in creating durable, stunning floors that last. To explore more about trustworthy tools and techniques, check out my curated collection of resources designed to elevate your installation game.
Empower Your Floors with Confidence
Now, armed with these lessons and resources, it’s your turn to transform your space into a testament to craftsmanship and durability. High-quality installation rooted in meticulous preparation and right tools can make all the difference, turning a simple project into a lifelong investment. Don’t let doubts hold you back—embrace the challenge, learn from experience, and watch your floors stand the test of time. Your hard work and attention to detail will reward you with beauty and resilience for decades to come. Ready to take the next step? Share your thoughts or ask questions below—together, we can make your flooring dreams a durable reality.