Ever spent hours installing new hardwood floors only to realize they creak, squeak, or worse, warp within a few months? I sure have. I remember the frustration of pouring effort into a project that didn’t deliver the durable, stunning result I envisioned. It was a lightbulb moment—understanding that the secret isn’t just in choosing quality materials, but in proper preparation and installation techniques. The challenge? Ensuring that my floors stay level and resilient over time, resisting the daily wear and tear that comes with family life and routine use.
Why Floor Leveling Can Make or Break Your Hardwood Floor Durability
When I first started tackling hardwood installation, I underestimated the importance of a perfectly leveled subfloor. I thought a little unevenness was no big deal—just a cosmetic issue. Turns out, it’s a recipe for disaster. If your subfloor isn’t properly leveled, the entire flooring can develop unsightly gaps, creaks, or even crack under pressure. That’s why investing time in quality floor leveling is crucial. According to experts, imperfections as small as 1/8 inch can lead to long-term problems, affecting the lifespan and appearance of your floors.
Have You Faced This Common Floor Installation Headache?
Many homeowners assume that a quick fix will suffice, but experience has shown me that skipping the proper leveling process only leads to costly mistakes down the line. I once rushed the leveling step and regretted it when my floors warped within a year. If you’ve ever experienced uneven floors or visible seams after installation, know that you’re not alone—and there’s a better way. Want to learn the proven strategies for flawless, durable hardwood floors? Check out this comprehensive guide.
Now, let’s get into the practical steps that will help you master the art of floor leveling and ensure your hardwood floors stand the test of time. Ready to transform your space into a durable, beautiful haven? Let’s dive in!
,
Secure a Solid Foundation with Precise Subfloor Preparation
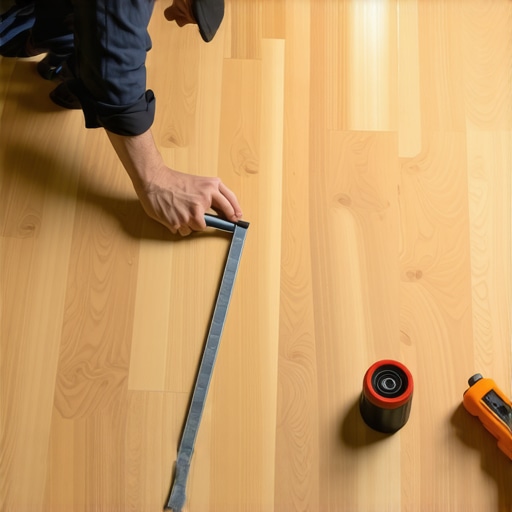
Start by thoroughly inspecting your subfloor for flaws. Use a long 4-foot level to identify high spots or dips. Think of this step as laying a foundation—if it’s uneven, everything built upon it will suffer. Use a self-leveling compound or shims to address these imperfections. I once spent a whole afternoon correcting a stubborn dip in my living room floor, which, after proper leveling, prevented future squeaks and cracks and made the installation much smoother.
Apply a Suitable Primer or Sealant
Before pouring leveling compounds, ensure the surface is clean, dry, and free of debris. Applying a primer improves adhesion and prevents future shifting. Skipping this step can cause the compound to separate over time, undermining your efforts. I learned this the hard way when my first attempt failed after a few months—since then, I never skip priming.
Choose the appropriate leveling method based on your subfloor type. For concrete, a traditional self-leveling compound works wonders, allowing flow into low spots and creating a flat surface. For wooden subfloors, shimming or underlayment leveling is better. Think of these methods as different tools in a craftsman’s belt—each suited for specific scenarios. My experience with self-leveling compounds was successful because I meticulously mixed and poured it in sections, working from the lowest point outward. This approach ensures no air pockets or uneven surfaces.
Mix and Pour Like a Pro
Achieve the right consistency by following manufacturer instructions. The mixture should be pourable but not too runny. Use a drill with a paddle attachment to mix thoroughly. When pouring, start at the lowest point, then spread the compound across the surface, gently vibrating the container to remove air bubbles. I once hurried this process and ended up with tiny voids that caused minor dips later, so patience here is key. Spread the compound evenly with a trowel, feathering edges for seamless integration.
Verify and Fine-Tune Your Leveling
After the compound cures—usually 24 hours—recheck with your level. Pay close attention to high spots or slight dips. If necessary, lightly sand or apply additional compound to smooth out irregularities. Remember, a perfectly leveled floor will make your hardwood installation easier and increase its longevity. My last project involved a small touch-up after initial leveling; the added precision made all the difference in creating a uniform surface that lasted years without issues.
Address Persistent Unevenness Promptly
If you encounter stubborn dips or bumps, consider cross-checking with a laser level for pinpoint accuracy. Sometimes, you need to repeat the leveling process in specific areas. Don’t rush this; the effort will pay off when your hardwood flooring is flush and free of imperfections. For more detailed techniques, explore strategies shared in this expert guide. Proper preparation is the secret to flooring that stands the test of time, achieving not just aesthetic appeal but durable performance.While many homeowners believe that selecting high-quality materials is the key to durable flooring, the real secret lies in mastering the nuances of installation. A widespread myth is that a perfect floor depends solely on choosing the best product; however, experts emphasize that improper preparation, especially in floor leveling, can undermine even the most expensive materials. Skipping meticulous subfloor inspection or rushing the leveling process can lead to uneven surfaces, gaps, and long-term damage, ultimately costing more in repairs down the line. For instance, a study published in the Journal of Building Engineering shows that uneven subfloors are a leading cause of floor failure, reinforcing that proper leveling is non-negotiable. Advanced installers focus on detailed surface assessment, utilizing laser levels for precise measurements—something many DIYers overlook. An often missed aspect is the importance of priming surfaces before applying leveling compounds, which enhances adhesion and prevents future shifting. The trap here is thinking that surface cleanliness alone suffices; neglecting primer can cause compounds to detach over time, creating unevenness and cracks. When tackling complex projects, asking, “What are the subtle imperfections that could compromise my flooring’s longevity?” helps clarify the importance of expertise-driven strategies. This involves understanding that different subfloor types require tailored leveling techniques—self-leveling compounds for concrete, shimming for wooden substrates—each with their own nuances. Learning from seasoned professionals and consulting advanced guides, such as [this in-depth resource](https://tiletrendshop.com/the-ultimate-guide-to-floor-leveling-for-a-perfect-finish), can prevent costly mistakes. Remember, the devil is in the details; flawless installation is achievable through careful surface prep, the right tools, and patience. Have you ever fallen into this trap? Let me know in the comments.
Achieving durable, flawless hardwood floors isn’t just about selecting the right materials; it heavily depends on the tools and maintenance routines you adopt over time. Investing in quality equipment ensures that your flooring remains beautiful and resilient for years to come. One tool I swear by is a laser level. Unlike traditional bubble levels, a laser level provides precise readings across large surfaces, making it invaluable for both initial installation and ongoing maintenance. I personally use the Bosch GPL 3 laser level because its multi-line lasers offer consistent accuracy, even in imperfect lighting conditions, which saves me hours of re-measuring and tweaking.
For flooring preparation, a high-quality concrete grinder or sander is essential. When dealing with uneven subfloors or removing old finishes, I rely on the DWE46151 5-Inch Random Orbit Sander. Its variable speed settings and ergonomic design help me smooth surfaces efficiently, preventing future issues like squeaks or uneven wear. Paired with a good vacuum attachment, it keeps dust to a minimum—a crucial factor when working in tight spaces or occupied homes.
Throughout the installation process, precise mixing tools make a significant difference. I recommend a drill with a paddle attachment, like the Makita DTDA106Z. It ensures the perfect consistency when preparing leveling compounds or adhesives, avoiding common pitfalls such as air pockets or inconsistent curing. Proper mixing is something I’ve learned the hard way—skimping on it leads to uneven surfaces that compromise long-term durability.
How do I maintain hardwood floors over time?
Regular maintenance is key to longevity. Employing tools like microfiber dust mops and HEPA vacuum cleaners allows me to remove debris that can cause scratches or dullness. Applying a high-quality hardwood floor polish periodically, like Bruce Hardwood Floor Polish, recharges the finish, restoring shine and providing an extra layer of protection. Additionally, keeping humidity levels stable—ideally between 35-55%—helps prevent wood from expanding or contracting, which can lead to gaps or buckling. For comprehensive tips, I recommend exploring this guide on hardwood floor care.
Looking ahead, I believe automation and smart tools will play an increasing role. Imagine self-leveling tools that adjust in real-time based on surface feedback, minimizing manual effort and ensuring perfect results every time. As technology evolves, embracing these innovations will be essential for professionals and DIY enthusiasts aiming for long-lasting, beautiful floors.
If you haven’t already, try using a laser level for your next project. The precision it offers can drastically reduce errors and set your floors up for success. Remember, maintenance isn’t just about fixing problems—you can proactively extend your floors’ lifespan with a few smart tools and habits. Ready to bring your flooring game to the next level? Dive into advanced techniques and keep your investment looking stunning for decades.
Why Cutting Corners in Floor Leveling Costs You Big Later
From my experience, the biggest mistake homeowners make is rushing through the subfloor preparation. It’s tempting to skip detailed inspections when you’re eager to see finished results, but ignoring tiny dips or bumps can lead to significant issues down the line, like cracks or squeaks. The hard-earned lesson? Invest time and precision here—your floors will thank you for years to come. For deeper insights, check out this comprehensive guide.
Not All Tools Are Equal—Choose Wisely for Durability
Throughout my projects, I’ve learned that using the right tools makes all the difference. A quality laser level, like the Bosch GPL 3, provides unwavering accuracy, saving countless headaches. Pair it with a reliable concrete grinder such as the DWE46151 5-Inch Random Orbit Sander, and you create a flawless foundation. My tip? Don’t skimp on these essentials—professional-grade tools are an investment in the longevity of your flooring. For trusted resources, explore this expert-approved guide.
The Gentle Art of Maintenance Can Save You Thousands
It’s often overlooked, but routine care plays a pivotal role in extending your hardwood floors’ lifespan. Regular inspections, gentle cleaning with microfiber mops, and periodic application of quality polish shield your investment. A small effort now can prevent costly repairs later, like refinishing or replacement. I’ve found that maintaining ideal humidity levels between 35-55% helps prevent wood from warping or gapping—simple habits that yield big rewards. For more advice, see this in-depth care guide.
Insider Lessons from Years of Flooring Triumphs and Mistakes
- Don’t Assume a Little Unevenness Is Okay: Small imperfections can compound, leading to uneven wear.
- Priming Is Your Best Friend: Skipping primer can cause failure over time—never overlook this step.
- Patience Pays Off: Taking extra time to re-check and fine-tune results prevents future headaches.
- Use the Right Level of Humidity: Stabilize moisture levels to keep floors looking their best and lasting longer.
- Invest in Quality Tools: They are your allies in creating durable, beautiful floors that stand the test of time.
What’s Next in Your Flooring Journey?
Embarking on or refining your hardwood flooring project is an act of craftsmanship and patience. Remember, mastery isn’t achieved overnight—each step, from precise subfloor leveling to consistent maintenance, builds a foundation for enduring beauty. By applying these personal insights and utilizing trusted resources like this expert guide, you set yourself up for success. Your floors are not just surfaces; they’re the backdrop to your everyday life—worthy of your best effort.
So, which step will you prioritize today—the meticulous preparation, the right tools, or a maintenance routine? Share your thoughts below; I look forward to hearing about your journey toward durable, stunning hardwood floors!
,