I vividly remember the first time I laid tile in my home. A simple mistake—skipping proper surface preparation—led to cracked tiles just a few months later. That lightbulb moment taught me a vital lesson: without the right installation techniques, even the most beautiful tile can lose its charm fast. If you’ve ever experienced uneven floors or cracked grout, you’re not alone. The good news? With a bit of expert guidance, you can achieve a stunning, durable finish that lasts for years.
Why Your Tile Installation Matters More Than You Think
Getting tile right isn’t just about aesthetics; it’s about creating a surface that can withstand daily life. A poorly installed floor can cause tripping hazards, develop cracks, and require costly repairs. Experts agree that meticulous preparation and proper technique are essential for longevity. In fact, an incorrect installation can reduce your tile’s lifespan by up to 50%, according to industry standards. That’s why understanding the fundamental principles is crucial. I recommend checking out some trusted tips on [tile installation pointers that save time and money](https://tiletrendshop.com/tile-installation-pointers-that-save-time-and-money) to get started.
Is Tile Installation Really Worth the Effort or Just a Trend?
At first, I thought I could wing it—use some quick DIY tricks and save money. So, I skipped leveling the subfloor properly, thinking it was just extra work. Turns out, that was a costly mistake. The uneven surface caused tiles to crack and pop loose within months. My experience taught me that investing time in precise surface prep and using quality materials pays off. If you’re still skeptical, just know that proper leveling techniques, like those detailed in [floor leveling strategies for a flawless finish](https://tiletrendshop.com/precise-floor-leveling-techniques-to-achieve-flawless-surfaces), can make all the difference.
Are you tired of dealing with fragile tile floors that don’t stand the test of time? Do your current surfaces have cracks or uneven spots? If yes, you’ve come to the right place. Next, we’ll dive into actionable tips that will elevate your flooring project from amateur to pro-quality—saving you time, money, and endless frustration. Ready to transform your space?
Start with a Solid Foundation
Before laying a single tile, ensure your subfloor is level, clean, and dry. Think of it like building a cake; if the base is uneven, the entire structure risks collapse. I once attempted to install tiles over a slightly uneven plywood subfloor without proper leveling, and by the second month, some tiles cracked or popped loose. To avoid this, use a reputable floor leveling compound, following the steps outlined in precise floor leveling techniques. Apply it evenly with a trowel, and allow ample drying time to create a perfectly flat surface.
Plan Your Tile Layout Carefully
Mark your starting point at the center of the room or along a focal line to ensure symmetry. Use a chalk line to snap reference lines, creating a grid that guides your placement. Remember, improper planning can lead to tiny slivers of tile at the edges, which look unprofessional. During my first project, I spent extra time measuring and marking, which saved me from awkward cuts and uneven borders later. Visualize the pattern and use spacers to keep grout lines consistent. This planning step acts as the blueprint for a polished finish.
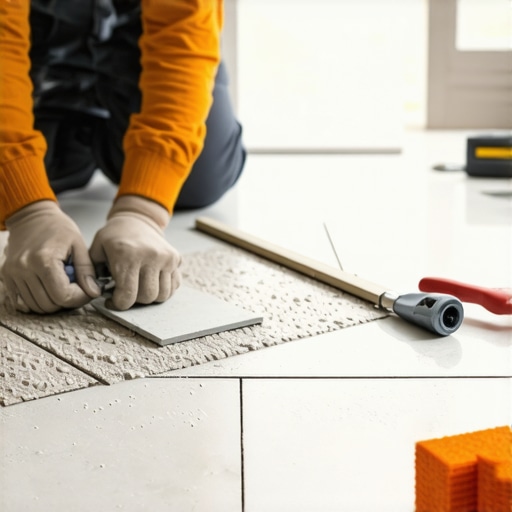
Cut Tiles Precisely
When it comes to fitting tiles around edges or obstacles, precise cuts are critical. Use a high-quality tile cutter or a wet saw for clean, accurate edges. I once tried to cut tiles with a bit of logic and a hand-held cutter; the edges were ragged, and installation became frustrating. Invest in the right tools and practice on scraps. Measure twice, cut once – a mantra that saves time and prevents waste. For tricky angles or curved cuts, consider using a tile nipper or a diamond blade, which provide control and precision.
Lay Tiles with Care and Consistency
Apply an even layer of thin-set mortar using a notched trowel, holding it at a consistent angle. Press each tile firmly into place, twisting slightly to embed it snugly in the mortar. Use a rubber mallet to tap tiles gently and ensure they sit at the same height, especially over uneven areas. During my session, I made the mistake of rushing and uneven tiles resulted in a wavy surface—learned the hard way that patience pays off. Regularly check your work with a level, and adjust as needed before the mortar sets.
Handle Grout and Finishing Details
Once the tiles are set and the mortar has cured, remove spacers and fill grout joints evenly, using a rubber float. Press grout firmly into the gaps and wipe excess with a damp sponge before it hardens. Clean the surface from grout haze thoroughly to reveal a sleek finish. I’ve seen DIY projects where careless grouting led to stains and uneven joints. Follow the manufacturer’s instructions strictly, and finish the project by sealing the grout to help withstand moisture and staining. Deep understanding of these steps turns a good installation into a professional-looking masterpiece.
Many DIY enthusiasts and homeowners often believe that laying tile, hardwood floors, or leveling a subfloor is straightforward—simply follow the steps, and you’ll get perfect results. However, what most people overlook are the subtle details and common misconceptions that can make or break the durability and beauty of your floors. Let’s dig deeper into some nuanced truths that experts know but are frequently missed by amateurs.
Myth: All floor leveling compounds are created equal
It’s a common misconception that any floor leveling product will do the job. In reality, different compounds have varied properties tailored for specific substrates and environments. Using the wrong type can lead to cracking, uneven surfaces, or failure over time. For instance, some formulations are designed for concrete bases, while others excel over plywood. Knowing which to choose is critical, and consulting the precise floor leveling techniques can save you from costly mistakes.
The trap of ignoring substrate preparation and moisture levels
A frequently overlooked step is the thorough inspection and treatment of the subfloor before installation. Moisture issues, especially under concrete slabs, can cause tile curling or hardwood cupping if not addressed properly. A common mistake is assuming the subfloor is dry and stable. Moisture barriers, proper drying, and surface cleaning are essential for long-lasting results. For detailed strategies on achieving a durable base, check out expert floor leveling strategies.
Why it matters: Small details lead to big problems
Did you know that seamless and professional-looking floors often come down to minor details like the consistency of mortar application or the timing of grout sealing? Many underestimate the importance of these nuances, leading to grout cracking, uneven joints, or tiles that loosen. Proper curing times, consistent application techniques, and finishing processes are what separate pro results from average DIY projects. This is why I emphasize the importance of understanding these finer points, as outlined in expert tile flooring tips.
Advanced question: How can precise substrate preparation influence long-term floor performance?
If you’re aiming for a fortress-like durability, understanding the science behind substrate preparation is key. The quality of the initial surface directly affects the adhesion, stability, and resistance to environmental factors. A study from the American Concrete Institute highlights that inadequate preparation can lead to delamination and cracking over decades. Investing in proper surface prep and leveling not only extends your floor’s lifespan but also reduces maintenance costs significantly. Remember, the foundation is everything—much like building a house, a solid base ensures lasting beauty. Discover more at ultimate guide to floor leveling.
Have you ever fallen into this trap? Let me know in the comments, and share your experience with subtle pitfalls or lessons learned in your flooring projects. Mastering these nuances can save you time, money, and frustration—so don’t underestimate the power of attention to detail in your next renovation!
Maintaining your floors over time requires the right tools and consistent care. Personally, I rely on a high-quality rubber mallet to gently tap tiles into perfect alignment without risking damage. It’s indispensable for ensuring level, seamless surfaces, especially when troubleshooting minor unevenness after installation. For measuring and alignment, a high-precision laser level has become a game-changer. Unlike traditional spirit levels, laser levels project bright, accurate reference lines across the entire room, saving time and significantly improving precision, particularly in large spaces.
To keep hardwood floors gleaming and in top condition, I use a microfiber mop designed to trap dust without scratching the finish. Regular cleaning with these mops prevents buildup that can affect the floor’s appearance and longevity. When deep-cleaning, I recommend a pH-balanced hardwood floor cleaner applied with a slightly damp mop, avoiding excess moisture that can warp wood over time.
Considering long-term results, investing in a floor polisher with adjustable RPM settings can restore shine and smooth out minor surface imperfections. Personally, I prefer models with a built-in vacuum system to collect debris simultaneously, simplifying the maintenance routine.
In terms of DIY maintenance, monitoring moisture levels is crucial, especially for hardwood and tile floors in humid environments. Using a digital hygrometer helps track humidity conditions, guiding you to use dehumidifiers or humidifiers as needed to maintain an optimal 30-50% range. According to industry standards, consistent humidity minimizes expansion or contraction that could crack or loosen tiles and weaken wood joints.
As we look ahead, technological advancements like self-healing floor coatings are emerging, promising to extend the lifespan of floors by actively repairing minor scratches and wear. Embracing these innovations can drastically reduce maintenance efforts and costs over time.
How do I keep my floors in top shape over time? The key is a combination of regular cleaning, targeted tools, and proactive environment control. For hardwood floors, checking the links to hardwood floor care secrets can provide additional expert techniques. I also encourage trying out a professional-grade floor polisher for your next deep-clean session—it’s a significant step toward long-lasting beauty and durability.
Lessons Hospitality Taught Me About Flooring Beyond the Surface
One of the most profound insights I gained is that meticulous surface preparation is the secret ingredient that transforms a good flooring project into a lasting masterpiece. Neglecting small details, like moisture barriers or subtle leveling nuances, can lead to cracks or uneven surfaces down the line. Remember, the devil is in the details—what seems insignificant today might become a costly repair tomorrow.
Another lesson is that patience and precision during the layout phase set the foundation for a seamless finish. Rushing through measurements or neglecting visual symmetry often results in tiny, unsightly slivers or awkward grout lines. Investing extra time at this stage pays enormous dividends by avoiding frustrating corrections later.
Finally, understanding that choosing the right tools is just as crucial as knowing the steps—whether it’s a high-quality wet saw for precise cuts or a laser level to ensure uniformity—can make the difference between a professional-looking floor and an amateurish one. So, don’t underestimate the power of good equipment; it’s your best ally in creating durable, beautiful floors that stand the test of time.
Tools and Resources That Elevated My Flooring Journey
Over the years, I’ve curated a set of tools and resources that have been game-changers. For comprehensive techniques on achieving flawless surface leveling, I trust the precise floor leveling techniques. They provide step-by-step guidance that prevents costly mistakes. My favorite tool for perfect cuts is a quality wet saw, which ensures clean, accurate edges—a must-have for complex layouts.
For inspiration and deeper insights, I regularly refer to industry-standard books like The Ultimate Guide to Floor Leveling, which has helped me understand the science behind substrate preparation and long-term durability. Finally, trusted suppliers like Tile Trend Shop offer top-tier materials and expert advice that keep my projects on track, ensuring every installation achieves both beauty and resilience.
Your Next Step Toward a Stunning Floor
Embracing these lessons and tools transforms the daunting task of flooring into an empowering experience—one where patience, precision, and knowledge come together to create a space that truly lasts. Don’t shy away from diving into your next project; with the right approach, you’ll be amazed at the results.
What’s been your biggest challenge or eye-opening realization in your flooring journey? Drop your experiences or questions below—let’s learn from each other and build floors that tell a story of craftsmanship and care.
Reading through this post really highlights how much attention to detail makes all the difference in flooring projects. I recall my own experience where rushing the prep work led to uneven tiles and cracking within just a few months. It’s a vivid reminder that an investment of time in proper surface preparation, especially moisture testing and leveling, pays off exponentially in the longevity of the floor. I’m curious—what do others find is the most overlooked step in tile installation that causes issues down the line? Personally, I think many DIYers underestimate the importance of allowing ample curing time before grout sealing. Would love to hear tips from seasoned pros on how they ensure each phase of installation is given the right priority for lasting results.