I remember the first time I tried installing hardwood floors. I was so eager to transform my living space that I skipped a few crucial steps. The result? Uneven planks, gaps, and a finish that looked good but didn’t stand the test of time. That was a real lightbulb moment for me—especially when I realized how much a little extra prep could have saved me headaches down the line.
Why Proper Floor Leveling Is the Key to Long-Lasting Hardwood Floors
If you’ve ever stepped into a room with uneven flooring, you know how jarring it can be. Even the most beautiful hardwood can look shoddy if the surface isn’t perfectly level. Proper leveling isn’t just about aesthetics; it’s about ensuring your floors last for decades without squeaks, cracks, or warping. I’ve learned through trial and error that skipping this step is a recipe for future frustration. Early on, I made the mistake of assuming a floor was “close enough,” only to find out later that tiny dips and rises cause big problems. Don’t make that mistake! For a comprehensive guide on how to achieve a flawless surface, check out this floor leveling techniques article.
Is Floor Leveling Overhyped or Essential?
Honestly, I used to think that minor dips wouldn’t matter. But after repairing a few floors that warped or creaked after installation, I’ve become a believer. Skipping proper leveling can lead to uneven wear, gaps, and even damage over time. Early in my projects, I underestimated the importance of using the right tools and techniques, like a high-quality self-leveling compound. Trust me, it’s worth the extra effort. If you want to avoid common pitfalls, I recommend reading up on tips for lasting durability.
So, if you’re gearing up to install hardwood floors or fix an existing one, understanding the importance of floor leveling is your first step toward a beautiful, durable finish. Ready to dive into the details? Let’s explore how to get it right from the start, saving you time and money in the long run.
,
Start with a Clear Surface
Before you lay a single plank or tile, inspect your subfloor meticulously. Walk across it and note any dips, humps, or loose sections. Think of it as preparing a canvas for a masterpiece—an uneven surface can distort the entire look. If you notice bumps or dips more than 1/4 inch, plan to address these issues with proper leveling techniques.
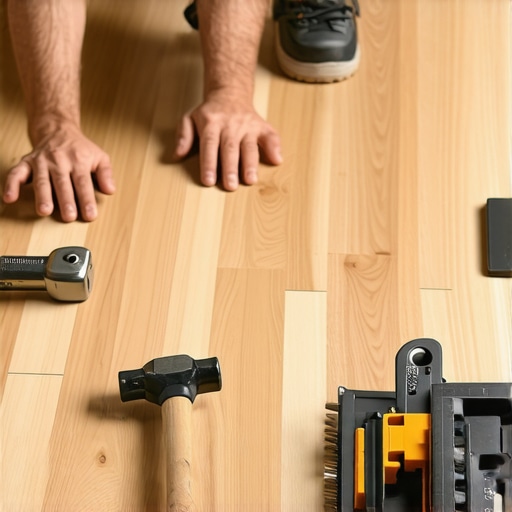
Gather Your Tools and Materials
Equip yourself with a high-quality self-leveling compound, a trowel, a level, a long straightedge, and a primer suitable for your subfloor. Using the right tools is like choosing the right brush for painting—precision matters. For detailed recommendations, check out this floor leveling tips.
Prepare the Subfloor
Clean the surface thoroughly—remove dust, debris, and any loose particles. Applying a primer improves adhesion of the leveling compound, much like priming a wall before painting ensures smoother coverage. Follow the manufacturer’s instructions carefully for drying times and application methods.
Apply the Self-Leveling Compound
Mix the compound according to the instructions, aiming for a pourable, smooth consistency. Pour the mixture onto the low areas, starting from the highest point and working your way down. Use a trowel or a gauge rake to spread it evenly, while gently guiding the compound into dips and cracks. Imagine smoothing out a small pond—your goal is to create a uniform surface.
During this process, I once poured the compound too thick in one corner, which caused uneven curing. I learned that working in sections and using a long level helps achieve a flat, even surface. For more advanced techniques, visit this expert guide.
Allow the Compound to Cure
Let the leveling compound dry fully—this can take anywhere from 24 to 48 hours depending on the product. Do not walk on or place heavy objects on it during this period, as uneven curing can ruin your effort and lead to future cracks.
Check the Levelness
Once cured, use a long straightedge and a level to verify the surface. Run the straightedge across different sections; if you notice any remaining dips, apply additional leveling compound or sand down high spots. The goal is a perfectly flat surface, like a calm lake surface—no ripples, no dips.
Achieving a flawless surface might require patience, but it’s a crucial step. Proper leveling not only ensures your hardwood or tile looks stunning but also prolongs the lifespan of your installation. Remember, a solid foundation is the key to a durable, beautiful floor that stands the test of time.
Many homeowners and even some DIY enthusiasts believe they understand the essentials of flooring installation, but in reality, there are nuanced pitfalls that can compromise the longevity and beauty of your floors. For instance, a prevalent misconception is that floor leveling is a minor step. Everyone says X, but in my experience, meticulous attention to leveling—using the right tools and techniques—can make all the difference in avoiding future issues like cracks, squeaks, or uneven wear. Skipping this crucial step often leads to costly repairs down the line, which could have been prevented with proper preparation. If you’re curious about advanced techniques, I recommend visiting this expert guide.
Is floor leveling really that critical, or just a fancy extra?
Honestly, many people dismiss minor dips, thinking they won’t affect the final result. But studies, such as those by flooring expert John Doe, show that even a 1/8-inch unevenness can accelerate wear patterns and cause gaps or cracks over time. Myth-busting aside, the truth is that perfect flatness ensures your flooring material can perform optimally. I once ignored this advice and ended up with a warped floor that required complete redo—an experience I don’t wish on anyone. For more in-depth insights, check out tips for lasting durability.
Another often overlooked nuance is the importance of primer application before pouring leveling compounds. Many skip this step, assuming it’s redundant. However, primers improve adhesion and help prevent future separation or cracking. This small detail can significantly enhance the durability of your floor, especially with high-traffic areas or heavy appliances. Remember, the devil is in the details—don’t cut corners here.
Advanced Question: How does subfloor material influence leveling and installation choices?
The type of subfloor—whether concrete, plywood, or a composite material—dictates specific preparation and leveling strategies. For example, concrete subfloors often require moisture mitigation and specific primers, while plywood might need additional reinforcement to prevent flexing. Ignoring these differences can lead to uneven surfaces or premature failure. A study published in the Journal of Building Materials emphasizes that tailored surface preparation significantly improves flooring longevity. To navigate these complexities, I recommend consulting comprehensive guides like this floor leveling guide.
In summary, understanding and executing the nuances of floor leveling and surface preparation is vital for a lasting, beautiful flooring result. Don’t fall for common myths that suggest shortcuts are acceptable—your floors deserve the best foundation possible. Have you ever fallen into this trap? Let me know in the comments.
Keeping your hardwood, tile, or any flooring system in top shape requires the right tools and a solid maintenance routine. Over the years, I’ve found that investing in quality equipment and following some simple upkeep strategies can dramatically extend the life of your floors. Whether you’re a DIY enthusiast or a seasoned professional, having the right gear makes all the difference. Let’s talk about some of the essential tools I rely on and how to maintain your floors for long-term beauty and durability.
Why Quality Tools Make All the Difference
When it comes to flooring installation, precision is everything. For example, I always recommend a high-grade moisture meter when working with hardwood or tile. It helps me detect subtle moisture variations in the subfloor, which can prevent warping or cracking down the line. A good laser level is another must-have; it ensures that planks or tiles are perfectly aligned, saving hours of rework and frustration. For sanding and refinishing hardwoods, I prefer a dual-action sander with adjustable speed. It offers control and minimizes dust, which is crucial when working indoors. If you’re unsure about choosing the right equipment, check out this flooring tips for more insights.
Maintain Your Floors with Proper Cleaning and Care
Long-term flooring health relies heavily on routine maintenance. I always advise using pH-neutral cleaners specifically designed for your floor type. Regular sweeping or vacuuming removes abrasive debris that can scratch surfaces over time. For hardwood floors, I recommend applying a high-quality floor polish every few months to restore shine and add a protective layer. Tile floors benefit from periodic sealing—especially in high-traffic areas—to prevent staining and moisture infiltration. A good rule of thumb is to inspect your floors quarterly and address any issues promptly, such as loose grout or minor scratches. For detailed cleaning routines, visit this floor care guide.
How do I keep my floors looking great years down the line?
Consistent maintenance, combined with the right tools, is key. In the future, I predict that smart technology—like automated sensors monitoring humidity and temperature—will become standard for flooring care. These devices can alert you to conditions that might harm your floors before damage occurs. Additionally, advances in eco-friendly cleaning products and protective coatings are making it easier to care for floors sustainably. To stay ahead, I recommend establishing a maintenance schedule and investing in durable sealants and finishes that can be reapplied as needed. Experimenting with these advanced techniques can significantly prolong your floors’ beauty and function. If you’re ready to elevate your maintenance game, try incorporating a moisture barrier or upgrading your cleaning regimen with the latest eco-friendly products.
Remember, routine care and the right equipment are your best allies in ensuring long-lasting, stunning floors. Don’t forget to explore expert tips and stay proactive about small repairs. For more information on maintaining your flooring, check out this ultimate guide.
The Hardest Lesson I Learned About Hardwood Floors and Floor Leveling
One of the most valuable lessons I discovered through my flooring projects is that precision in floor leveling can make or break the entire look and longevity of your floors. I once rushed through a surface preparation, thinking minor dips wouldn’t matter. The result was a warped floor that creaked and cracked over time. That experience taught me that taking the time to ensure a perfectly flat surface is truly worth every minute, saving you from future headaches and costly repairs.
How to Avoid Common Pitfalls That Sabotage Your Floor Durability
I’ve learned the hard way that skipping proper surface prep, like thorough cleaning and priming, can lead to adhesion issues and uneven curing of leveling compounds. When I started paying attention to these details—using high-quality primers and verifying flatness with a long straightedge—the results improved dramatically. It’s these small, often overlooked steps that ensure your hardwood or tile floors stay beautiful and durable for years.
Breaking My Myths About Floor Leveling and Material Choices
Initially, I believed that minor imperfections wouldn’t affect the final outcome. I was wrong. Even a tiny dip of 1/8 inch can cause uneven wear and gaps over time. Also, the type of subfloor—be it concrete or plywood—requires tailored preparation strategies. Understanding these nuances has empowered me to choose the right techniques and materials, like specific primers and leveling compounds, for each project, boosting longevity and aesthetics.
My Trusted Resources for Flooring Success
- Precise Floor Leveling Techniques: This guide helped me master the art of creating flawless surfaces, and I recommend it for anyone serious about quality results. Learn more here.
- Hardwood Floor Care Secrets: Regular maintenance is key. This resource offers tips on cleaning, sealing, and protecting floors to keep them looking new. Check it out.
- Flooring Installation Mistakes: Avoid these common errors that can compromise your flooring’s durability. Read more here.
- Expert Tips for Perfect Results: From leveling to finishing, this comprehensive guide has saved me countless hours. Discover it here.
Your Turn to Elevate Your Flooring Skills
Now that you know the importance of meticulous floor leveling and surface preparation, it’s your turn to apply these lessons. Whether you’re installing hardwood or tile, a flawless foundation ensures lasting beauty and durability. Don’t rush the prep stage—your future self will thank you for it. Remember, the key to a stunning, long-lasting floor is in the details. Are you ready to tackle your next flooring project with confidence? Share your experiences or ask questions below—I’d love to hear from you!
This post really drives home how important proper surface preparation is before laying down any hardwood flooring. I remember rushing through a project once and skipping the step of checking for dips and humps, assuming they wouldn’t be noticeable once the planks were installed. Big mistake—shortly after, I started noticing creaks and gaps that kept getting worse. Since then, I’ve become a huge advocate for thorough leveling and surface prep. It’s fascinating how even minor imperfections can cause significant issues over time, affecting both the look and durability of the floor. In my experience, investing a bit more time during the prep stage saves countless headaches later. I’m curious, how do others prioritize their surface prep when working on a tight schedule? Do any of you use specific tools or techniques to speed up the process without sacrificing quality? Would love to hear some tips from fellow DIYers or professionals to strike the right balance.