
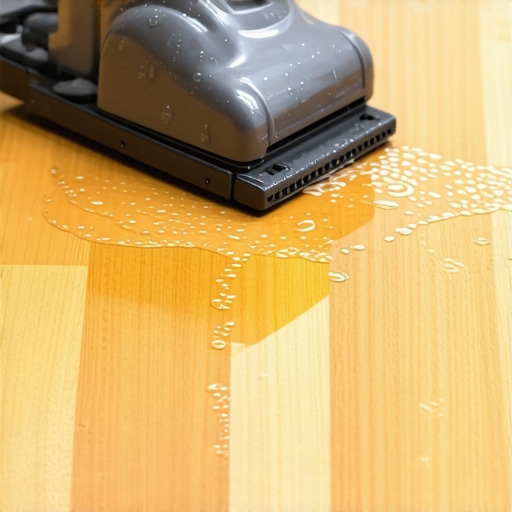
I’ll never forget the sound of water dripping onto my pristine oak floors at 3 AM. It wasn’t just a leak; it was the sound of my bank account draining. I’d spent weeks mastering hardwood floor refinishing and finally felt like a pro, until that moment. I made the classic rookie mistake: I thought if the surface looked dry, the wood was safe. I grabbed a pile of towels, mopped up the puddle, and went back to bed. Two days later, the floor started to cup, looking like a series of small, wooden waves. The real damage happens underneath, where you can’t see it, and I learned the hard way that towels are just a cosmetic fix. But there is a better way. I eventually discovered that my wet/dry shop vac was the most powerful tool in my arsenal for pulling moisture out of the deep grain before it was too late. Today, I’m going to show you exactly how to create a vacuum seal on your floorboards to literally suck the water out of your subfloor, saving you thousands in replacement costs.
That Sinking Feeling When Your Kitchen Becomes a Lake
Moisture is the mortal enemy of wood. It doesn’t take long for a simple spill to turn into a nightmare. According to the National Wood Flooring Association (NWFA), wood is hygroscopic, meaning it acts like a sponge, constantly absorbing and releasing moisture from the surrounding environment. When a major leak happens, the water travels down the tongue-and-groove joints and gets trapped against the subfloor. If you don’t act fast, the boards will cup—the edges rise higher than the center—and at that point, you’re looking at a massive sanding job or a full replacement. You need to identify water damage in hardwood before the rot actually sets in, because once the fibers break down, there’s no turning back. I’ve seen beautiful installs ruined because homeowners focused on the surface instead of the structure.
Is a Vacuum Really Enough to Stop the Rot?
I know what you’re thinking. “My vacuum is for Cheerios and sawdust, not professional flood restoration.” But hear me out. A high-powered wet/dry vac, when used with a specific suction-sealing technique, can create enough negative pressure to pull water out from deep within the wood pores. I’ve seen it work in my own home when industrial fans failed to reach the subfloor. Have you ever stood over a puddle on your expensive flooring and felt that pit in your stomach, wondering if your home was toast? Tell me your horror stories—I’ve lived through them all. We often worry about hardwood floor care secrets like wax and shine, but the real secret to longevity is knowing how to handle an emergency.
Stop the Cupping Before It Becomes Permanent
My early failure taught me that every minute counts. I once waited until the next morning to deal with a small radiator leak, and by then, the subfloor was saturated. I had to learn how to fix a squeaky subfloor because the moisture caused the plywood to swell and rub against the joists for months afterward. Now, I keep my shop vac in the garage, primed and ready. It’s one of those 7 tools you actually need for maintaining a home with wood floors. We aren’t just cleaning up a mess; we are performing a rescue operation on your home’s most valuable asset. Research from the University of Massachusetts Amherst confirms that wood can swell significantly with even a small percentage increase in moisture content, making immediate extraction the only real way to prevent permanent warping. Let’s get into the step-by-step process of how to turn your vacuum into a professional-grade moisture extractor.
Seal the Suction for Maximum Water Pull
If you just point your vacuum nozzle at a puddle, you are only cleaning the surface. To reach the water trapped in the tongue-and-groove joints, you have to create a localized vacuum. Think of your floorboards like a series of interconnected straws; if there is a leak at the bottom, you can’t suck the liquid up if air is leaking in from the sides. This is where most homeowners fail, and it is one of those flooring installation mistakes to avoid for lasting results because improper drying leads to permanent warping. When my dishwasher let go, I spent two hours just vacuuming the surface like I was cleaning up spilled coffee. It did nothing. The real shift happened when I grabbed a roll of painter’s tape and a heavy-duty trash bag. I taped the bag down over the worst joints, cut a tiny hole for the vacuum nozzle, and turned it on. The sound changed from a high-pitched whine to a deep, guttural growl. I watched as the plastic sucked tight against the wood, and for the first time, I actually heard the water gurgling up from the subfloor.
The DIY Extraction Plate Trick
You can take this a step further by creating a dedicated extraction plate. Find a flat piece of plywood or heavy plastic about 12 inches square. Drill a hole in the center just large enough for your wet/dry vac hose to fit snugly. Apply weatherstripping or a foam gasket around the bottom perimeter of the plate. When you place this over a wet area and turn on the vacuum, the gasket creates an airtight seal against the wood. This concentrated pressure forces air to be pulled through the gaps in the flooring and up from the subfloor, bringing moisture with it. This technique is far more effective than just hoping a fan will do the job. If you are worried about the finish, don’t be; hardwood floor care secrets to longevity and shine always start with a structurally sound base. Putting a little weight on the plate helps the seal, but don’t overdo it, or you might crush the fibers of the already softened wood.
Keep the Air Moving Under the Surface
Once you have extracted the bulk of the liquid, the remaining moisture needs to be evaporated. This is the stage where people get impatient and stop too early. You need to create a high-pressure environment using industrial fans or dehumidifiers to pull the moisture out of the air once it’s out of the wood. But here is where most DIYers—and even some “pros”—get it completely wrong: they confuse a level floor with a flat floor. You can have a floor that is perfectly level relative to the earth’s horizon but still has enough waves to make a sailor seasick. In my experience, focusing on precise floor leveling techniques to achieve flawless surfaces is secondary to ensuring the subfloor is actually flat. If you skip the 3-foot level test for checking subfloor flatness like a pro, you’re just pouring expensive leveler into a pit that might still have structural issues.
How Much Bounce is Too Much for Your Subfloor?
The most sophisticated mistake I see is ignoring “deflection.” Even if you’ve sucked every drop of water out, the moisture might have weakened the adhesive or the fasteners. The Tile Council of North America (TCNA) states that for a tile installation to last, the subfloor must not exceed a deflection of L/360 for ceramic tiles and L/720 for stone. If your floor has too much “give” when you walk on it, you need to learn how to check for subfloor flex before you lay rigid tile before you even think about the finish. I’ve seen gorgeous $20-per-square-foot marble crack within a month because the homeowner fixed the water damage but ignored the bounce. Have you ever fallen into this trap where you fixed the dip but the floor still felt “bouncy”? Let me know in the comments.
Don’t Sand Until the Wood is Mentally Ready
Here is the “oops” factor that ruins more refinishing jobs than anything else: sanding too early. When wood cups from water damage, the top is drier than the bottom. If you rush in and sand those high edges flat while the bottom is still damp, you’re in trouble. As the bottom eventually dries and shrinks, those edges will drop, and the center of the board will now be higher than the sides—a nightmare known as “crowning.” You must how to use a moisture meter to prevent floor failure to ensure the wood has reached equilibrium. Only then should you start the best grit sequence for sanding red oak to a mirror finish. Pushing the timeline by even 48 hours can result in a permanent structural mistake that no amount of polish can hide.
Why Self-Leveler Isn’t Always the Answer
We often treat self-leveling compound like a magic eraser, but it has its own set of rules that most people ignore. If you’re working over a subfloor that was previously wet, the wood might have “dusted” or become slightly delaminated. If you don’t prime it correctly, you’ll find out why your self-leveler is peeling off the concrete in sheets the hard way. Professional mastering floor leveling pro secrets for perfect installations always involve mechanical fasteners or high-bond primers that go beyond the basic instructions on the bag. Furthermore, don’t forget the underlayment. After a flood, people often dry the wood but forget that standard foam acts like a mold-growing sponge. You need to choose the best eco-friendly underlayment for quiet apartments that also offers superior vapor protection. Success isn’t just about the tools you use; it’s about respecting the physics of the materials underneath your feet.
The One Tool That Saves My Sanity Every Time
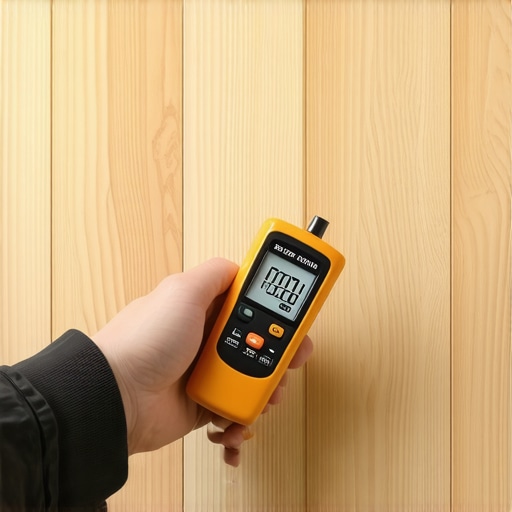
I used to think my hand was a calibrated instrument, but wood is far more temperamental than it looks. The secret weapon in my kit isn’t a fancy saw; it’s a high-end pinless moisture meter. I personally swear by the Wagner Orion series. While pin-style meters are great for firewood, you don’t want to be stabbing your luxury oak every six inches to check its status. If you skip the step to how to use a moisture meter to prevent floor failure, you are essentially gambling with your bank account. Dr. Eugene Wengert, a leading wood scientist known as “The Wood Doctor,” emphasizes that wood moisture content must be within a 2-4% range of its intended environment’s equilibrium moisture content (EMC) before you even think about nailing it down. If you ignore this technical baseline, you are inviting flooring installation mistakes to avoid for lasting results that no amount of wood filler can hide.
How can I keep my floors looking new for a decade?
The biggest threat to your floor after the initial install isn’t foot traffic; it’s the air. I eventually learned to treat my home like a living organism. I installed a smart hygrometer in my crawlspace and my main living area to track relative humidity. Wood likes to live between 30% and 50% humidity. When the furnace kicks on in winter and the air gets bone-dry, those wide planks will start to pull apart, creating gaps you could lose a credit card in. This is why hardwood floor care secrets to longevity and shine usually involve managing your home’s HVAC system rather than just buying a bottle of spray polish. I’ve seen $15,000 floors fail because the homeowner didn’t spend $50 on a humidity sensor to catch the dry spells early.
Stop Cleaning Your Floors Like They’re Made of Plastic
If you’re still reaching for that high-pressure steam mop you saw on an infomercial, please put it down for the sake of your subfloor. You’re literally forcing pressurized water into the joints of your wood, which leads to the cupping issues I mentioned earlier. I’ve had to help neighbors revamp your home with expert flooring installation tips specifically because their steam mops caused the veneers on their engineered wood to delaminate. Instead, use a microfiber mop that is barely damp. For deep cleans, especially after a project, knowing how to clean hardwood floors after a major renovation without scratching the topcoat is the difference between a floor that glows and one that looks perpetually dusty.
The Smart Floor Revolution is Coming for Your Living Room
We are moving toward an era of “smart floors” where the maintenance is automated. I am already seeing high-end luxury installs where moisture sensors are embedded directly into the subfloor to detect pipe leaks before they ever reach the surface. It sounds like science fiction, but for anyone who has dealt with a major insurance claim, it’s a bargain. Until those become standard in every home, I recommend every DIYer follows a step-by-step guide to flooring installation and leveling success to ensure the foundation is bulletproof. My best advice for you right now? Go buy a pinless moisture meter today. Use it to check three different spots in your house—you might be surprised at what the “invisible” moisture is doing to your investment while you sleep.
Hard-Earned Lessons from a Decade of Floods
If there is one thing I have learned from my 3 AM disasters, it is that wood is a patient material, and you must be too. Water doesn’t just sit on the surface; it migrates into the cellular structure of the wood, and if you rush the recovery process, you are essentially sealing in a slow-motion catastrophe. One of the most critical flooring installation mistakes to avoid for lasting results is assuming that once the visible moisture is gone, the danger has passed. I once saved a floor only to have it fail six months later because I didn’t address the humidity in the crawlspace below.
- The 48-Hour Rule: Most wood can recover from a spill if you begin extraction within the first 48 hours. After that, fungal growth and permanent cell collapse start to take hold.
- Listen to the Vacuum: When using the vacuum seal method, the pitch of the motor will tell you how much water you’re pulling. A high-pitched whine means air leakage; a deep growl means you’re actually pulling liquid from the grain.
- The Invisible Puddle: Always check adjacent rooms. Water travels along the subfloor, often appearing 10 feet away from the original leak under a different threshold.
The Gear That Actually Saved My Home
I don’t believe in having a hundred tools, but I do believe in having the four right ones. My emergency kit is always packed and ready because when the water is flowing, you don’t have time to go to the hardware store. First, the Wagner Orion Pinless Moisture Meter is my absolute lifeline; it lets me know when to start how to use a moisture meter to prevent floor failure by giving me a non-destructive look at the subfloor. Second, a high-CFM wet/dry vac is essential for the suction plate trick. Third, I always keep a roll of heavy-duty 6-mil poly plastic for creating vacuum tents. Finally, I trust the technical guidelines from the National Wood Flooring Association—they provide the baseline data that keeps my repairs professional. These are some of the 7 tools you actually need to turn a panic-inducing leak into a manageable DIY project.
#IMAGE_PLACEHOLDER_E#
Take Control of Your Home’s Foundation
It can feel overwhelming when a pipe bursts or a window leaks, but remember that your hardwood is incredibly resilient if you treat it with respect. Whether you are performing an emergency rescue or planning a fresh step-by-step guide to flooring installation and leveling success, the key is to prioritize structural integrity over cosmetic speed. You don’t need a massive restoration crew for every spill, but you do need the professional-grade patience to let the wood dry at its own pace. Your home is your biggest investment; don’t let a little water wash away its value because you were in a hurry to sand. Have you ever dealt with a floor leak that felt like the end of the world? Drop a comment and let me know how you handled it!