
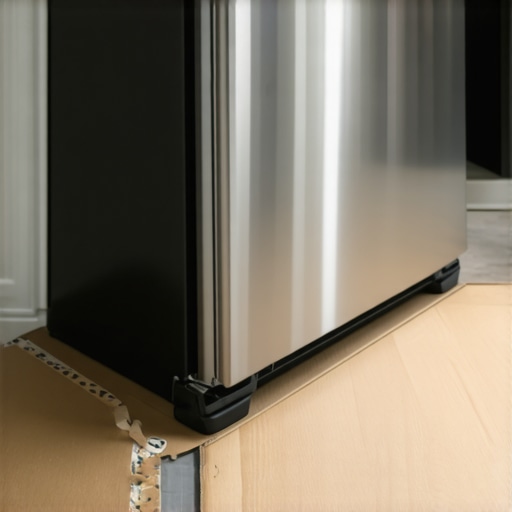
I’ll never forget the sound. It was a sharp, heart-sinking skreeee across my brand-new luxury vinyl planks. I’d spent weeks obsessing over flooring installation mistakes to avoid for lasting results, and there I was, five minutes into moving the fridge, ruining the finish. My ‘heavy-duty’ appliance dolly, the one the rental shop promised wouldn’t leave a mark, had a tiny pebble stuck in the wheel. That one little rock acted like a diamond-tipped glass cutter. It didn’t just scratch the surface; it gouged the wear layer right down to the core. I felt like an absolute amateur. But that’s when my neighbor, a retired floor installer with forty years of grime under his fingernails, tossed a flattened shipping box over my fence and told me to ‘stop being fancy.’ That was my lightbulb moment.
Why Your Vinyl Floor Hates Your Professional Tools
Most people assume that high-end equipment is the only way to protect a home during a renovation. We buy the sliders, the air-sleds, and the expensive rubber-wheeled dollies. But here’s the reality: vinyl is a resilient floor, not an indestructible one. Even if you follow a step-by-step guide to flooring installation and leveling success, the sheer point-load of a 400-pound refrigerator can cause the planks to compress or the seams to pop. According to the Resilient Floor Covering Institute, luxury vinyl can withstand significant pressure, but sharp lateral movement is its Achilles’ heel. One wrong turn and you’re looking at how to hide gaps in your vinyl plank flooring or, worse, replacing the whole row. My mistake was trusting the tool instead of the physics. I thought the rubber wheels were enough, but they actually trapped grit against the floor. I’m here to tell you that the simplest solution is often the best one sitting in your recycling bin.
Does cardboard actually provide enough protection?
It sounds ridiculous, right? You’ve spent thousands on materials, and I’m telling you to go raid the recycling bin behind the grocery store. But cardboard—specifically clean, corrugated cardboard—acts as a sacrificial layer. It distributes the weight of the appliance over a larger surface area and provides a smooth ‘runway’ that won’t trap debris against the vinyl. If you’ve ever had to remove scuff marks from your new luxury vinyl floors, you know that prevention is ten times easier than the cure. Today, I’m going to show you exactly how to prep your ‘cardboard tracks’ so you can slide a range, a washer, or a massive French-door fridge without breaking a sweat or a plank. Have you ever heard that gut-wrenching sound of metal meeting vinyl in your own kitchen? Drop a comment or reach out via our contact-us page; I’d love to know I’m not the only one who learned this the hard way.
Build a Runway Instead of a Scratch Pad
To start, you need to think of your kitchen floor like an airport tarmac. If the surface isn’t perfectly clear, the plane—or in this case, your stainless steel fridge—is going to have a rough landing. I grab the thickest corrugated boxes I can find, usually the double-walled ones from a local appliance store. You want to flatten these out completely and lay them in a continuous path from the entry to the final spot. This isn’t just about how to protect your new floors during a full kitchen remodel; it’s about creating a friction-free zone. I once tried moving a range by just putting cardboard under the feet, but as soon as I pushed, the cardboard bunched up like a rug. Now, I tape the sheets together using painters tape—never duct tape, which leaves a sticky residue that’s a nightmare to clean later.
Secure the Track for Zero Movement
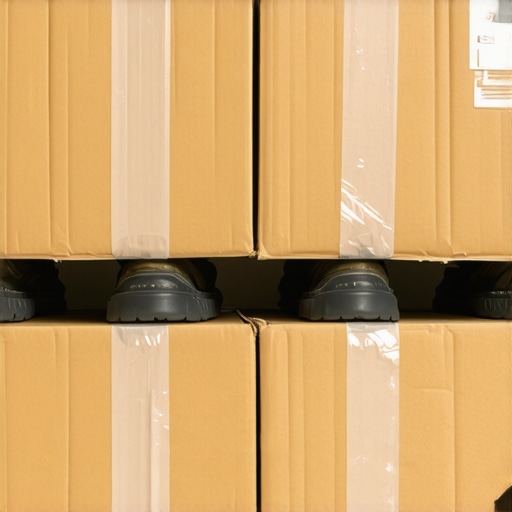
Movement is the enemy of a successful move. If your cardboard slides while the fridge is on top of it, you’re basically sanding your floor with the underside of the box. I learned this lesson the hard way at my sister’s house. We were moving a heavy washer, and I didn’t secure the “runway.” A piece of cardboard shifted under a heavy leg, and the metal corner bit into the floor. If I had followed the 7 mistakes that ruin your luxury vinyl plank installation advice, I would have known that even minor lateral pressure can cause issues. Always tape the leading edge of the cardboard to the baseboards or a stable surface. This ensures the “shield” stays put while the weight rolls over it. It’s a similar logic to the cardboard shield for protecting new floors during paint; you want a barrier that is an extension of the floor, not a loose accessory.
The Walking Technique That Saves Your Back
Don’t just shove. Shoving creates a sudden burst of energy that can overwhelm the locking mechanism of your vinyl planks. Instead, use the ‘walking’ or ‘shuffling’ method. You tilt the appliance slightly to one side, move the leading corner forward an inch, then repeat on the other side. It’s like a slow, heavy dance. This method ensures the weight is never concentrated on one tiny point for too long. If you feel any resistance, stop immediately. Usually, it’s a piece of debris that’s worked its way under the cardboard. I keep a shop vac handy to suck up any dust before I lay the next piece of the runway. This level of obsessive cleaning is why pros can provide expert flooring installation tips that actually work; they know that the smallest grain of sand is basically a mountain to a vinyl plank.
Why Subfloor Stability Still Matters
Even though your flooring is already down, the stability of what’s underneath still matters during a heavy move. If you have a soft spot or a dip, that 400-pound load will find it. This is why precise floor leveling techniques to achieve flawless surfaces are so critical during the initial install. If you know you have a slightly uneven subfloor, double up the cardboard layers over the low spots. Think of it as adding extra suspension to a car. By distributing that weight across multiple layers of corrugated paper, you bridge the gaps and prevent the vinyl from flexing too deeply into a void, which is the primary cause of cracked tongues and grooves. This is especially true when navigating areas where different flooring types meet, where you might need the secret to seamless flooring transitions between kitchen and living rooms to ensure the lip of the transition strip isn’t crushed by the force. If you’ve ever dealt with how to fix a bounce in your plywood subfloor, you know that dynamic loads are much harder on a structure than static ones. Moving slowly gives the floor time to settle and compress evenly rather than being shocked by a sudden slide.
While the ‘cardboard runway’ trick handles the surface physics of a move, let’s dig deeper into what’s happening beneath your feet. Most DIYers think that a bucket of self-leveling compound is a magic eraser for a bad subfloor. It’s a common belief: if the floor is wavy, just pour more liquid. In my experience, this ‘more is better’ approach is exactly why your self-leveling compound is cracking like a dry lake bed. Leveling isn’t just about making the surface look flat to the eye; it’s about eliminating the micro-flex that kills flooring over time. If you ignore the structural nuances, no amount of cardboard will save you from a floor that sounds like a haunted house six months later.
The High-Speed Mixing Trap
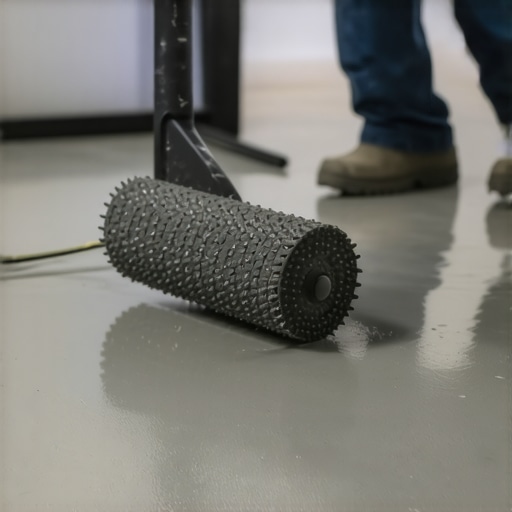
Here is the ‘oops’ factor that ruins more professional-grade leveler than anything else: the drill speed. People grab their heavy-duty 18V drill, crank it to the highest setting, and whip that leveler like they’re making a meringue. This introduces millions of tiny air bubbles. Once poured, those bubbles rise, pop, and leave your floor looking like Swiss cheese. Professional standards, such as those found in the ASTM F710-17 guidelines for preparing concrete floors, emphasize that moisture and air management are the real keys to success. I’ve seen beautiful installations destroyed because the installer skipped the spiked roller, which is essential for degassing the mixture. Have you ever fallen into this trap and ended up with a pockmarked floor? Let me know in the comments; I’ve definitely been there.
Is your floor actually flat enough for large format tile?
This is where the pros separate from the amateurs. Most people use a short spirit level and call it a day. But for today’s massive tiles, a 2-foot level is useless. You need to perform the 3-foot level test for checking subfloor flatness like a pro—though honestly, a 6-foot or 10-foot straightedge is even better. According to the Tile Council of North America (TCNA), large format tiles require a floor that doesn’t deviate more than 1/8 inch over 10 feet. If you’re off by even a hair, you’ll experience ‘lippage,’ where one tile edge sits higher than the next. Many try to compensate by using more thinset, but why your trowel teeth are ruining your thinset coverage becomes the next problem; too much mortar leads to shrinkage and hollow spots.
Stop Chasing Flatness and Start Chasing Stability
Another myth is that self-leveler bonds to anything. It doesn’t. If you have any residue from old adhesives, the chemical bond will fail. This is why your floor primer is making the leveler bubbling worse if it isn’t applied correctly on a porous slab. You must ensure the subfloor is ‘Surface Saturated Dry’ or properly sealed to prevent the concrete from sucking the moisture out of the leveler too fast. I always recommend the bucket test how to check your concrete slab for excessive moisture before you even think about pouring. Moisture vapor pressure can literally pop a leveled layer right off the concrete. By focusing on precise floor leveling techniques to achieve flawless surfaces, you’re not just prepping for a move; you’re ensuring that 7 mistakes that ruin your luxury vinyl plank installation don’t haunt you. Before you lay your next plank, remember: the most important tool in your kit isn’t the hammer or the leveler—it’s the patience to let the prep work dry correctly.
Invest in a Real Moisture Meter Before You Touch a Plank
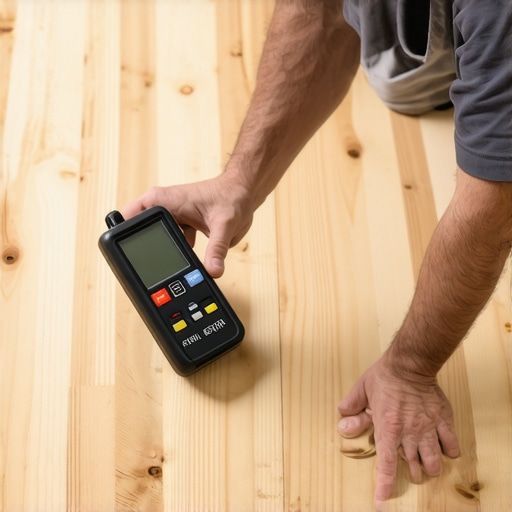
I’ve seen more $10,000 floors fail because of a $50 mistake than for any other reason. If you aren’t checking the moisture levels of your subfloor and your material, you are gambling with your bank account. I personally use the Wagner Meters Orion 950 because it’s pinless—meaning it doesn’t leave little vampire bite marks in my expensive walnut. According to the NWFA (National Wood Flooring Association) Technical Manual, the moisture content between a wood subfloor and the strip flooring should be within 4 percentage points of each other. If you ignore this, you’ll be looking up hardwood floor care secrets to longevity and shine much sooner than you’d like, probably while trying to fix a buckled mess. Measuring is the only way to guarantee mastering hardwood floor refinishing expert tips for 2025 actually yields a lasting result.
How do I maintain my hardwood floors over time?
Maintenance isn’t about deep cleaning once a month; it’s about the daily habits that prevent the finish from eroding. One of the biggest mistakes I see is the use of steam. I will say it until I’m blue in the face: why you should never use a steam mop on engineered wood floors is because that pressurized vapor forces moisture into the joints, causing the edges to swell and peel. Instead, stick to a microfiber mop and a pH-neutral cleaner. If you have high-traffic areas, don’t just rely on rugs; ensure you are following expert flooring installation tips regarding transition strips and felt pads on every single piece of furniture. Those little felt stickers are the unsung heroes of floor longevity.
The Straightedge That Beats Every Spirit Level
If you’re still relying on a 2-foot level to check for dips, you’re missing the big picture. When I’m prepping for tile, I use a 6-foot aluminum screed. It’s light, it’s dead straight, and it doesn’t lie. This is the foundation of the 3-foot level test for checking subfloor flatness like a pro. If that straightedge rocks or shows a gap larger than an eighth of an inch, I know I have work to do before I even open a bag of mortar. This prevents the nightmare of lippage where one tile corner catches your toe. Furthermore, understanding why your trowel teeth are ruining your thinset coverage helps you realize that the tool’s shape and size must match the tile’s footprint. I always keep a variety of notched trowels—specifically the Euro-notch—because they provide better collapse and air release for those massive porcelain slabs.
The Future of Your Kitchen Floor
Looking ahead, I predict we are going to see a massive shift toward smart subfloor systems. Imagine a world where sensors embedded in the floor-leveling layer can alert your smartphone if moisture levels spike behind a dishwasher or under a fridge. We are already seeing ‘self-healing’ polyurethane finishes that can close up micro-scratches with a bit of heat. Until then, my best advice is to embrace the tech we have. Stop guessing. Use a moisture meter, buy a high-quality straightedge, and stop using that steam mop! If you’re about to start a new project, go grab a pinless moisture meter right now—it’s the single best investment you’ll make for your home’s value.
Three Hard Lessons I Learned While Ruining My Own Floors
If there is one thing that years of dusty knees have taught me, it is that the floor is only as good as the silence beneath it. My biggest lightbulb moment happened when I realized that most flooring installation mistakes to avoid for lasting results aren’t about the planks themselves, but about the patience you show the subfloor. I once rushed a job by skipping a secondary moisture check, and within three months, the edges were cupping like tiny wooden canoes. Now, I never start a project without verifying that my subfloor is ready for its new life. Another lesson? Never underestimate the power of a perimeter gap. I’ve seen beautiful rooms buckle because the installer didn’t respect the home’s natural expansion and contraction. Finally, remember that the ‘finish’ isn’t the end—it’s just the beginning of the maintenance cycle.
#IMAGE_PLACEHOLDER_E#
My Personal Toolkit for a Lifetime of Flooring Success
I don’t believe in owning every gadget in the hardware store, but I do believe in owning the right ones. To avoid the 7 mistakes that ruin your luxury vinyl plank installation, I always keep a high-quality tapping block and a heavy-duty pull bar in my gear crate. For those transitioning into more complex projects, I highly recommend checking out 7 tools you actually need for a professional diy hardwood install to ensure you aren’t wasting money on fluff tools that won’t last. My most trusted resource isn’t a tool at all, but a habit: I always cross-reference my prep work against mastering floor leveling pro secrets for perfect installations. Having a reliable straightedge and a calibrated moisture meter has saved me more money in replacement materials than the tools ever cost to buy.
Your Journey to a Flawless Home Starts Now
You’ve done the research, you’ve gathered the cardboard for your runways, and you know how to dodge the moisture traps that catch most DIYers. Now, it’s time to stop planning and start doing. Whether you are aiming for hardwood floor care secrets to longevity and shine or just trying to get through a weekend kitchen renovation, remember that every pro started exactly where you are: with a single plank and a bit of uncertainty. Your home deserves a foundation that is stable, beautiful, and built to last. Have you ever encountered a subfloor problem that seemed impossible to fix? Let me know in the comments below—let’s learn from each other’s sawdust!