
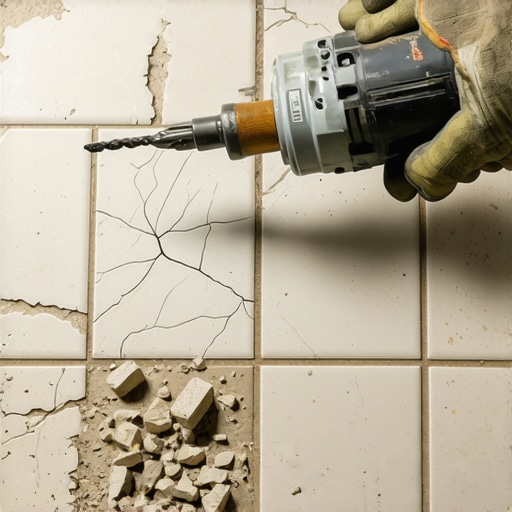
I remember standing in my kitchen, sweat stinging my eyes, staring at 200 square feet of stubborn, 1990s-era beige ceramic tile. I had a heavy mallet and a pry bar. Four hours into the job, I’d managed to clear exactly six tiles and earned myself a back spasm that lasted three days. It was a nightmare. I was ready to call a pro and spend thousands, but then I discovered the hammer drill scaling trick. It changed everything.
The Day I Almost Quit My Kitchen Remodel
If you’ve ever tried to chip away at old mortar and tile by hand, you know the soul-crushing realization that comes after hour one. You realize that your weekend plans are dead, and your floor is winning. I made the mistake early on of thinking I could just “tough it out” with manual tools. Big mistake. Not only did I move at a snail’s pace, but I also ended up with jagged shards of ceramic everywhere because I was hitting the tiles at the wrong angle. This is one of those flooring installation mistakes to avoid if you want to keep your sanity. Today, I’m going to show you how to turn a week-long struggle into a Saturday morning project using a tool you might already have in your garage.
Won’t a Heavy Power Tool Just Shred My Subfloor?
This is the number one question I get from neighbors whenever I lend them my SDS drill. It’s a valid fear. You’re taking a miniature jackhammer to your house! However, the secret isn’t raw power; it’s the angle of the blade. When you use the right tile installation pointers, the tool does the heavy lifting, sliding right under the bond without gouging the wood or concrete beneath. I once tried to use a standard drill on hammer mode with a tiny bit—don’t do that. It doesn’t work and it’ll burn out your motor. You need the right gear, which usually tops the list of 7 tools you actually need for a professional DIY install. Interestingly, research from the CDC on construction ergonomics highlights that using vibration-controlled power tools significantly reduces worker fatigue and repetitive strain compared to high-impact manual prying. Have you ever felt that “day-after” regret where your hands are too cramped to even hold a coffee mug? If so, this hack is for you.
We’re going to dive into the specific chisel bits you need and how to set the depth so you don’t accidentally puncture a water line. Before we move on to the setup, you might want to check for a squeaky subfloor while the tile is up; it’s the best time to fix those annoying noises once and for all.
Equip Yourself With a Wide Scaling Chisel
A standard masonry bit is meant for drilling holes, but for demo, you need a 2 or 3-inch wide scaling chisel. Think of it as a powered putty knife. I made the mistake during my first laundry room renovation of trying to use a narrow bull-point bit I already owned. I spent hours essentially poking holes in the ceramic while the mortar stayed stubbornly bonded. Once I swapped to the wide scaling chisel, which is one of the 7 tools you actually need for a professional DIY install, the tiles started popping off in full sheets. These bits are designed with a slight crank in the neck, which allows the tool to sit at the perfect angle while the blade stays flat against the floor.
Why Your Tool Angle Makes or Breaks the Subfloor
To get the tile up without gouging the wood or concrete beneath, you have to treat the drill like an airplane landing. If you come in too steep, you’ll dive right into the subfloor, creating divots that you’ll have to fix later using precise floor leveling techniques to achieve flawless surfaces. If you stay too flat, the chisel just bounces off the edge of the tile. Aim for a 20 to 30-degree angle. This allows the percussive force to drive the wedge between the tile and the thinset, breaking the bond instantly. When I finally found this ‘sweet spot,’ I felt like a hot knife through butter. 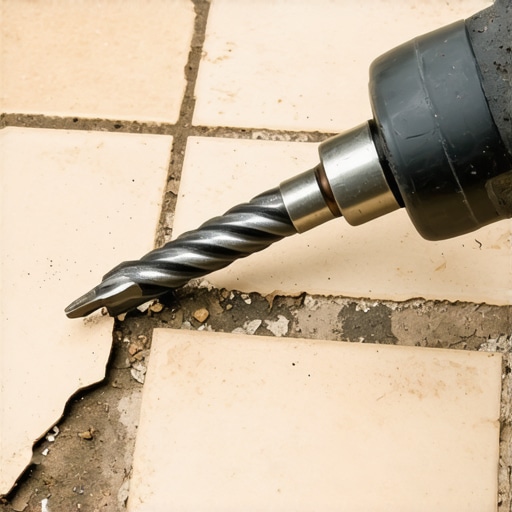
The Best Way to Handle the Hammer Drill Weight
Rotary hammers are heavy, and after thirty minutes, your forearms will feel like lead. The secret is to let the tool’s own weight do the work. Don’t lean your entire body weight into it; instead, guide it. Use your dominant hand on the trigger and your other hand on the side handle to steer the blade along the grout lines. Breaking the grout first often creates a ‘weak point’ that makes the tiles pop easier. This is one of those tile installation pointers that saves both your back and your time. If you hit a particularly stubborn patch where the builder used a high-polymer bond, don’t force it. Move to a different side of the tile and attack it from a new corner.
Clear the Debris as You Go
One of the biggest mistakes I made was leaving the broken shards on the floor while I kept working. The shards get under your feet, making your footing unstable, and they can actually get caught under the chisel, redirecting the blade into the floor. Stop every 10 minutes to shovel the waste into a heavy-duty bucket. This gives you a clear view of the subfloor so you can perform the 3-foot level test for checking subfloor flatness immediately. If you find you’ve accidentally created some deep gouges, you’ll need to address those with a patch before you even think about the right way to mix thinset for heavy tiles. Keeping a clean workspace ensures you see the transition points where the subfloor might be thinner or where wires might be tucked near the baseboards.
Dealing With the Leftover Thinset Ridges
Once the tile is gone, you’re usually left with a landscape of hardened mortar ridges. This is where most people get exhausted. Instead of switching back to a manual scraper, keep the rotary hammer out. Lay the scaling bit almost completely flat—about 5 to 10 degrees—and sweep it across the ridges. It will vibrate the old mortar loose without digging into the substrate. Following a step-by-step guide to flooring installation and leveling success means realizing that the demo isn’t over until the floor is smooth to the touch. I remember one specific corner where the mortar was nearly an inch thick; I had to go slow and work in layers, but the hammer drill saved me from a full day of manual grinding.
The Self-Leveling Myth That Ruins Modern Renovations
Most homeowners believe the term ‘self-leveling’ means they can simply pour a bag of compound and walk away. In my experience, that is a recipe for disaster. The reality is that surface tension often prevents the liquid from reaching corners or filling low spots perfectly. This is one of those flooring installation mistakes to avoid if you want a professional finish. To get it right, you must manually guide the material with a gauge rake and a spiked roller to release trapped air. If you just dump it, you’ll end up with ‘humps’ where the pour started, making your precise floor leveling techniques to achieve flawless surfaces much harder to pull off during the actual tile laying process.
Why did my expensive leveling compound crack like a dry lake bed?
This is a common frustration for advanced DIYers. You spend the money on high-quality products, only to find a spiderweb of cracks the next morning. Usually, this is not a product failure but a substrate issue. According to ASTM F710, the industry standard for preparing concrete floors, moisture vapor emission and surface porosity are the two biggest variables. If your concrete is too porous, it sucks the water out of the leveler before it can properly cure. This is why I always recommend performing the bucket test to check your concrete slab for excessive moisture before you begin. If the slab is dry but thirsty, skipping a high-solids primer is the ultimate ‘trap.’ Without primer, you will inevitably see why your self-leveling compound is cracking like a dry lake bed once it dries.
Master the Mechanical Bond Before You Lay Tile
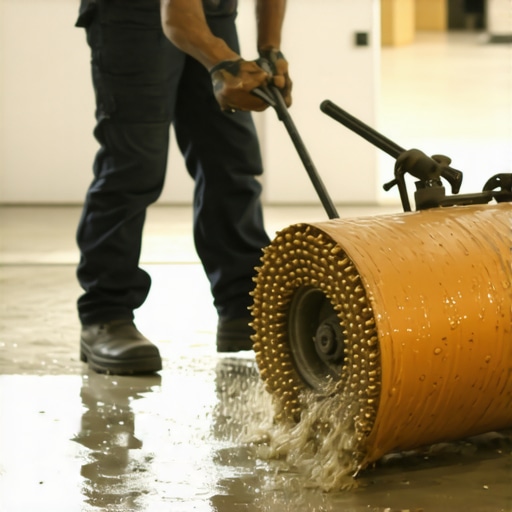
Even if your floor is as flat as a pool table, the tile won’t stay down if you don’t have a ‘mechanical profile.’ After using the hammer drill to scale off the old thinset, the concrete underneath can sometimes be too smooth or contaminated with old adhesive residue. Thinset needs tiny pores to ‘grab’ onto. If the surface is too sealed, your tiles will eventually sound hollow when walked on. This is a nuance often missed in basic tutorials. Before you move on to the best way to mix self-leveler for a perfectly smooth surface, ensure the substrate is clean and slightly roughened. Furthermore, don’t forget to how to check for subfloor flex before you lay rigid tile. A level floor that bounces will crack your grout lines in weeks, regardless of how much leveler you used. Have you ever fallen into this ‘level but loose’ trap? Let me know in the comments, and let’s troubleshoot your subfloor together!
Stop the Destruction Before the Paint Dries
Once the heavy demo is over, don’t make the rookie mistake of thinking the “hard part” of your project is finished. I’ve seen gorgeous white oak ruined by a single dropped hammer during a backsplash installation. You need to learn how to protect your new floors during a full kitchen remodel by using a heavy-duty breathable membrane like Ram Board. Never use non-breathable plastic sheeting; it traps moisture against the wood and can cause permanent cupping within 48 hours. I personally swear by the cardboard shield for protecting new floors during paint projects because it allows the wood to acclimate while offering significant impact resistance. While you’re at it, use the blue tape secret for cleaner caulking around your new baseboards; it prevents that messy smear on your fresh planks and ensures a crisp, professional line that won’t peel.
How do I keep my new tile and wood looking pristine for decades?
Maintenance is where most DIYers fail their long-term investment. I’ve had friends brag about their new floors, only to find them dull and warped six months later because they used a steam mop. You must realize why you should never use a steam mop on engineered wood floors; the high-pressure heat drives moisture deep into the core, causing the layers to delaminate. Instead, follow the hardwood floor care secrets to longevity and shine by using a damp—never dripping—microfiber mop and a pH-neutral cleaner specifically formulated for your finish type. The same rule applies to your bathroom or kitchen tiling. You need to stop using bleach on your grout before you read this, as harsh alkaline chemicals actually eat away at the sealer, making your grout more porous and susceptible to deep-set staining over time.

Why the Future of Flooring is Smart and Moisture-Obsessed
Regarding technical precision, the National Wood Flooring Association (NWFA) Technical Publication A100 emphasizes that maintaining a consistent indoor relative humidity between 30% and 50% is non-negotiable for wood stability. I always suggest doing the moisture test you must do before gluing down wood to ensure your subfloor isn’t a ticking time bomb of vapor emission. In the coming years, I predict a massive shift toward “smart” underlayments with integrated moisture sensors that alert your smartphone if a leak occurs under your kitchen tiles before the damage is visible. For now, mastering hardwood floor refinishing expert tips for 2025 will keep you ahead of the environmental curve. We are already seeing self-healing finishes that use micro-spheres of polyurethane to fill in tiny scratches during regular foot traffic. My best advice? Invest in a high-quality digital hygrometer to monitor your room’s environment. It’s a $20 tool that can save a five-figure floor from cracking. Try this: go to your thermostat right now and check your humidity levels; if it’s outside the 30-50% range, your floor is already under stress and needs a humidifier or dehumidifier immediately.
The Hardest Lessons I Learned While Wrestling With Concrete
Experience is just a fancy word for ‘the list of mistakes I’ll never make again.’ When I first started working with hardwood floors and tile, I thought I could skip the tedious prep work. I was wrong. First, never underestimate the power of a vacuum. Even a tiny bit of dust can lead to the dreaded situation why your floor primer is making the leveler bubbling worse, which ruins your bond before you even begin. Second, if you hear a ‘clack’ instead of a solid thud when you walk on your finished work, you need to know how to fix a hollow sounding tile without tearing it up. It usually means your thinset wasn’t combed properly. Finally, patience with the primer is your best friend—if it’s still tacky, stay off it.
My Essential Kit for a Professional Finish
I don’t believe in buying every gadget at the hardware store, but these few are non-negotiable for me. I always keep an SDS rotary hammer with a 3-inch scaling bit for demo—it’s the only way to avoid the backaches I mentioned earlier. #IMAGE_PLACEHOLDER_E# For the actual layout, I rely on the 7 tools you actually need for a professional DIY hardwood install, specifically a high-quality tapping block and a digital hygrometer. To protect my hard work from other trades, I never skip a breathable membrane, especially when I’m learning how to protect your new floors during a full kitchen remodel. These tools aren’t just about speed; they’re about preventing failure points before they happen.
Step Into Your Next Project With Confidence
Renovating your home is a marathon, not a sprint. It’s easy to get overwhelmed when you’re staring at a bare subfloor, but remember that every pro started exactly where you are right now. By following a step-by-step guide to flooring installation and leveling success, you are already ahead of the majority of DIYers who just wing it. Your home deserves the stability of proper floor leveling and the beauty of perfectly laid planks. You’ve got the knowledge, the tool list, and the warnings—now it’s time to get to work. Have you ever discovered something strange or unexpected under your old floor during demo? Let me know in the comments below!