I vividly remember the moment I laid my first hardwood floor—an uneven nightmare that haunted me for years. Every step, every squeak, was a reminder that I didn’t quite get it right. It was a lightbulb moment, realizing that proper floor leveling isn’t just about aesthetics; it’s the foundation of durability. If you’ve ever faced a similar frustration—wobbly floors or cracked tiles—you know how vital this step really is. Today, I promise to share expert strategies that will transform your flooring projects into long-lasting masterpieces.
Why Proper Floor Leveling Changes Everything
Believe it or not, uneven floors are the root cause of most flooring failures. From cracked tiles to squealing hardwood, the culprit almost always traces back to inadequate leveling. According to industry experts, a perfectly leveled surface can extend the lifespan of your flooring by years. But here’s the catch: many DIYers and even pros underestimate the importance of thorough leveling, rushing through this critical step. That’s a mistake I made early on—skipping detailed prep and focusing only on the visible surface. It’s a mistake I want you to avoid. Properly leveling your subfloor sets the stage for a flawless finish and enduring performance. Want to learn how to do it right? Keep reading, and I’ll walk you through proven strategies.
Is Floor Leveling Actually Worth the Hype?
Great question. I used to think a quick fix was enough—until I saw my meticulously installed tiles crack within months. That’s when I realized that ignoring proper leveling is like building on quicksand. It’s tempting to cut corners, especially with tight schedules or budgets, but the long-term costs far outweigh the initial effort. From my experience, investing in precise leveling techniques results in floors that not only look stunning but also stand the test of time. Don’t just take my word for it; industry studies show that subfloor preparation can reduce repair costs by up to 50%. So, yes, the hype is real—and it’s worth every bit of effort.
If you’ve ever faced uneven floors or fears of future repairs, you’re not alone. Many homeowners and contractors stumble at this stage, often due to lack of knowledge or underestimating its importance. That’s exactly why I’ve dedicated myself to mastering expert strategies for 2025. Ready to learn the secrets that will make your flooring last for decades? Let’s dive into the practical steps that will elevate your next project from good to great.
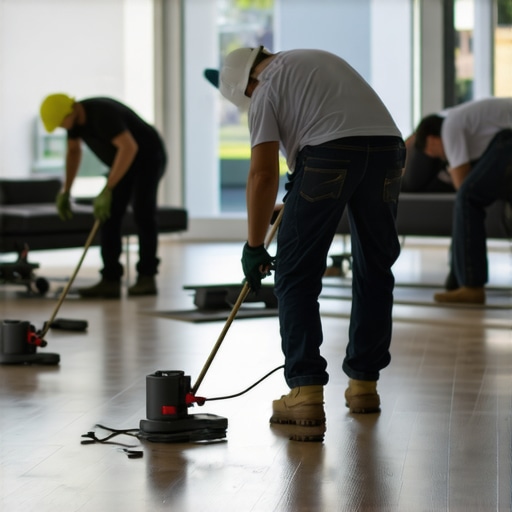
Prepare Your Subfloor Like a Pro
Start by cleaning the entire surface thoroughly to remove dust, debris, and any loose material. Use a straightedge or a long level to identify high and low spots across the entire area. If you notice significant unevenness, mark these areas clearly. During my first project, I neglected this step, which resulted in a wobbly floor despite the finishing. Proper preparation ensures your leveling process is accurate and effective.
Assess and Mark the Problem Areas
Use a long level or a laser level for pinpoint accuracy. Place the level in different directions—north-south and east-west—to check for dips and humps. Mark any irregularities with a pencil or chalk. This visual map guides your corrective steps, saving time and material in the long run. I recall spending extra time marking my basement floor, which paid off when I started applying the leveling compound precisely where needed.
Apply the Right Leveling Compound with Precision
Choose a high-quality self-leveling compound designed for your flooring type. Mix it according to the manufacturer’s instructions, ensuring a smooth, pourable consistency. When pouring, start from the highest point and let gravity do the work, spreading the compound evenly across the surface.
During one of my installations, I poured the compound in sections, working quickly to ensure it leveled out before setting. Use a gauge rake or a trowel to help spread the mixture into low spots and feather the edges. This step is crucial to achieve a smooth, uniform surface that will support your flooring material flawlessly.
Use a Long Level or Laser for Verification
After the compound has settled, recheck the surface with a long level or a laser level. Look for any remaining dips or humps. If needed, apply a second coat of leveling compound to address residual unevenness. I learned the hard way that rushing this step leads to future squeaks and cracks, so patience and thorough verification are essential.
Allow Adequate Curing Time
Follow the manufacturer’s instructions for curing time—typically 24 to 48 hours. Do not walk on or install flooring until the surface is fully cured. During this period, keep the area free of dust and vibrations to prevent imperfections.
In my experience, rushing the curing process resulted in minor cracks that compromised the durability of the floor. Taking this step seriously guarantees a stable, long-lasting foundation for your hardwood or tile installation.
Final Check and Surface Preparation
Once cured, do a final inspection with your level to confirm the surface is perfectly flat. Sand down any high spots or rough patches if necessary. Clean the surface thoroughly again before proceeding with your flooring installation, whether it’s hardwood, tile, or another material. Properly leveled subfloors not only improve aesthetic appeal but significantly enhance the longevity of your floors.
For more detailed tips on installing your floors correctly, visit this guide. Remember, precise leveling is the backbone of durable, beautiful flooring that stands the test of time. Master these steps, and your floors will look stunning and perform reliably for years to come.
While many DIYers and even professionals believe they have a solid grasp of floor leveling, there are often overlooked nuances that can make or break your project. Let’s dig deeper into what most people get wrong about this critical step—and how to avoid costly mistakes.
Why the Biggest Myths About Floor Leveling Can Sabotage Your Results
A common misconception is that as long as the surface looks even, your floor is properly leveled. But appearances can be deceiving. Subtle dips or humps, often invisible to the naked eye, can cause long-term problems like cracking, squeaks, or uneven wear. This is why professional-grade tools such as laser levels or long straightedges are essential for detecting imperfections that standard bubble levels might miss. According to industry experts, relying solely on visual checks can lead to an uneven foundation, which significantly shortens your floor’s lifespan. For detailed techniques on how to accurately assess your subfloor, visit this comprehensive guide.
Beware the Trap of Rushing the Curing Process
Many get caught in the trap of thinking they can skip or shorten the curing time of leveling compounds. This mistake is more than just a minor oversight; it can cause severe issues like cracks, sinking, or uneven surfaces that compromise the entire flooring installation. Patience is key—allow ample curing time as specified by the manufacturer, typically 24 to 48 hours. Skipping this step can lead to hidden weaknesses that only reveal themselves after the floor is installed. Remember, rushing this process is an advanced mistake that even seasoned pros sometimes overlook. For expert tips on proper curing and surface prep, check out this resource.
The Sophisticated Question: How Do I Ensure Long-Term Durability After Leveling?
Advanced DIYers often ask how to guarantee their leveled surface will hold up over time. The answer lies in meticulous surface preparation and choosing the right materials. For example, using a high-quality, fast-curing leveling compound combined with a thorough cleaning and priming process can significantly enhance adhesion and stability. Additionally, addressing any residual imperfections with fine sanding after curing ensures a smooth, durable foundation. Industry studies indicate that well-prepared, properly leveled substrates can extend the lifespan of flooring by years, especially when combined with proper maintenance. For more insights, visit this ultimate guide and master your skills for lasting results.
Have you ever fallen into this trap? Let me know in the comments. Mastering these nuances can save you time, money, and frustration in the long run—and ultimately give you a flawless, durable floor that stands the test of time.
Investing in the Right Tools Ensures Longevity
When it comes to maintaining your floors over time, having the right tools can make all the difference. I personally swear by a high-quality laser level for ongoing checks—it’s precise and easy to use, helping me quickly identify any settling or uneven spots that may develop. A durable, long-reach squeegee is essential for applying cleaning solutions without damaging the surface, especially on hardwood or tile. Additionally, a vibration-free orbital sander is invaluable for smoothing out minor surface imperfections that can occur with everyday wear. These tools not only streamline maintenance but also help extend the life of your flooring by catching issues early.
Plan Regular Check-Ups to Prevent Major Repairs
Set a routine inspection schedule—biannually works well—to assess your floors’ condition. During these check-ups, use your laser level to confirm that the surface remains perfectly flat, especially after seasonal shifts that can cause minor shifts in subfloor stability. If you notice any dips or humps, address them promptly with appropriate leveling compounds or professional assistance. Regular maintenance with proper tools can prevent costly repairs down the line, keeping your investment looking pristine for decades. For more detailed guidance on routine checks, visit this resource.
Future Trends in Floor Maintenance and Tools
The industry is moving toward smart monitoring systems integrated with mobile apps, allowing homeowners to track floor stability and identify issues remotely. In the near future, expect more AI-driven tools that can automatically detect unevenness or damage, alerting you to needed repairs before they become visible or costly. Staying ahead of these trends means investing in adaptable tools now, like laser levels with Bluetooth connectivity or sensor-based floor analyzers, which can seamlessly integrate with your smart home ecosystem.
How do I maintain my flooring over time?
Consistent cleaning and prompt repairs are key. Use gentle, pH-balanced cleaning solutions and avoid harsh chemicals that can degrade surface finishes. Regularly inspect high-traffic areas for signs of wear or damage, and address issues immediately—whether by reapplying leveling compounds or consulting a flooring expert. Properly maintaining your floors not only preserves their beauty but also reinforces their structural integrity, ensuring they last for many years. Remember, the right tools and a proactive approach are your best allies in keeping your floors in top shape. For specialized tips on hardwood floor care, visit this guide.
The Hardest Lessons I Learned About Floor Leveling
One of my biggest surprises was discovering just how subtle imperfections can sabotage an entire flooring project. I once thought that a quick eyeball check was enough, only to face cracks and squeaks months later—an eye-opening lesson in the importance of precise assessment.
3 Myths About Floor Leveling That Held Me Back
I used to believe that surfaces looking even to the naked eye meant they were truly flat. Turns out, invisible dips can cause long-term issues. Additionally, I thought rushing the curing process was harmless—until I saw my floors develop cracks. Lastly, I underestimated the value of quality tools, which are game-changers in achieving durability and perfection.
What Experts Won’t Tell You About Floor Preparation
Many overlook the significance of thorough cleaning and marking problem areas. Skipping these steps leads to uneven surfaces and costly repairs. Using professional-grade leveling compounds and verifying with laser levels can save you time and money, guaranteeing a flawless foundation for your floors.
My Essential Toolkit for Floor Leveling Success
I swear by a high-quality laser level for ongoing checks, a durable squeegee for applying compounds, and a vibration-free sander for surface finishing. These tools are reliable allies that help me catch issues early and ensure long-lasting results.
Keep Your Floors Perfect for Years to Come
The future of floor maintenance is smart—think Bluetooth-enabled laser levels and sensor-based analyzers. Regular inspections, proper cleaning, and prompt repairs are your best strategies. Staying proactive now means you’ll enjoy beautiful, durable floors for decades, turning a simple project into a lasting legacy. Ready to elevate your flooring game? Visit this comprehensive guide for more expert insights.