
I was standing in my garage, staring at what was supposed to be a “hand-rubbed espresso” finish on a maple coffee table, but it looked more like a muddy leopard print. I had done everything right—or so I thought. I sanded, I wiped away the dust, and I applied a high-quality oil stain. But the wood had other plans. It was my first real lesson in the stubborn nature of closed-grain hardwoods. If you’ve ever felt that sinking feeling in your stomach when your beautiful project starts looking like a Pinterest fail, you aren’t alone. I once made the mistake of thinking I could treat maple like oak, and that hubris cost me a whole weekend of stripping and re-sanding. Today, I am going to show you exactly how to avoid my early failures and get a finish so smooth it looks factory-made.
Maple Doesn’t Play Nice with Stain
The problem usually isn’t your technique; it is the wood’s biology. Maple has a wild, erratic grain density. Some areas are dense and tight, while others are porous and thirsty. When you slap a traditional liquid stain on it, the porous spots drink it up like a sponge, while the dense spots just let it sit on the surface. It’s why you get those ugly dark patches right next to areas that look barely touched. I used to think I could just master hardwood floor refinishing by sheer force of will, but maple requires a different kind of finesse. According to the Wood Database, Acer saccharum (Sugar Maple) has a Janka hardness of 1,450 lbf, making it significantly harder and less predictable than something like Red Oak. This density is great for hardwood floor care and longevity, but it can be a nightmare for coloring if you don’t know the secrets.
Is Maple Even Worth the Effort?
You might be tempted to just paint the whole thing and call it a day. I have been there, believe me. But there is a reason we love maple—it is durable, smooth, and has a subtle elegance that is hard to beat. Today, I’m going to walk you through the prep work that actually matters. We are going to talk about wood conditioners, gel stains, and why your grit sequence is your best friend. Have you ever had a staining project turn into a blotchy disaster halfway through? Let me know in the comments! Before we move on to the sanding phase, remember that expert flooring installation tips often emphasize that preparation is 90% of the battle, and that holds true for furniture too.
Nail the Sanding Sequence First
Sanding maple is a game of patience, not power. If you rush through the grits or skip a step, the wood will punish you the moment the stain hits the surface. I remember a maple dresser project where I thought I could jump from 80-grit straight to 180-grit because the wood felt smooth to the touch. It was a massive mistake. When I applied the finish, the 80-grit scratches looked like glowing neon signs under the stain. Now, I follow a strict progression: 80, 100, 120, and finally 150. Going higher than 180 can actually burnish the wood—essentially polishing the pores shut so they cannot take any color at all. You should stop sanding your hardwood until you read this warning about over-polishing. Unlike when you follow the best grit sequence for sanding red oak to a mirror finish, maple requires you to stop just before it becomes glassy. 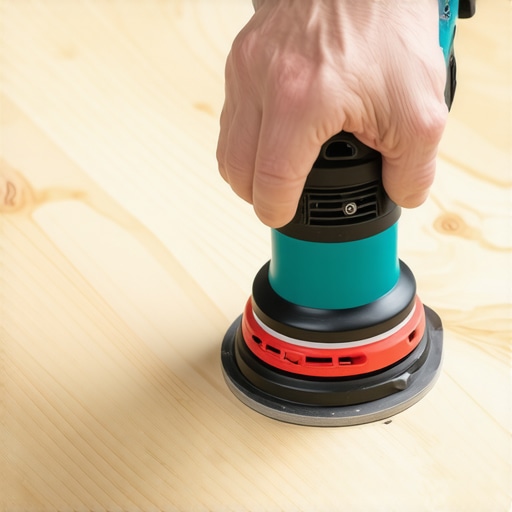
Clean Surfaces Mean Better Absorption
Even the smallest amount of dust left in the pores will create a muddy, amateur look. I use a vacuum with a brush attachment first, then a high-quality tack cloth. You might think a damp rag is fine, but water raises the grain on maple instantly, ruining your smooth surface. It is similar to how the best way to clean dust after sanding hardwood floors involves a meticulous multi-step process to ensure a clean bond for the finish.
Wood Conditioning Prevents The Dreaded Blotch
Think of wood conditioner as a traffic controller for your stain. It fills the thirstiest pores just enough so they do not over-absorb the pigment. One time, I tried a natural oil-only finish on a maple tabletop without conditioning, and it looked like someone had spilled coffee in random puddles across the wood. Now, I apply a generous coat of pre-stain conditioner, let it sit for exactly fifteen minutes, and then wipe off every single drop of excess. This creates a level playing field for the color. It is a fundamental part of the 7 tools you actually need for a professional diy hardwood install when dealing with finicky wood species.
Why Gel Stain Wins Every Time
If you are still struggling with blotching even after conditioning, switch to gel stain immediately. Traditional liquid stains are thin and sink deep into the grain where they are hard to control. Gel stains are thick, similar to pudding, and they mostly sit on the surface of the wood. This gives you significantly more control over the final opacity. When you learn how to match stain for a hardwood floor repair, you will find that gel stains allow for shading, where you can leave a bit more pigment in lighter areas to even things out. It is the closest thing to painting with wood grain that you can get while still showcasing the natural beauty of the maple.People often tell me they can fix a wavy floor just by using a bit more mortar under their tiles. That is the quickest way to end up with cracked grout and lippage that catches your toes every time you walk by. In my experience, relying on thinset to correct a subfloor is a rookie move that eventually leads to flooring installation mistakes to avoid for lasting results. You need a dead-flat surface before the first tile ever touches the ground. If you are working with large format tiles, the margin for error is non-existent. One common trap is thinking that self-leveling compound is a ‘pour and forget’ solution. I have seen countless DIYers wonder why your self-leveling compound is cracking like a dry lake bed simply because they skipped the primer or added too much water. Have you ever fallen into this trap? Let me know in the comments! 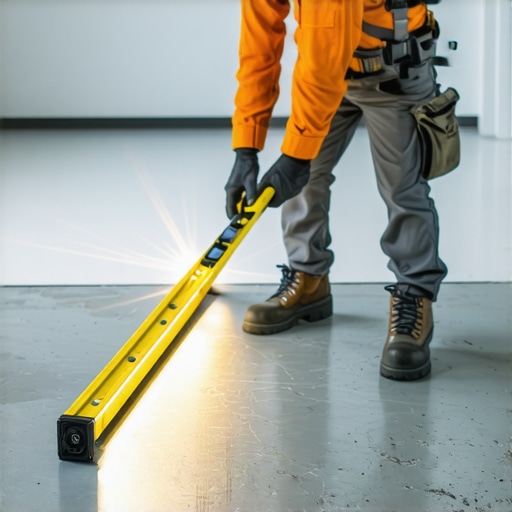
Thinset Is Not a Magic Leveling Tool
The most dangerous myth in the industry is that ‘medium bed’ mortar can act as a floor leveler. It is designed to support the weight of the tile, not to fill half-inch valleys in your concrete. When mortar is applied too thick, it shrinks as it cures, pulling the tile down with it and creating uneven edges. To get it right, you must learn how to achieve flawless floor leveling before tile laying. According to the Tile Council of North America (TCNA) Handbook, the maximum allowable variation for large format tiles—those with one side longer than 15 inches—is a strict 1/8 inch in 10 feet. Anything less and you are asking for structural failure.
Why Does Your New Subfloor Feel Bouncy?
If you are installing over plywood and notice a slight ‘give’ when you walk, stop immediately. Many homeowners assume that adding a layer of cement board will stiffen the floor. It won’t. Cement board adds zero structural integrity; its only job is to provide a bonding surface for tile. You likely need to address the joist spacing or subfloor thickness. This is one of those 7 signs your tile contractor is cutting corners on prep work if they ignore the deflection of your floor.
The Moisture Trap Most Professionals Ignore
Even if your floor is flat as a pancake, moisture is the silent killer. I once saw a gorgeous maple floor buckle three months after installation because the installer didn’t check the concrete’s relative humidity. You cannot just look at a slab and know it is dry. Performing the moisture test you must do before gluing down wood is non-negotiable. If you ignore the hydrostatic pressure coming up through the slab, no amount of expensive adhesive or high-end finish will save your project.I’ve realized over the years that the difference between a floor that lasts five years and one that lasts fifty isn’t just the wood or tile you choose—it’s the precision of the tools you use to monitor it. I used to rely on my ‘trained eye’ to spot high spots in a subfloor, but that ego led to many a squeaky plank. Now, I never start a project without my Wagner Orion 950 moisture meter. It is a bit of an investment, but it tells me the Equilibrium Moisture Content (EMC) of the wood, which is vital for preventing the warping I mentioned earlier. If you aren’t using a high-quality meter, you are essentially gambling with your materials. Beyond moisture, I’ve become obsessed with the the 3-foot level test for checking subfloor flatness like a pro. If that level light isn’t shining through, you’ve got work to do. For those working with tiles, the the flashlight test for checking floor flatness before glue is my personal favorite low-tech hack to find those hidden dips that cause lippage. These aren’t just gadgets; they are the 7 tools you actually need for a professional diy hardwood install that turn a stressful weekend into a successful renovation.
How do I maintain my hardwood and tile floors over time?
Longevity starts the second the finish is dry. My golden rule is to throw away your steam mop immediately; the pressurized heat is a death sentence for the adhesives in engineered wood and can eventually crack grout. Instead, focus on pH-neutral cleaners and microfiber pads. Knowing the best way to clean a new hardwood floor for the first time sets the tone for the wood’s entire lifespan. According to the National Wood Flooring Association (NWFA) Technical Publication No. A100, maintaining a consistent indoor environment between 60 to 80 degrees Fahrenheit and 30% to 50% humidity is the single most important factor in preventing wood failure. This level of environmental control is one of those hardwood floor care secrets to longevity and shine that most people overlook until they see their first gap. 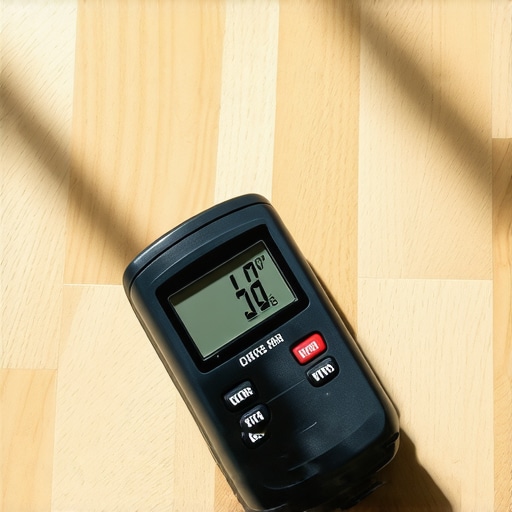 Looking ahead, I predict we are going to see a massive shift toward ‘smart floors’—subfloors with embedded sensors that alert your phone the moment a pipe leak begins under your tile or wood. Until that tech becomes affordable, we have to be the sensors. My big tip for you this week: before you apply your final coat of finish or grout, take a high-lumen work light and lay it flat on the floor. It will reveal every sanding swirl and uneven joint that you’d otherwise miss under overhead lighting. Fix it now, and you won’t have to stare at it for the next twenty years.
Hard Truths About Maple and Leveling That Saved My Sanity
After years of wrestling with stubborn grain and uneven slabs, I’ve realized that maple isn’t just another wood species—it’s a test of character. If you try to force it to look like oak, it will rebel every single time. Respecting the density of the wood and the physics of the subfloor is the only way to avoid a DIY disaster. Here are the lightbulb moments that finally clicked for me:
- Maple demands a light touch: Over-sanding actually seals the wood. Stop at 150 or 180 grit, or you’ll be wondering why your stain won’t stick.
- Subfloors don’t lie: A tiny dip today becomes a massive crack or a permanent squeak tomorrow. Using 7 tools you actually need for a professional diy hardwood install properly means checking for flatness before you ever open a box of flooring.
- Conditioner is non-negotiable: On maple, skipping wood conditioner is like trying to paint a wall with a dry brush. It just doesn’t work.
- Moisture is the silent killer: You can have the best finish in the world, but if your subfloor is wet, the wood will cup and warp within months.
The Gear I Trust to Get the Job Done Right
I don’t believe in buying every gadget on the shelf, but these few items have saved me thousands in potential mistakes. First, the Wagner Orion 950 is my constant companion for checking moisture levels. Second, I always keep a high-quality self-leveling primer on hand; I’ve found that how to achieve flawless floor leveling before tile laying depends entirely on that initial bond. For sanding, a HEPA-rated vacuum is essential to keep the air clean, especially if you want to learn how to sand a hardwood floor without creating a massive dust cloud. Lastly, General Finishes gel stains are the only way I finish maple now—they provide the control that liquid stains simply lack. #IMAGE_PLACEHOLDER_E#
Take the Leap and Start Your Next Project
Whether you are refinishing a family heirloom or tackling a full mastering hardwood floor refinishing project, the secret is simply to start with the right foundation. It might feel overwhelming at first, but once you master the flooring installation fundamentals: leveling for a seamless look, the rest of the process becomes a rhythmic, rewarding experience. You have the knowledge now—go create something beautiful. Have you ever had a project look perfect until the final coat of finish went on? Let me know in the comments!