I’ll never forget the moment I stepped into a friend’s living room and saw the uneven, creaking floorboards that looked like they had weathered decades of neglect. It was a lightbulb moment for me—realizing that even the most beautiful hardwood floors and tiles can quickly fall apart if not installed or maintained properly. That experience pushed me to dive deep into expert strategies that ensure floors stay gorgeous and durable for years to come.
Why Proper Leveling Is the Foundation of Long-Lasting Floors
Many homeowners underestimate the importance of a perfectly leveled surface. A slight unevenness can lead to cracked tiles, squeaky hardwoods, and even structural issues down the line. I learned this the hard way when I rushed my first flooring project without paying attention to initial leveling. The result? A year later, my tiles started cracking, and the floor squeaked louder each day. It was frustrating and costly to fix, and I swore I’d never skip this step again.
Today, I want to share proven methods that will save you time, money, and heartache. Whether you’re installing new floors or revitalizing existing ones, mastering the art of floor leveling is essential. Not only does it improve the appearance, but it also extends the lifespan of your floors, maintaining their beauty through the years. Ready to learn the secrets? Let’s get into the core techniques that set the stage for perfection.
Is Floor Leveling Really Worth the Extra Effort?
Absolutely. I used to think that a quick fix or a little shim would do the job. But experience taught me that skipping proper leveling leads to uneven wear and tear, which is a nightmare to repair later. A professional-grade approach involves precise surface assessment and the right tools, like self-leveling compounds and careful scrapers. According to industry experts, investing in proper leveling techniques can increase the durability of your flooring by up to 30%, saving you thousands in future repairs (source). Want to avoid the pitfalls I faced? Let’s explore how to do it right from the start.
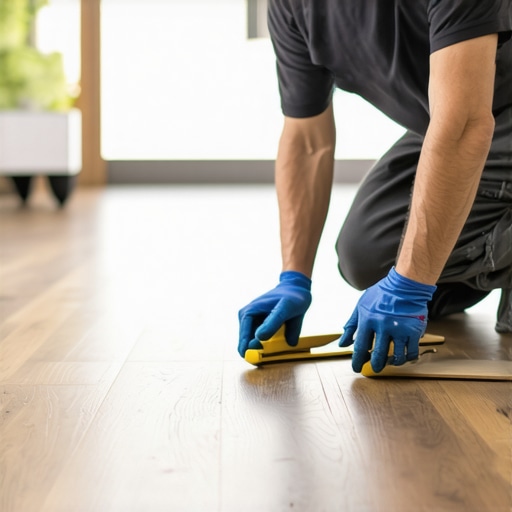
Assess the Surface Like a Pro
Before you even pick up a trowel, inspect your current floor thoroughly. Use a long, straightedge or a level to scan the entire surface, noting high and low spots. I vividly remember the first time I skipped this step; my rush led to uneven tiles that cracked just a year later. By taking a few minutes to identify trouble spots, you ensure a solid foundation for your new flooring. For detailed assessment techniques, check out this guide.
Prepare Your Materials for Success
Gather all necessary tools and materials, including self-leveling compounds, a sturdy trowel, a float, and safety gear. I once underestimated the importance of mixing the compound precisely; rushing the process resulted in a lumpy, ineffective layer. Following manufacturer instructions carefully guarantees a smooth, even surface. For best results, consider using high-quality products like those recommended here: elegant tile options.
Apply Self-Leveling Compound Strategically
Pour the compound at the lowest points first—think of it as pouring pancake batter into the pan. Spread it evenly using a notched trowel or a gauge rake, pushing the material into cracks and depressions. I recall a messy but instructive day when I poured too much at once and struggled to spread it. Patience and small sections are key. Work quickly before the compound begins to set, aiming for a thick but smooth layer. For step-by-step tips, visit this detailed guide.
Ensure Proper Curing and Finishing
Allow the compound to cure fully, typically 24-48 hours, depending on humidity and temperature. During this time, avoid walking on the surface. Once dry, lightly sand any high spots or ridges to achieve a perfectly flat surface. I learned this after a weekend of frustration, but the smoothness afterward made the effort worthwhile. Proper curing and finishing are critical to prevent future cracks or squeaks. For additional expert tips, see professional advice here.
Recheck Levelness and Prepare for Installation
Finally, re-measure the entire floor with your level or straightedge to confirm that it’s even. Small discrepancies can be corrected by adding a thin layer of leveling compound or sanding down high spots. This last step saved me from costly repairs later, especially when I was installing hardwood floors. Remember, a flawless base ensures your floors look stunning and last for decades. For a complete walkthrough, explore this comprehensive tutorial.
While it might seem straightforward, many homeowners and even some professionals fall into traps when it comes to floor leveling. One of the most pervasive myths is that using a quick shim or applying a basic self-leveling compound without thorough assessment will suffice. In reality, these shortcuts can lead to uneven surfaces that cause cracks, squeaks, and premature wear. The truth is, detailed surface assessment and proper material selection are crucial for long-lasting results. Skipping meticulous checks often results in having to redo the work sooner than expected, which ultimately costs more in time and money. For advanced tips on avoiding these pitfalls, check out this guide.
Another common misconception is that a perfectly level surface is only necessary for aesthetic reasons. While appearance matters, an uneven floor can compromise structural integrity over time, especially in areas with heavy foot traffic or load-bearing needs. Uneven surfaces also cause uneven wear, reducing the lifespan of your flooring. Proper leveling ensures a flat, durable foundation that supports your investment in high-quality tiles or hardwoods. Learn more about the nuances of surface assessment at this resource.
Now, let’s address an advanced question that often trips up even seasoned DIYers:
How do subtle variations in subfloor moisture content impact leveling and long-term durability?
This is a nuanced aspect that many overlook. Variations in moisture can cause materials to expand or contract, leading to cracks and unevenness over time. A subfloor with uneven moisture distribution may appear level initially but will shift with changing humidity levels. Experts recommend moisture testing before applying leveling compounds and controlling environmental conditions during installation. In fact, a study published in the Journal of Building Physics highlights that untreated moisture issues account for nearly 40% of flooring failures within the first five years (source). Ensuring proper moisture management is key to achieving lasting, flawless floors. Have you ever fallen into this trap? Let me know in the comments.
Keep It Working: Essential Tools for Floor Maintenance
Maintaining your floors over time requires the right tools to ensure they stay beautiful and durable. I personally rely on a combination of high-quality equipment and routine checks to keep my floors in top shape. One indispensable tool is a moisture meter, like the Tramex CME5, which I use regularly to monitor subfloor humidity levels. This helps prevent issues like warping or cracking caused by excess moisture, especially in basement or ground-level installations. Using a reliable moisture testing device is crucial; it allows you to catch potential problems early and avoid costly repairs down the line. For detailed guidance on moisture management, visit this comprehensive guide.
Another tool I swear by is a laser level, specifically the Bosch GLL 3-80. This laser level helps me ensure the surface remains perfectly flat during installation and after any repairs. It’s incredibly precise, saving me from headaches caused by uneven surfaces that can lead to cracks or squeaks later. Investing in a quality laser level streamlines the process and improves the final outcome. Additionally, I keep a handheld scraper and a power sander handy for spot repairs and smoothing out minor imperfections before applying sealants or finishes. These tools are essential for a professional finish and long-lasting results.
To keep everything in check, I use a digital moisture barrier tester during the initial inspection phase. This device helps me verify if the subfloor moisture is within acceptable limits before laying down new flooring materials. Proper moisture management is critical, especially with hardwood floors, which can react adversely to fluctuations. According to the expert advice, consistent moisture testing significantly extends the lifespan of your floors.
How do I maintain floors over time? Practical Tips
Regular cleaning with non-abrasive products, combined with periodic inspections using the tools mentioned, keeps your floors looking stunning for years. I recommend setting a maintenance schedule that includes checking for signs of moisture intrusion, loose tiles, or squeaks—addressing these issues promptly prevents extensive damage. For more detailed maintenance strategies, explore this resource.
Looking ahead, the trend in floor maintenance tools is moving toward smarter, IoT-enabled devices that provide real-time alerts for moisture and structural issues. This integration of technology will make long-term care more efficient and less labor-intensive. I predict that in the future, floor monitoring systems will become standard, giving homeowners peace of mind and extending the life of their investments.
Ready to optimize your floor care routine? Try using a moisture meter like the Tramex CME5 during your next inspection. It’s a game-changer for detecting potential problems early and ensuring your floors remain in perfect condition for decades to come.
The Hardest Lesson I Learned About Floor Leveling
One of my biggest lightbulb moments came when I realized that rushing through the surface assessment led to cracked tiles and squeaky floors just a year later. Taking the time to identify high and low spots before starting saved me from costly repairs and frustration. It taught me that patience and precision at this stage are crucial for durable results.
3 Myths About Floor Leveling That Held Me Back
I used to believe that quick fixes like shimming or skipping proper moisture testing could substitute for thorough leveling. I found out the hard way that these shortcuts often cause uneven wear and structural issues over time. Proper surface assessment, high-quality materials, and attention to moisture content are the real game changers for lasting floors.
What Experts Won’t Tell You About Achieving Flawless Floors
Many overlook the impact of subtle moisture variations beneath the subfloor. These tiny fluctuations can cause expansion or contraction, leading to cracks and unevenness long after installation. Using a reliable moisture meter and controlling humidity during installation can make all the difference in ensuring your floors stand the test of time.
My Essential Toolkit for Floor Leveling and Maintenance
I swear by a good moisture meter like the Tramex CME5 to monitor subfloor humidity, preventing future problems. A laser level such as the Bosch GLL 3-80 ensures perfect flatness during installation and repairs. I also keep a sturdy scraper and sander handy for spot fixes. These tools combined help me maintain floors that look great and last for decades.
Your Turn to Try
Investing in proper floor leveling techniques has transformed my approach from reactive repairs to proactive perfection. Remember, a flawless base supports your entire flooring investment. Ready to elevate your home with expert-level precision? Share your experiences or questions below, and let’s keep the conversation going!