
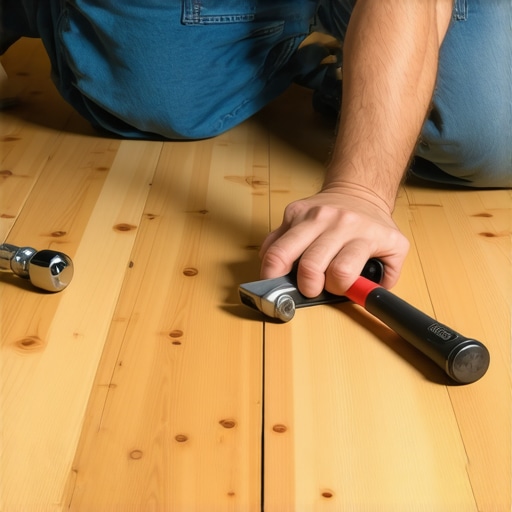
I remember the sinking feeling when I stepped onto my hardwood floor and felt that unsettling wiggle under my feet. There was a particular plank that had somehow become loose after years of near-perfect stability. At first, I panicked, thinking I’d have to rip up an entire row or call in a costly professional. But then, a lightbulb went off — maybe I could fix this myself, without the mess and expense of tearing up the floor.
Why a Loose Hardwood Plank Isn’t Just a Minor Wobble
Hardwood floors are designed to last decades, but they’re also sensitive to moisture, temperature changes, and minor shifts in subflooring. A loose plank isn’t just an aesthetic issue; it can lead to further damage, creaking, and even trip hazards. If left untreated, the problem can become more pronounced, requiring more invasive repairs.
Interestingly, studies have shown that many flooring problems stem from installation mistakes or subfloor issues that develop over time. For example, improper nailing or a shift in the subfloor can cause planks to loosen. The good news? Small, targeted fixes can often restore stability without tearing up whole rows. I’ll walk you through the step-by-step process that I used and that experts recommend, saving you time, money, and a potential headache.
Have you ever faced this particular problem? If so, you’re not alone. Many homeowners discover loose hardwood planks long after the initial installation — often when the creaking becomes unbearable or the wobbling catches their eye. The key is knowing there’s a practical solution that can be executed with basic tools and a bit of patience.
Before diving into the repair process, I want to caution you about a common mistake I made early on: rushing into fixing a loose plank without checking the underlying cause. Sometimes, what appears to be a simple loose nail or staple might actually be a sign of a wider issue, like warped subflooring. To avoid making this mistake, I suggest reviewing some [flooring installation mistakes to avoid](https://tiletrendshop.com/flooring-installation-mistakes-to-avoid-for-lasting-results), which can help you diagnose the root of the problem and ensure a lasting fix.
Now, with the basics covered, let’s explore how you can tighten that stubborn loose plank and restore the beauty and safety of your floors without tearing up the entire row. Whether you’re a seasoned DIYer or just eager to learn, these tips will empower you to tackle this common issue with confidence.
Tighten the Loose Plank Like a Pro
First, identify the loose area by gently pressing on the plank to confirm it wobbles or lifts slightly. Use a pry bar or a putty knife to lift the plank carefully, avoiding damage to neighboring boards. If the planks are nailed, locate the existing nail holes or staple marks; if glued, proceed cautiously to avoid damaging the veneer.
Prepare the Repair Materials
Gather finishing nails or staples that match your flooring, a hammer, a nail set (to drive nails below the surface), wood glue, and a putty that matches your floor color. For added stability, consider using construction adhesive or epoxy, especially if staples aren’t enough. I once fixed a stubborn wobble in my living room by opting for 1-1/4 inch corrosion-resistant nails and a bit of wood glue to reinforce the bond.
Secure the Plank Back in Place
Apply a small amount of wood glue to the nail holes or staple lines if needed. Using the hammer, gently drive the nails or staples into the subfloor through the existing nail holes, angling them slightly for maximum holding power. Use the nail set to sink the nail heads just below the surface, avoiding any protrusions. This process is akin to tightening loose tooth fillings with a dental tool—precision is key.
Refinish the Surface
Once the nail heads are set, fill the holes with matching wood filler or putty, pressing it in firmly. Sand smooth after it dries with fine-grit sandpaper. Clean off dust and reapply finish or sealant if necessary. I remember a time I fixed a loose plank and ended up with a slight color mismatch until I adjusted the stain, but the fix held well. This ensures the repair blends seamlessly without obvious patches.
Verify and Prevent Future Looseness
Press along the repaired area to confirm it doesn’t wobble anymore. To prevent ongoing issues, ensure your floor isn’t exposed to excess moisture or temperature swings, as these can cause expansion and contraction. Regular cleaning and protective pads on furniture can also extend the lifespan of your hardwood.
For deeper insights into installation mistakes that can lead to loose floors, check out installation pitfalls to avoid. When leveling your subfloor, proper techniques are vital—visit mastering floor leveling for expert guidance. Remember, patience and precision make the difference between a temporary fix and a lasting solution.When it comes to flooring installation, many homeowners rely on popular myths that can lead to costly mistakes. One prevalent misconception is that leveling the subfloor is always an unnecessary step. In reality, skipping proper leveling can cause uneven floors, cracked tiles, and squeaky hardwoods over time, as highlighted in expert guides on floor leveling challenges. Another commonly held belief is that hardwood floors can be installed directly over existing flooring without preparation. This is misleading; without proper assessment, underlying issues like moisture or old adhesive residues can compromise the new installation’s durability. Advanced installers often perform moisture tests and use precise underlayment techniques to ensure longevity.
Many don’t realize that the choice of adhesive or fasteners isn’t a one-size-fits-all decision. Using the wrong type, such as non-compatibility between adhesive and tile material, can lead to tiles lifting or cracking, which is why consulting expert advice on tile installation tips is crucial.
An oversimplified approach to subfloor preparation can trap homeowners. For example, assuming that a surface appears flat enough visually might overlook subtle dips that cause issues later. To avoid this, employing professional tools like a 3-foot level or a laser device ensures accuracy, as discussed in floor leveling guides. Properly preparing the surface also involves understanding the importance of perimeter gaps and expansion joints, which many beginners might neglect, leading to buckling or cracking under temperature fluctuations.
Have you ever fallen into this trap? Let me know in the comments. Understanding the nuances behind these common misconceptions can save you from expensive repairs and ensure a flawless finish. Remember, thorough preparation, using the right materials, and consulting experienced professionals when in doubt are key to mastering flooring installation—details often overlooked by DIYers but essential for lasting results.Maintaining a flawless floor over time requires more than just initial installation or repair; it hinges on the right tools and consistent upkeep. Personally, I swear by a high-quality oscillating multi-tool, like the Fein MultiMaster, which I use for detailed sanding and precision cuts around tricky areas such as edges and tight corners. Its variable speed and oscillating motion make it indispensable for refinishing or removing old adhesive without damaging surrounding material. For measuring subfloor flatness and ensuring your leveling efforts are precise, I rely on a laser level like the Bosch GLL 3-80, which projects multiple laser lines for comprehensive coverage, saving both time and guesswork—especially vital when dealing with uneven subfloors for tile or hardwood installation.
How do I keep my floors in top shape over the years?
Regular cleaning with gentle, pH-neutral cleaners helps preserve hardwood finishes, but employing a microfiber mop prevents scratches and maintains shine. For deep cleaning, I recommend using a steam cleaner designed explicitly for hardwood—some models emit controlled steam that lifts dirt without moisture seeping into the wood, which I find superior to traditional mopping. Additionally, monitoring humidity levels with a hygrometer like the AcuRite 00613 is essential, since fluctuations can cause expansion or contraction, leading to loose tiles or cracks. Installing moisture barriers during initial installation or repairs can prevent future issues related to rising damp or unexpected moisture migration.
Future trends suggest smart tools will become more integrated into flooring maintenance.
Imagine devices that alert you when moisture levels rise or even automatically adjust climate control systems to protect your floors proactively. Embracing these innovations now can extend your flooring’s lifespan significantly.
Maintaining Your Floors for Longevity
To keep hardwood, tile, or leveled surfaces in prime condition, schedule periodic inspections focusing on grout integrity, sealant wear, and signs of moisture intrusion. Applying a fresh coat of sealant every few years not only restores luster but also reinforces the surface against spills and stains. For tile floors, regular re-grouting or sealing of grout lines prevents cracking and discoloration—a trick I learned from professional tilers—that keeps the surface looking pristine for decades. Remember, prevention is always better than repair; addressing minor issues early avoids costly replacements later. Trying out a high-precision tool like a digital moisture meter can help you detect hidden water damage, especially in areas prone to leaks or high humidity, aligning with expert advice on installation pitfalls. Ultimately, committing to routine maintenance with the right equipment ensures your flooring remains both beautiful and durable.Little did I realize that mastering small repairs like re-tightening a loose plank would drastically prolong the life of my hardwood floors. One of the most valuable lessons I learned is that patience and attention to detail are your best friends—rushing might save time upfront but can lead to bigger headaches later. I also discovered that understanding the root cause—such as moisture issues or subfloor instability—prevents the same problem from recurring. Equipping myself with the right tools, like a quality nail set or laser level, made the process smoother and more precise, turning a tricky fix into a manageable task. Furthermore, seeking out expert guides and avoiding common installation mistakes saved me both money and frustration, reaffirming that thorough preparation is key. These experiences have transformed my approach from reactive fixes to proactive maintenance, ensuring my floors stay beautiful and durable long-term.