
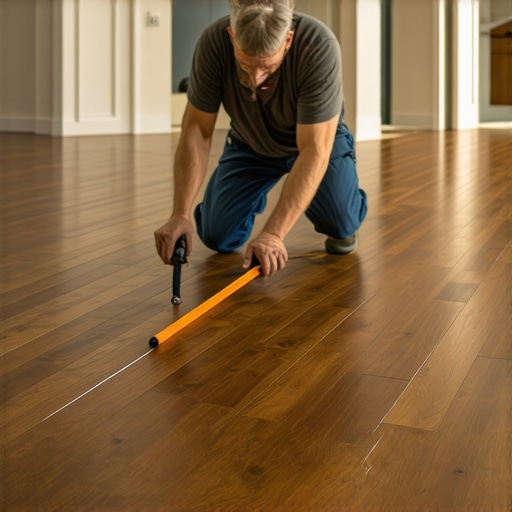
I remember the moment vividly: I was walking across my new wide-plank hardwood floor when I suddenly felt a slippery gap open up beneath my feet. It was as if the flooring was sighing, settling apart after just a few months. Frustration mixed with concern—was I doomed to live with these unsightly cracks forever? That lightbulb moment hit me hard: I had overlooked a crucial step in the installation process.
If you’ve ever stared at your beautiful new hardwood only to notice unsightly gaps forming over time, you’re not alone. Gaps in wide-plank hardwood floors are a common complaint, especially in climates with fluctuating humidity and temperature. The good news? With a bit of knowledge and careful preparation, you can minimize or even prevent future gapping altogether.
In this post, I’ll walk you through a proven method to install your hardwood planks to keep gaps at bay for years to come. From choosing the right materials to mastering installation techniques, you’ll learn what it takes to keep your floor looking flawless. And trust me, avoiding these pitfalls will save you time, money, and a whole lot of frustration later.
Why Gapping Happens and How to Stop It Before It Starts
Many homeowners underestimate just how much environmental factors influence hardwood expansion and contraction. Wood is a living material—it breathes, absorbs moisture, and releases it. When moisture levels fluctuate, the wood responds by swelling or shrinking. If your installation isn’t done with this natural movement in mind, gaps are practically inevitable.
Early in my own project, I made the mistake of ignoring the importance of proper acclimation. I unpacked the planks and started installing straight away. The result: gaps appeared within months. According to industry experts, allowing the wood to acclimate in your home environment for at least a week is a critical step in reducing future gapping. More detailed strategies for acclimation can be found in [this guide](https://tiletrendshop.com/transform-your-living-area-with-elegant-tile-designs), which emphasizes how environmental control impacts overall installation quality.
So, what’s the bottom line? Successful installation begins well before the first nail is driven. It involves ensuring your space’s humidity and temperature are stable, choosing the right wood species, and preparing all materials thoroughly. If this sounds overwhelming, don’t worry—I’ll guide you through each step.
Have you faced gaps in your hardwood floors that just won’t quit? Would you like to learn how to install wide-plank hardwood that stays flush for decades? Keep reading—we’re about to shift from common mistakes to proven solutions that work in the real world.
Start with Proper Acclimation to the Environment
Before any installation, set your hardwood planks in their target space for at least a week. Place them in the room at normal living conditions—this allows the wood to adjust to humidity and temperature, minimizing future movement. I once skipped this step, thinking I could save time, only to see gaps form within months. When I finally acclimated the wood properly, the gaps reduced significantly, proving this step’s importance.
Ensure a Level and Stable Subfloor
A foundation that isn’t flat is like laying bricks on an uneven surface—it causes instability. Use a long straightedge or a laser level to identify high and low spots. For uneven areas exceeding 3/16 inch over 10 feet, apply leveling compounds or sand these areas down. I used quick-setting self-leveling compound on my basement subfloor, which saved me from future squeaks and gaps. For detailed guidance, check out this expert guide.
Strategic Placement and Expansion Gaps
Leave perimeter gaps of about 1/2 inch around the room to accommodate expansion. Use spacers during installation to maintain uniform gaps. Think of your hardwood like a concert hall—space around the edges allows the wood to breathe without buckling or gapping. During my install, I forgot this, and my floors ended up buckling when the wood expanded in summer. Proper spacing prevented that issue.
Stagger Joints for Structural Integrity
Arrange planks so that joints don’t line up in adjacent rows. This staggered pattern, typically by at least 6 inches, provides stability and reduces movement at joint points, much like bricks in a wall. I laid out a template and moved planks around to achieve a random, sturdy pattern. This simple step significantly improved floor durability, especially as seasons change.
Correct Hammering and Nailing Techniques
Use a cushioned tapping block and a rubber mallet to snugly fit planks together without damaging edges. Ensure nails or staples are driven straight without overdriving, which can cause buckling. I once hammered too aggressively, splitting a plank; learning to gentle yet firm made a big difference. Practice on scrap pieces if needed. For more details, visit this tutorial.
Finish with Proper Sanding and Sealing
After installation, sand the entire surface smoothly, removing any ridges or overlaps. Use progressively finer grit sandpapers for a dustless finish. Seal with a high-quality finish to create a moisture barrier, reducing wood movement. I used a polyurethane kit, which also enhanced the increasing gloss and protection. Regular maintenance and timely refinishing will keep gaps at bay for years. Learn more at this comprehensive guide.
Many homeowners and even some professionals operate under assumptions that can sabotage their flooring projects. One pervasive myth is that a perfectly level subfloor isn’t critical, but in reality, overlooking subtle unevenness can lead to cracking, lippage, or squeaks down the line. It’s tempting to assume that if the surface looks smooth to the eye, it’s sufficient, but studies have shown that subfloor irregularities even as small as 1/8 inch can cause issues in tile and hardwood installations. To prevent this, mastering advanced floor leveling techniques, such as using laser-guided systems and self-leveling compounds properly, is essential. For an in-depth review of these methods, check this expert guide.Proper maintenance of your flooring is vital to ensure longevity and keep it looking pristine over the years. As someone who has installed and refinished countless floors, I highly recommend investing in specialized tools to make maintenance tasks more effective and less stressful. For example, a high-quality floor buffer equipped with soft-grit pads can effortlessly remove surface scratches and restore shine without damaging the finish. Personally, I use the **DEWALT DWP849X random orbit sander**, which provides excellent control and a smooth finish, especially on hardwood surfaces. This tool is versatile enough to tackle refinishing projects and minor repairs, extending the life of your flooring.
When it comes to deep cleaning, I rely on a **microfiber mop system** combined with a pH-neutral cleaner designed specifically for wood or tile floors. This combination prevents buildup of residues that can dull the surface or cause discoloration. Regularly inspecting your floors and addressing small issues promptly can prevent them from turning into costly repairs.
Adopting a proactive approach to maintenance continually benefits your investment. Consider scheduling quarterly inspections where you check for loose tiles, squeaky boards, or minor chips. Catching these early allows for simple fixes, such as re-gluing loose tiles or filling small cracks, maintaining an impeccable appearance.
Looking ahead, I think the trend will lean heavily toward **smart flooring technologies**—embedded sensors capable of detecting moisture levels, structural shifts, or temperature fluctuations. Emerging software could notify homeowners of potential issues before they become visible problems, making upkeep more manageable and future-proof.
### How do I maintain hardwood or tile floors over time?
Establish a routine of gentle cleaning with recommended products, periodically inspect the floor’s condition, and address minor repairs immediately. Using proper tools like a **professional floor buffer** or specialized cleaning systems ensures your floors stay durable and beautiful.
If you’re ready to elevate your maintenance game, I suggest trying a **floor buffing method** with a soft pad and a high-quality finish restorer. This simple step can dramatically improve your floor’s appearance and extend its lifespan. For more detailed techniques on maintaining a flawless finish, check out [this guide](https://tiletrendshop.com/mastering-hardwood-floor-refinishing-expert-tips-for-2025). Remember, your floors are a significant investment—giving them the attention they need now saves money and time in the long run.
The Hidden Pitfalls I Learned the Hard Way About Floor Gaps
One of the most eye-opening lessons was realizing how subtle environmental conditions could sabotage even the most careful installation. I once overlooked the importance of moisture testing before laying the flooring, which led to unpredictable expansion and contraction down the line. Now, I know that proactive moisture management, including proper acclimation and moisture barriers, is essential for long-lasting, gap-free floors.
Another unexpected insight was the impact of subfloor quality. I used to think a quick fix would suffice, but I discovered that uneven or weak subfloors cause persistent issues like squeaks and gaps. Investing in thorough subfloor preparation using precision leveling techniques made all the difference—checking out this comprehensive guide helped me master the art of flawless subfloor flatness.
Lastly, I learned that even the best-nailed or glued hardwood can’t compensate for poor spacing and expansion considerations. Leaving proper perimeter gaps and staggering joints isn’t just about aesthetics; it’s about giving the wood room to breathe during seasonal shifts. My tip? Use spacers diligently during installation and remember that these small steps prevent costly repairs later on.
Tools and Resources That Transformed My Flooring Projects
Over the years, I’ve come to rely on specific tools to ensure top-tier results. A high-quality laser level, for instance, made checking subfloor flatness a breeze and drastically reduced guesswork—more details can be found in this expert guide. For creating consistent expansion gaps, I swear by adjustable spacers that adapt to different room sizes, ensuring uniformity without guesswork.
When it came to maintaining my floors post-installation, I invested in a reputable random orbit sander, which restored shine and removed scratches without damaging the finish—trust me, a well-maintained floor is less prone to gaps or cracks. For deep cleaning and periodic upkeep, a microfiber mop paired with pH-neutral cleaners helped prolong the beautiful appearance of my hardwood. Want to take your skills further? This collection of refinishing techniques has been a game-changer.
Take Charge and Bring Your Flooring Vision to Life
Every time I step onto my well-installed hardwood floors, I feel a sense of pride knowing I took the time to learn and apply these insider secrets. If you’re contemplating your own project, remember that attention to detail makes all the difference—start with proper acclimation, ensure your subfloor is flawless, and use the right tools. The art of flooring installation isn’t just about laying planks; it’s about creating a foundation that lasts a lifetime. Don’t wait—your dream floor is within reach, and with the right knowledge, you can make it happen. What aspect of installing hardwood floors did you find most challenging? Share your experience below and let’s learn together.