
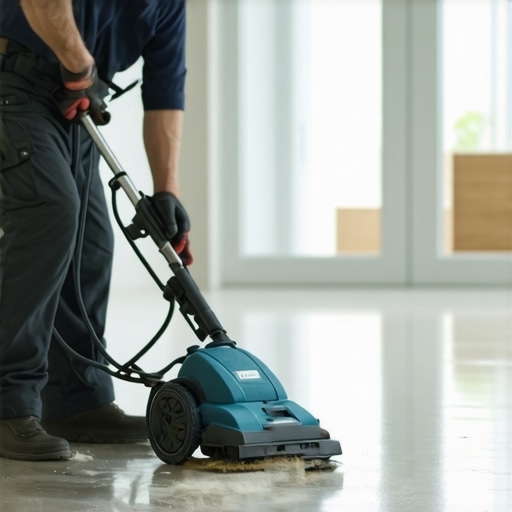
I still remember the first time I attempted to sand my hardwood floors. Expecting a simple upgrade, I dove right in, only to be greeted by clouds of dust that seemed to settle in every corner of my house. It was overwhelming, and honestly, a little nerve-wracking. That lightbulb moment made me realize: dust isn’t just messy; it can also pose health risks and turn renovation projects into nightmares.
The Hidden Costs of Dust when Sanding Hardwood Floors
Dust from sanding isn’t just an inconvenience; it’s a health concern, especially for allergy sufferers or those with respiratory issues. Plus, cleaning up that massive mess takes hours, drains your energy, and adds unexpected expenses to your project. As I learned the hard way, traditional sanding methods often create a dust cloud that seems to settle everywhere, even in places you didn’t think to cover. According to the National Institute for Occupational Safety and Health (NIOSH), exposure to fine dust particles can lead to serious respiratory problems over time, making it clear that a dustless approach isn’t just convenient—it’s essential for safety and cleanliness.
So, how do you avoid turning your home into a dusty disaster zone while still achieving perfectly smooth floors? That’s exactly what I want to share here, based on my personal journey and a few tried-and-true techniques I’ve picked up along the way. Whether you’re refinishing your hardwood or undertaking a major renovation, understanding the right tools and methods can make all the difference.
Have you ever faced a dust storm during flooring work and wished for a cleaner alternative?
If so, you’re not alone. Early on, I made the mistake of using standard sanders without considering the dust. That mistake cost me extra time cleaning, and I promised myself I wouldn’t do it again. Today, I’ll walk you through practical solutions that will help you keep dust under control and get your floor project done efficiently. Ready to learn my secrets? Let’s dive into the details and turn that dusty challenge into a clean, smooth finish.
Set Up Your Workspace Properly
Before starting, clear the room of furniture and cover nearby items with plastic sheeting. Place heavy-duty plastic or specialized dust barriers at doorways to prevent dust migration. Wear a high-quality respirator mask, safety goggles, and disposable coveralls to protect your health. In my personal experience, spending time on this initial setup drastically reduces cleanup time afterward, making the entire process smoother.
Choose the Right Dustless Sander
Invest in a dustless orbital sander or a dual-mode sander with integrated dust collection. These tools attach to a HEPA-filter vacuum system that captures fine dust particles at the source. I once rented a multi-head sander with excellent dust collection, which kept the dust cloud minimal—a game-changer compared to traditional tools. When selecting equipment, consider compatibility with your vacuum system to maximize efficiency.
Optimize the Dust Collection System
Ensure your dust extractor is equipped with a HEPA filter for optimal filtration. Attach the sander’s dust port securely to the vacuum hose to prevent leakage. Run the vacuum continuously during sanding, and check filters regularly for clogging. During my last project, I practiced testing the suction before sanding, which helped identify leaks and ensure maximum dust capture from the start.
Master the Sanding Technique
Use a consistent, light pressure with overlapping passes to avoid gouges and uneven finishes. Keep the sander moving at a steady pace—about 1 foot per second—allowing the sandpaper to gently abrade the surface. I found that sanding in the direction of the wood grain produces a more uniform surface and facilitates the removal of old finish. Maintaining a consistent speed and pressure limits dust disturbance and enhances the finish quality.
Fine-Tune the Sander’s Settings
Adjust the sander’s orbital pad to the appropriate grit, starting with coarser grits like 80 for initial removal and progressing to finer grits like 120 for smoothing. Test the settings on a small, inconspicuous area first. In my experience, setting the sander to a moderate speed reduces dust agitation and prevents accidental damage to the floor. Refer to your tool’s manufacturer guidelines for ideal adjustments.
Monitor and Manage Dust During Sanding
Keep the vacuum operating at all times, and periodically check the vacuum’s container or filter for clogging. Use a flashlight directed at the surface to spot missed spots or uneven sanding, which can generate additional dust if not addressed. During one project, I paused to inspect under the sander’s dust shroud, ensuring a tight seal, which helped maintain dust containment and kept the air much cleaner.
Clean Up and Final Inspection
After sanding, turn off the equipment and carefully remove the dust collection hose. Dispose of the dust in sealed bags to prevent airborne particles. Use a damp cloth or microfiber mop to pick up residual dust from surfaces—dry dust can settle into new finishes, dulling the final look. I always employ a HEPA-filter vacuum for the last pass, ensuring minimal dust remains before moving on to staining or finishing.
Implementing these steps effectively transforms a dusty, messy job into a clean, efficient process. For more insights on achieving perfect results, review mastering floor leveling to complement your sanding efforts, ensuring your hardwood floors are the perfect canvas for finishing.
Many homeowners and DIY enthusiasts believe that leveling floors and installing new flooring is straightforward: lay the materials, ensure they’re flat, and you’re done. However, this oversimplification leads to common pitfalls that can compromise the lifespan and appearance of your floors. In my experience working on various projects, I’ve uncovered several misconceptions and advanced mistakes that many overlook. Understanding these nuances can save you time, money, and frustration.
A prevalent myth is that a self-leveling compound alone guarantees a perfectly flat surface. While these compounds are excellent for minor discrepancies, relying solely on them without proper subfloor preparation often results in cracks or unevenness over time. As detailed in The Ultimate Guide to Floor Leveling, pre-installation assessment and addressing structural issues are crucial before applying leveling agents.
Another misconception is that thicker setting adhesives or grouts can compensate for uneven subfloors. In reality, this approach masks problems rather than solves them, leading to future tile cracks or tile liftings. Advanced installers emphasize the importance of meticulous subfloor assessment and correction methods, which can be found in Floor Leveling Challenges and Mistakes to Avoid. Proper correction techniques, such as shimming or subfloor replacement, should never be overlooked.
One trap that often catches even seasoned pros is neglecting moisture testing prior to installation. Moisture beneath the subfloor can cause adhesives to fail and tiles to crack or delaminate. According to structural engineers, unexpected moisture is a silent killer of flooring longevity. An advanced step—using a calcium chloride test—is essential, especially in basements or ground-level installations. This is discussed in detail in Floor Flatness and Moisture Testing for Professional Results. Ignoring this can lead to costly repairs down the road.
*How can mastering the intricacies of subfloor assessment elevate your project?* The key lies in understanding the importance of comprehensive preparation before even touching tools or materials. From accurately measuring floor flatness to addressing structural issues, each step influences the final outcome and durability.
Now, consider the impact of choosing the right materials. For example, using the latest tile trends that complement hardwood floors can enhance your space’s aesthetic, but should align with your subfloor’s condition to prevent issues later. Check out Best Tile Trends for Hardwood Compatibility for ideas.
In conclusion, the difference between a mediocre and a professional-looking floor hinges on understanding the nuanced steps involved in leveling and installation. Avoid common myths and traps by investing effort into thorough preparation—this ensures your floors not only look stunning but stand the test of time. Have you ever fallen into this trap? Let me know in the comments.
How Do I Maintain Flooring Tools Over Time?
Investing in high-quality tools is only half the battle; proper maintenance ensures they perform optimally and last for many projects to come. Personally, I swear by the use of a dedicated vacuum hose with HEPA filters and a soft-bristle brush attachment for cleaning sander components—regular cleaning prevents dust buildup that can compromise suction power and lead to premature wear. Lubricating moving parts according to the manufacturer’s instructions—usually with silicone spray—reduces friction and preserves tool precision. Additionally, storing equipment in climate-controlled environments shields sensitive components from humidity and temperature fluctuations, preventing corrosion and warping.
Recommended Equipment That Truly Delivers
When choosing a dustless orbital sander, I opt for models like the Festool RTS 400 EQ, renowned for their superior dust collection and ergonomic design. The integrated dust port connects effortlessly to a HEPA-filter vacuum, capturing fine particulate matter at the source, which not only improves air quality but also prolongs the life of the tool. For subfloor assessment, I rely on a digital moisture meter like the Tramex CME4; it provides quick, accurate readings and helps prevent moisture-related issues that can cause tiles or hardwood to fail prematurely. Mastering floor leveling with the right tools minimizes uneven surfaces and creates a flawless foundation.
Look Ahead in Flooring Technology
As technology advances, expect tools to become even smarter—incorporating sensors that provide real-time feedback on moisture levels or surface flatness, reducing guesswork. Automated leveling systems are already gaining ground for large-scale projects, offering consistent results with less manual effort. Staying updated with these innovations not only improves quality but also increases efficiency on site.
How do I Keep My Tools Working Long-Term?
Beyond cleaning and proper storage, developing a routine check-up schedule is vital. For example, inspecting sander pads for wear and replacing them before they wobble ensures smooth, even sanding. Periodically calibrating digital moisture meters guarantees accurate readings, avoiding costly mistakes. As noted in common installation pitfalls, inconsistent tool calibration can lead to uneven floors or adhesion failures. Taking these small steps guarantees your tools perform at their best—saving you money and time in the long run. I highly recommend trying out an advanced dust collection system integrated with your sander; it transforms messy projects into virtually dust-free experiences and is worth the investment.
What My Hardest Floor Guess Taught Me About Precision
Early in my flooring journey, I underestimated the importance of meticulous preparation. I thought I could wing it, but a seemingly minor oversight led to uneven surfaces and delayed projects. That lightbulb moment made me realize that no step is too small—details like sealing the subfloor or testing moisture levels can make or break the final look.
How I Discovered That Tools Are Only Half the Battle
Investing in high-quality tools, like a dustless sander or digital moisture meter, changed my game. But I learned that regular maintenance, calibration, and proper storage are what truly prolong their life and performance. Trust me, a well-maintained tool saves hours of frustration and costly errors, and I now view equipment care as part of my craft.
Why I No Longer Chase Quick Fixes for Floors
Rushing to level a subfloor with thick compounds or ignoring moisture testing initially seemed easier, but it often led to flaking, cracking, or future failures. The real lesson came when I prioritized thorough assessments and slow, deliberate corrections—these investments in quality paid off with flawless, durable floors that stand the test of time.
Turning Dust Chaos Into Clean Progress—My Secret Weapon
Switching to dustless sanding systems revolutionized my renovation process. It’s not just about avoiding mess; it’s about safeguarding my health, reducing cleanup time, and achieving professional results. If you’re tired of dust storms and messy spaces, upgrading your dust collection is a game-changer that I wholeheartedly recommend.
Resources I Swear By for Flooring Success
- Mastering Floor Leveling: This comprehensive guide helped me understand the nuances of subfloor prep, avoiding costly mistakes and achieving a flat surface.
- Step-by-Step Installation: A must-read for DIYers seeking clarity on best practices and tool choices.
- Floor Care Tips: Maintaining your floors after installation ensures longevity and beauty, something I’ve learned firsthand.
- Design Inspiration: Combining tiles with hardwood can elevate your space—check out this resource for creative ideas.
Seize the Moment and Elevate Your Flooring Game
Remember, mastering the art of dustless sanding and precise leveling isn’t just about aesthetics—it’s a commitment to quality and safety. Whether you’re a homeowner or a seasoned professional, embracing these lessons will help you achieve incredible results and avoid pitfalls. Now’s the time to pick up that sander, evaluate your tools, and turn your flooring dreams into reality. Are you ready to make your floors the envy of the neighborhood? Share your experiences below—I’d love to hear what’s worked for you or where you’re facing challenges.