
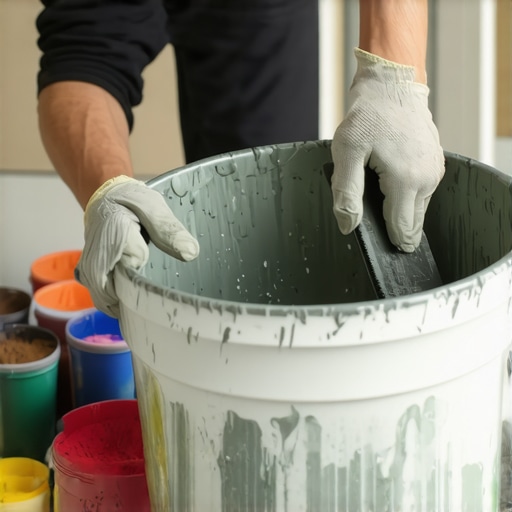
It was a lazy Saturday morning when I first realized my grout was turning into a different shade than I had envisioned. I knelt down, screwdriver in hand, scrubbing away what I thought was a simple cleaning job, only to see my carefully chosen grout color fade into a dull, uneven mess. That moment? It was a lightbulb flickering in my head—if I didn’t master how to mix and apply grout properly, all my hard work on the flooring or tiling project could be for nothing.
Why Matching Grout Color Matters More Than You Think
Ever gone to a friend’s house and looked at their beautiful tiled backsplash or bathroom floor, only to notice that the grout lines look like they belong to a different room? It’s a common mistake, and one that can undermine the entire aesthetic you’re aiming for. Achieving a consistent grout color isn’t just about aesthetics—it’s about durability, ease of maintenance, and the overall harmony of your space. When grout is uneven or fades too quickly, it can lead to stains, discoloration, and even faster deterioration of your tiles, as highlighted by experts in hardwood and tile maintenance.
But here’s the thing: mixing grout is an art—and a science. Early on, I made the mistake of rushing the mixing process, which resulted in a patchy appearance that I couldn’t fix after installation. Since then, I’ve learned that the right techniques and some insider tips can make all the difference—saving you time, money, and frustration down the line.
Is Proper Grout Mixing Really That Important?
Honestly, I used to think that as long as the grout looked okay during application, I was done. But the truth is, improper mixing leads to inconsistent drying and color fading, which is a pain to fix later. When I skipped the crucial step of thoroughly mixing my grout and used the wrong water-to-powder ratio, I ended up with stained patches and a grout that didn’t match the sample I’d carefully selected. Since then, I always double-check my mixing ratios and employ reliable techniques, like using a drill mixer and letting the grout rest before application.
So, if you’ve ever faced the frustration of uneven grout or color bleeding, don’t worry—this post will guide you through proven methods to keep your grout color uniform and vibrant. From mixing tips to sealing techniques, I’ll share everything I’ve learned so your tile project looks flawless and stands the test of time. Ready to make your grout truly a finishing touch instead of a flaw? Let’s dive into the secrets of mixing grout so that the color stays perfectly consistent.
Prepare Your Workspace and Materials
Begin by organizing your tools: a clean mixing bucket, a reliable drill with a mixing paddle, measuring cups, and a clean trowel. Protect adjacent surfaces with painter’s tape to prevent splashes. Ensure your tiles are clean and dry, free of dust or debris, to guarantee proper adhesion and prevent grout discoloration.
Accurate Measurement Is Key
Use a measuring cup to combine the grout powder and water in the correct ratio, typically found on the grout packaging. For example, a 1:1 ratio by volume is common, but always verify for your specific product. I recall my first attempt where I eyeballed the mixture; the resulting uneven color made me redo the entire job. Precise measurement ensures uniform color and consistency.
Mix Thoroughly for Uniformity
Pour the water into the bucket, then add the grout powder gradually. Attach the paddle to your drill and mix at a medium speed for at least 2-3 minutes. The goal is to achieve a smooth, lump-free paste that resembles peanut butter. Avoid over-mixing, which can introduce air bubbles, or under-mixing, which causes inconsistent color and texture. My mistake was rushing this step, leading to patchy grout lines that I had to carefully rework.
Let the Mixture Rest and Pre-Condition
Allow the grout to sit for 5-10 minutes after initial mixing; this period lets the ingredients fully hydrate, resulting in better workability and color consistency. During this time, do not add water or remix. Skipping this step resulted in a thinner, uneven grout that was difficult to work with. Think of it like letting batter rest before baking—patience pays off.
Achieve the Perfect Consistency for Application
The grout should be firm but workable—similar to toothpaste consistency. If it’s too watery, dilute it slightly with more powder; if too stiff, add a small amount of water. During a recent project, I adjusted the mixture to this ideal texture, which made applying the grout smoother and prevented color bleeding into the tile joints.
Apply with Precision and Care
Use a rubber float to spread the grout diagonally across the tiles, pressing it into the joints thoroughly. Work in small sections to prevent the grout from drying out. Remember, consistent mixing directly influences the uniformity and durability of your grout color; inconsistent mixing leads to mismatched shades and early wear. Proper preparation and mixing techniques will save you from costly corrections later on. For more detailed tips on tile installation, check out this comprehensive tile installation guide.When it comes to flooring, many assume that adhering to basic leveling and installation techniques guarantees a flawless finish. However, even seasoned DIYers and professionals often miss a crucial nuance: the significance of subfloor preparation and understanding material compatibility. Overlooking these details can lead to uneven surfaces, cracking tiles, or hardwood floors that squeak and warp over time.
A common myth is that using the thickest self-leveling compound or the most expensive underlayment ensures a perfect floor. In reality, expertise shows that the key lies in correctly assessing your subfloor’s condition and choosing materials suited to your specific environment. For example, moisture-prone areas demand proper moisture barriers and ventilation strategies, which many ignore, resulting in adhesion failures or mold growth. For more on addressing subfloor issues, check out the ultimate guide to floor leveling.
The ‘Oops’ trap many fall into is assuming that surface-level preparations suffice. I once rushed through a job, neglecting to test the subfloor’s stability, which later caused tiles to crack and hardwood planks to heave. The true masters conduct a thorough subfloor assessment, inspecting for dips, flex, and moisture, and then tailor their approach accordingly.
Combatting Shrinkage and Expansion: What’s the Advanced Trick?
Experienced installers understand that environmental factors influence flooring longevity more than the material alone. Wood, in particular, expands and contracts based on humidity. To mitigate this, it’s vital to understand the concept of acclimation beyond just leaving planks inside for a few days. Proper acclimation involves measuring moisture content with a hygrometer, ensuring the wood’s moisture levels align with indoor conditions, and installing with expansion gaps. For expert insights, explore mastering professional installation secrets.
Neglecting to account for these nuances often results in costly repairs and replacements. As Ken McVay, a flooring expert, emphasizes, “Prevention begins with understanding the microclimate of the installation space and choosing compatible materials that can handle environmental stressors.” Don’t let overlooked details undermine your hard work. Properly preparing and understanding your subfloor and materials ultimately ensures durability and aesthetic appeal.
Have you ever fallen into this trap? Let me know in the comments.
Keep Your Floors in Top Shape with the Right Tools and Routine Maintenance
Maintaining floor installations, whether tile or hardwood, demands more than just initial effort; it requires a strategic approach with the right equipment and consistent care. In my experience, investing in specialized tools can significantly extend the life of your floors and keep them looking pristine. For instance, a high-quality microfiber mop, like the O-Cedar ProMist MAX, allows gentle cleaning without scratching sensitive surfaces, making routine upkeep effortless. Additionally, applying a dedicated hardwood floor cleaner such as premium hardwood care products helps preserve shine and prevent build-up of dirt and grime that accelerate wear.
Beyond cleaning products, seasonal inspections are vital. Regularly checking for loose tiles or creaking hardwoods can prevent small issues from escalating. I personally recommend using a digital moisture meter like the Protimeter TimberMaster, to monitor humidity levels that influence wooden floor stability, especially in fluctuating climates. This proactive approach aligns with expert advice found in mastering hardwood refinishing, underscoring the importance of environmental monitoring for longevity.
How Do I Maintain Flooring Over Time? Practical Tips for Durability
Long-term maintenance hinges on consistent cleaning and protective measures. For tile floors, sealing grout lines annually with a high-quality sealant like Aqua Mix Sealer’s Choice Gold prevents stains and discoloration. Hardwood floors benefit from periodic refinishing—generally every 7-10 years—using fine-grit sanding and a high-quality polyurethane finish. I also advocate for laying down felt pads beneath furniture legs, reducing scratches and dents that mar your flooring’s appearance over time.
Looking ahead, I predict technological advancements will make maintenance even smarter. Innovations such as robotic mops integrated with UV-C disinfection, like the iRobot Braava Jet M6, are on the rise, promising cleaner floors with minimal effort. Staying updated with these trends ensures your floors remain beautiful and functional for decades. For in-depth techniques, exploring fundamentals of flooring care can help you craft a lasting maintenance regimen.
Simple Upkeep Before You Rest
One advanced trick I regularly employ is using a microfiber dust mop every day before deep cleaning. This reduces abrasive particles and keeps your floors looking new longer. Try incorporating this small step into your routine—it truly makes a difference in preserving the beauty of your investment. Start today by adding this simple habit, and your floors will thank you for it in the years to come.
Throughout my journey in flooring and tile installation, I’ve uncovered that the most overlooked aspect is the subtle art of preparation—especially mixing and applying grout correctly. The moment I realized that even minor inconsistencies in mixing ratios could lead to uneven colors and durability issues was pivotal. It taught me that patience and precision aren’t just virtues—they’re essentials that save time and money. Another key lesson involved understanding your subfloor deeply; thin overlayings and superficial fixes often hide larger problems that can manifest years later as cracks or warping. Embracing a meticulous approach—not rushing the prep and taking the time to assess environmental conditions—makes a tangible difference in outcomes. Over time, I’ve found that these insights are invaluable and apply across various projects, from hardwood refinishing to tile transitions. Investing in the right tools and continuously educating myself pushes the boundaries of what’s possible in floor installation, transforming what could be a mundane task into a craft. So, my advice? Dedicate yourself to mastering these foundational skills, and you’ll create floors that are not only beautiful but built to last, bringing lasting satisfaction and value to your living space.