
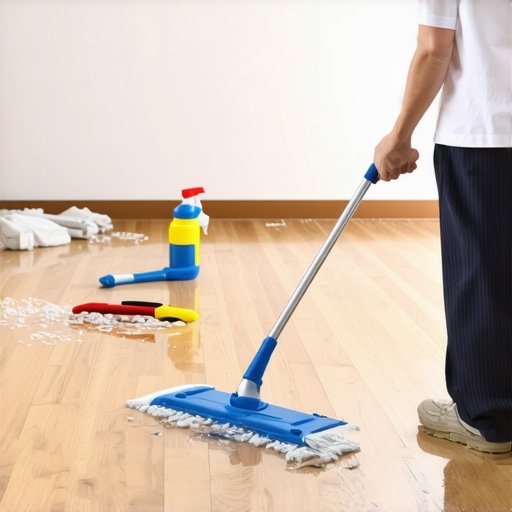
Walking into my living room after a huge renovation felt like stepping into a different world—except I immediately noticed the mess. Dust, debris, and leftover grout dust from tile work seemed to have made my beautiful hardwood floors their new home. I had underestimated just how much cleaning was needed, and honestly, I was a bit overwhelmed. Sound familiar? If you’ve recently tackled a major renovation and now face the daunting task of restoring your hardwood floors to their former glory, you’re not alone.
The truth is, cleaning hardwood floors after a renovation is more than just a quick sweep; it requires a strategic approach to avoid damaging your floors and ensure a spotless, shiny finish. Over the years, I’ve learned that rushing or neglecting certain steps can turn a simple cleanup into a costly mistake, like using the wrong cleaning products or skipping crucial drying phases. Believe me, I’ve made those mistakes early on, and I paid the price with streaks, scratches, or even lingering odors.
Today, I promise to guide you through an effective, safe cleaning routine that will leave your hardwood floors looking pristine. Whether you’re a seasoned DIYer or just starting to tackle your post-renovation mess, these tips will help you avoid common pitfalls and achieve professional results. Plus, I’ll share insights I’ve picked up, including mistakes to dodge and tools that save time. If you’re wondering whether the effort is worth it, trust me—well-cleaned floors make a huge difference in the overall feel of your home. Plus, they can even extend the life of your investment, as proper cleaning prevents scratches and warping.
Now, before we dive into the step-by-step process, let’s address a common concern: ‘Will regular cleaning methods suffice, or do I need specialized equipment?’ The answer depends on the mess, but I’ll show you how to assess your situation and use right techniques that make a difference. And if you’ve ever faced this dilemma, I want you to know—you’re not alone, and there’s a straightforward way to clean without fear of damage.
Ready to get your floors back to their stunning, pre-renovation shine? Let’s start with understanding the key mistakes many make—so you can avoid them and be confident in your cleaning routine. But first, a quick look at why proper cleaning after a renovation is crucial for maintaining your hardwood’s beauty and durability.
Start with a Thorough Dry Sweep
Immediately after finishing your renovation, grab a microfiber dust mop or a soft-bristled broom and sweep the entire surface. Think of it as removing the top layer of a snowstorm before packing down the snow—it prevents scratching your floors during wet cleaning. In my own experience, I once skipped this step, and dirt scratched the surface during mopping, leaving marks I had to buffer out later.
Vacuum for Embedded Particles
Next, use a vacuum cleaner with a soft brush attachment to pick up stubborn debris lodged in corners, crevices, and along baseboards. Unlike a broom, a vacuum lifts fine dust that might stay hidden and cause micro-scratches if rubbed in with a cloth. I learned this the hard way when leftover dust from drywall mud settled into my floor grains, dulling the sheen.
Choose the Right Cleaning Solution
Select a pH-neutral hardwood floor cleaner—avoid harsh chemicals like ammonia or bleach, which can damage finishes. For a DIY approach, mix a few drops of mild dish soap with warm water. Remember, strong cleaners are like using a sledgehammer to hang a picture—they cause more harm than good. I found that diluting my cleaner properly prevented streaks and preserved the finish.
Use a Damp, Not Wet, Mop
Moisten a microfiber mop or cloth with your cleaning solution—squeeze out excess moisture until just damp. Excess water can penetrate seams and planks, causing swelling or warping over time. During my first attempt, I over-saturated the mop, and I had to wait days for the floor to fully dry, risking mold. The key is gentle dampness, like a gentle breeze on a summer day, not a storm.
Work in Small Sections
Divide the floor into manageable zones and clean one section at a time. This prevents dirt from settling back onto cleaned areas and allows for more thorough drying. I once tried to do the entire floor at once, rushing the process and leaving streaks. Breaking it down ensures attention to detail and a consistent finish.
Dry the Surface Completely
After mopping, immediately follow with a dry microfiber cloth or dry mop to remove any remaining moisture. This is crucial to prevent water damage and ensure a streak-free shine. I always keep a few dry towels handy for this step—skipping it resulted in early warping in my less dry spots.
Polish for Extra Shine
Optional: buff your floors with a soft, dry cloth or use a hardwood floor polish to restore luster. This step enhances the depth of color and offers additional protection. Be cautious and choose products compatible with your existing finish. I experimented with a commercial polish, which made my floors look brand new without fussing over every detail.
Regular Maintenance and Deep Cleaning
Establish a routine to keep your hardwood floors looking pristine. Regular sweeping and damp mopping prevent dirt buildup, while periodic deep cleans—using solutions like white vinegar diluted with water—help maintain the health of the finish. Remember, avoiding abrasive tools or harsh chemicals prolongs the beauty of your investment.
Applying these steps consistently will yield stunning results, making your hardwood floors the centerpiece of your refreshed space. For expert tips on choosing the best hardwood flooring materials or addressing specific installation challenges, check out this guide or consult professional installation resources to ensure your floors stay durable and beautiful for years to come.
Many homeowners believe that choosing a beautiful tile pattern or a high-end hardwood automatically guarantees perfect results. However, the reality is far more nuanced. One widespread misconception is that all subfloors are equally suitable for flooring installation. In truth, subfloor stability and flatness are critical; neglecting proper assessment can lead to uneven surfaces and early wear. Instead of rushing into installation, it’s essential to perform detailed levelness checks, as highlighted in floor leveling fundamentals. Additionally, many assume that a quick DIY job is sufficient; but without expert knowledge, common mistakes—like incorrect leveling or improper adhesive use—can result in costly repairs later. For example, applying thinset with an improper trowel angle, as explained here, compromises bonding integrity. Furthermore, the myth that larger tiles are easier to install often leads to surface cracks. Actually, larger-format tiles demand ultra-flat substrates and precise technique, detailed in expert-level leveling secrets—a nuance many overlook. On the topic of hardwoods, some believe acclimation isn’t essential, but studies show that wood needs to reach equilibrium with the environment to prevent warping, as stressed by industry experts. An advanced mistake involves ignoring the floor’s natural expansion gaps, which can cause buckling if neglected. Instead, understanding and accommodating these gaps is vital for longevity, which you can learn more about here. To elevate your installation game, always verify subfloor moisture levels, because excessive dampness leads to delamination or mold, as detailed here. Remember, cutting corners might seem convenient but often results in long-term setbacks. The hidden nuance is that meticulous prep work, precise leveling, and environment assessment are the true cornerstones of enduring flooring. Have you ever fallen into this trap? Let me know in the comments.Maintaining your hardwood floors is an ongoing process that requires the right tools and a proactive approach to ensure they stay beautiful over time. Investing in quality equipment not only makes your maintenance easier but also helps prevent damage caused by improper cleaning or neglect. For instance, I never underestimate the power of a good microfiber mop; its gentle fibers effectively trap dust without scratching delicate finishes. Using a microfiber cloth rather than rough towels is essential when buffing out stubborn spots, as it minimizes swirl marks. Additionally, a dual-action buffer with appropriate pads can be fantastic for restoring sheen after deep cleaning, especially if your floors have lost their luster over the years. When it comes to assessing your flooring’s long-term health, tools like moisture meters are indispensable. They help you monitor humidity levels and detect potential warping risks—highlighted in detailed guides like floor leveling fundamentals. I strongly recommend regularly checking moisture levels in high-humidity areas to prevent buckling or mold growth. Looking ahead, technological advancements are steering us toward smarter cleaning devices equipped with sensors that automatically adjust cleaning intensity based on dirt levels—making maintenance more efficient and less invasive. To keep your floors in prime condition, consider building a maintenance routine that incorporates these tools and techniques. Regular sweeping combined with occasional use of pH-neutral cleaning solutions—applied with properly dampened microfiber mops—keeps dirt at bay without damaging the finish. Want to take your maintenance game up a notch? Try using a high-grade, ergonomic microfiber mop for quick daily upkeep and invest in a moisture meter to track environmental conditions. These small but significant upgrades can extend your hardwood floors’ lifespan and preserve their stunning appearance for decades. For more insights into advanced maintenance methods, check out hardwood floor care secrets. Remember, the key to enduring beauty lies not just in initial installation but in consistent, informed maintenance that adapts to your home’s needs.
Lessons That Changed How I Approach Floor Cleaning
One of the most profound lessons I learned was the significance of patience during the drying process; rushing to buff or walk on damp floors can cause lasting damage. Another wisdom etched in my mind is that investing in quality tools—like a microfiber mop and moisture meter—pays off in the long run, preventing scratches and ensuring proper environment monitoring. I also discovered that understanding the chemistry of cleaning solutions, opting for pH-neutral and diluted mixes, preserves the finish and prolongs the floor’s life. Lastly, I realized that a consistent maintenance routine, rather than sporadic deep cleans, keeps hardwood floors radiant and durable over time, making my home feel truly cared for.