
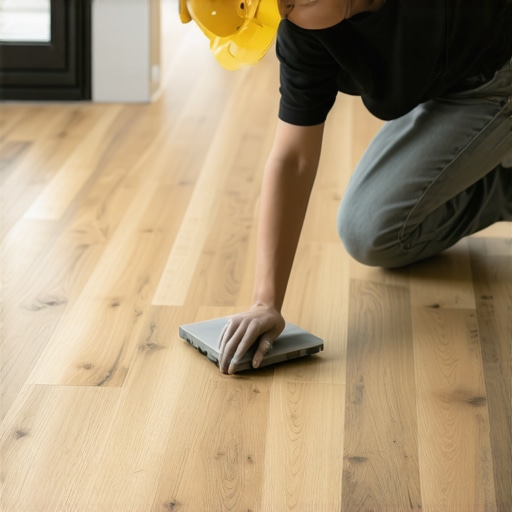
Ever had that sinking feeling when your brand-new hardwood floors buckle, warp, or squeak just a few weeks after installation? I remember vividly the moment I realized I rushed the acclimation process. My living room hardwood planks warped—an unsightly twist that made me question if I’d made a giant mistake. It was a lightbulb moment—hardwood flooring isn’t just about laying it down and calling it a day. Proper acclimation can make or break your project, and yet, it’s often overlooked or misunderstood. Sound familiar?
Why Proper Hardwood Acclimation Can Save Your Investment
When installing hardwood floors, many homeowners and even seasoned DIY enthusiasts jump straight into the lay, thinking the wood will just adapt on its own. But that’s like trying to fit a square peg into a round hole without any prep. Woods are hygroscopic—they absorb and release moisture based on their environment. If they’re not acclimated, they can swell, shrink, or develop gaps and buckles over time. This issue isn’t just cosmetic; it can jeopardize the entire flooring repair project and lead to costly fixes.
Early in my journey, I made the mistake of skipping this essential step altogether, thinking the space’s climate was stable enough. Turns out, even slight changes in humidity can have a dramatic impact. According to the Wood Flooring Association, improper acclimation is the leading cause of early failure in hardwood flooring installations. So, it’s not just about patience—it’s about doing it right from the start.
Today, I promise to guide you through a simple, effective process to acclimate your hardwood flooring without turning your entire home upside down. You won’t need expensive equipment or a controlled environment—just some know-how and a little patience. Ready to learn how to get it right?
Is Fumbling the Acclimation Process Really Worth the Hype?
Initially, I thought I could save time by rushing through acclimation or by installing wood directly from the store. That’s a mistake many make. It’s like trying to plant a seed without giving it time to settle—growth is hindered, and problems arise. Skipping proper acclimation can lead to warped boards, gaps, or even structural issues down the line. Trust me, I’ve been there. For a detailed step-by-step guide, check out this resource on achieving a flawless finish.
Let’s delve into the best practices for acclimating your hardwood, ensuring it looks gorgeous and performs well for years to come.
}#]]}#}#system શક્ય create_posts ethau ответ вать {
Prepare the Space and Materials
Before you even open the hardwood bundles, ensure the room has stable temperature and humidity levels—ideally between 60-70°F and 35-55% humidity. Remove all accessories, and stack the wood planks in the installation area, not near exterior walls or direct sunlight. This helps the wood adapt evenly. When I installed my oak floors, I laid out the planks in the living room for three days, rotating bundles to allow air circulation, which prevented uneven moisture absorption.
Allow the Hardwood to Reach Equilibrium
Storing and Stacking
Stack the planks flat, staggering the end joints, and cover the top with a breathable fabric or plastic to prevent dust accumulation. This stacking equalizes moisture content across the boards. Think of it like letting a loaf of bread rest after baking; it stabilizes before use. During my project, I kept the planks in the room for at least 72 hours, which resulted in a uniform appearance and minimal warping after installation.
Monitor and Adjust Room Conditions
Use a hygrometer and thermostat to keep the environment stable. If humidity swings occur, employ a humidifier or dehumidifier to maintain consistent conditions. This step prevents the wood from expanding or contracting post-installation, which can cause gaps or buckling. I learned this firsthand when a sudden cold snap dropped humidity; my newly installed floors developed tiny gaps that I had to fill later.
Acclimate the Hardwood in the Installation Area
Once the wood has been stored properly, move it into the space where it will be installed. Do not open the bundles; simply place the planks on the floor or against the wall in a zigzag pattern to allow air flow. Keep the area well-ventilated, and avoid stacking the planks directly against walls to permit expansion space. Remember, just like letting meat rest before cooking, the wood needs to ‘rest’ in its final environment to adapt fully. During my experience, adhering to this step prevented major issues like buckling or gaps that are costly to fix later.
Final Checks Before Installation
Before laying the first row, verify the room’s humidity and temperature have remained steady for at least a week. Check the moisture content of the wood using a moisture meter—ideally, it should match the subfloor’s moisture level within 2%. This ensures the wood won’t shift and create problems over time. When I did this, I avoided having to re-do sections due to improper moisture content, saving me time and money. For more in-depth details on floor leveling, visit this comprehensive guide.While many DIY enthusiasts focus on the obvious aspects like choosing the right materials or following installation steps, there’s a less obvious but critical detail often misunderstood: the intricacies of floor leveling and the myths surrounding it. A common misconception is that a slightly uneven subfloor doesn’t significantly impact the final appearance or durability of hardwood or tile. However, in my experience, even minor discrepancies beyond 3/16 inch over six feet can cause visible lippage, gaps, or stress fractures in tiles, compromising both aesthetics and longevity. This myth—that small imperfections can be overlooked—can lead to costly repairs down the line. Many homeowners and installers also underestimate the importance of moisture barriers and proper moisture testing before leveling. Ignoring this nuance can result in trapped moisture that causes wood planks to cup or tiles to crack months later. According to a study by the Tile Council of North America, proper subfloor preparation, including precise leveling, reduces installation failures by over 40%. For advanced installers, understanding how to use self-leveling compounds effectively—such as adequate mixing, timely application, and priming—is vital. The quality of your tools, like trowels and gauges, directly impacts the surface evenness. Remember, rushing through leveling or relying solely on visual inspection often misses hidden dips or high points that only precise tools can detect. Don’t fall for the trap of assuming leveling is a quick step; it’s the foundation of every successful flooring project. Need detailed guidance? Check out this comprehensive guide for mastering professional-level leveling techniques. Have you ever fallen into this trap? Let me know in the comments.
Keeping Your Floors in Prime Condition
Maintaining hardwood and tile floors isn’t just about routine cleaning; it requires precise tools and proactive strategies to ensure longevity. Over time, debris and wear can diminish the beauty and performance of your investment. That’s why I recommend investing in specialized equipment and adopting consistent maintenance habits. For hardwood floors, a high-quality microfiber mop paired with a pH-neutral cleaner offers gentle yet effective cleaning, preventing scratches and keeping the finish vibrant. When dealing with stubborn stains or older finishes, a steam mop can be tempting, but I advise caution—see this article to understand why certain steam cleaners might damage engineered wood.
Tools I Trust for Long-Term Results
For hardwood refinishing and deep cleaning, I rely on a vacuum with soft brush attachments that gently removes dust and debris without scratching. An oscillating floor sander, equipped with high-grade abrasive pads, is invaluable for minor refinishing tasks, especially when you notice dullness or scratches. When it comes to tiles, a grout saw and detail brush are essential for addressing grime buildup in textured grout lines—these tools help prevent discoloration that often leads to premature replacement.
Moreover, using a moisture meter when testing the subfloor and hardwood’s moisture content can prevent future issues—I personally use the Tramex MC-4 for its accuracy, mentioned in this guide. Proper tools not only enhance precision but also safeguard your floors from damage during routine maintenance.
Embracing Smart Technologies for Maintenance
Looking ahead, I see a trend toward smart floor monitoring systems that continuously assess humidity and temperature, alerting homeowners before conditions become problematic. While still emerging, integrating such technology could revolutionize floor care, making it more predictive and less reactive. For now, I recommend installing a digital hygrometer in key areas and setting up automated climate control systems—these small upgrades drastically extend your floors’ lifespan.
How do I maintain hardwood and tile floors over time?
To keep floors looking their best, schedule regular inspections of grout and finishes—catching issues early can save significant repair costs. Also, avoid harsh chemicals or abrasive cleaning pads; they can etch or erode surfaces. Instead, opt for gentle cleaners designed for your flooring type, and always adhere to manufacturer guidelines. Once a month, apply a protective wax or sealant to hardwoods to bolster their defense against scratches and stains. For tiles, seal grout lines annually to prevent moisture ingress and discoloration—that’s a step I can’t stress enough for maintaining visual appeal and structural integrity. This comprehensive article offers expert secrets to maximizing your floors’ lifespan. As an advanced step, I recommend trying the use of a detergent-free microfiber mop combined with periodic polishing for hardwoods; it’s a game-changer in restoring shine and minimizing abrasive wear.
Remember, consistent care tailored to your floor type, coupled with strategic tool use, ensures they remain stunning for years to come. Ready to elevate your maintenance routine? Give one of these tips a try today and experience the difference!
Unveiling the Lessons Hidden in Plain Sight
One of the most profound lessons I learned was that overlooking the subtleties of floor leveling can silently sabotage your entire project. Small dips or high spots might seem insignificant, but they compound over time, leading to uneven surfaces that are not only unsightly but also risky for long-term durability. I once dismissed a minor imperfection in my subfloor, only to face cracked tiles months later—a costly reminder that perfection starts with attention to detail. Additionally, the myth that humidity control is optional is one I debunked early on. Even in seemingly stable environments, fluctuations can cause unexpected movements in hardwood, emphasizing that proactive monitoring is essential. Lastly, I discovered that quality tools and proper techniques are worth their weight in gold; cheap accessories often lead to compromised results and rework, eroding confidence and budget alike. These insights aren’t just tips—they’re the difference between a floor that impresses and one that disappoints.