
Ever had that sinking feeling when you step into a room after sanding your hardwood floors, only to realize a fine layer of dust is floating everywhere? I remember one project, thinking I had everything covered—until I turned on the lights and saw the dust particles shimmering like tiny stars in the air. It’s one of those moments that makes you question your entire process.
Hardwood floor refinishing can be incredibly satisfying, but the cleanup afterward? That can be a real headache. If you’ve ever struggled to get rid of that stubborn dust, you’re not alone. Trust me, I’ve been there—and I’ve learned some tricks that make all the difference.
Today, I promise to walk you through the **best way to clean dust after sanding hardwood floors**. Forget the endless sweeping and inefficient vacuuming routines that leave particles behind. With the right tools and techniques, you can achieve a dust-free, pristine surface ready for staining or sealing.
Why Dust Remains a Problem Even After Sweeping
Sanding hardwood floors releases a tremendous amount of fine dust particles into the air. These particles are so tiny that they can easily settle into the tiniest cracks and absorb into new finish coats. Regular sweeping might seem effective, but in reality, it just scatters the dust around or pushes it into corners and under baseboards.
Research shows that proper cleaning techniques not only improve the final look but also extend the lifespan of your finish—since dust can cause imperfections and bonding issues. This is why a thoughtful dust removal process is essential.
Have you found that vacuums or traditional brooms leave dust behind? If so, you’re not alone, and that’s exactly what we’re here to fix. You’ll be surprised how much easier the cleanup becomes once you adopt a systematic approach.
Let’s dive into the practical steps that will transform your dust cleanup routine, saving you time and frustration, and giving your project that professional touch.
Prepare Your Workspace for Dust-Free Results
Start by opening windows and turning on fans to improve ventilation, preventing dust from settling in new places. Wear a dust mask and disposable coveralls to protect yourself and contain airborne particles. Gather your cleaning tools, including a commercial-grade vacuum with a HEPA filter, microfiber cloths, and damp mops, to ensure you’re ready for each step.
Utilize the Right Vacuum Technique
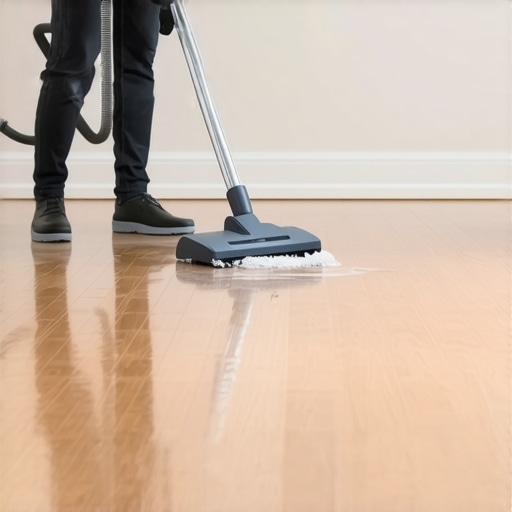
Use a professional-grade vacuum with a HEPA filter to meticulously remove dust from the surface and edges. Slowly run the vacuum along the grain of the wood, making multiple passes over the same area to capture fine particles. Remember, a standard household vacuum often lacks the necessary filtration; investing in a commercial vacuum can make a significant difference. I once used a regular vacuum, and residual dust made the next finish look cloudy—switching to a HEPA-filter vacuum completely changed the outcome.
Detail Dust Removal Along Edges and Corners
Switch to a brush attachment or use a soft-bristled hand tool to reach into corners, baseboards, and tight spots where the vacuum might not fit snugly. For stubborn dust in tricky spots, damp microfiber cloths work wonders, trapping particles rather than pushing them around. When I cleaned my own floors, I found that damp cloths effectively picked up hidden dust that vacuuming missed—saving hours of rework later.
Implement Fogging or Dust Barriers for Heavy Dust
In cases of extreme dust, consider using a dust misting spray or fogging system designed for renovation sites. These create a thin barrier that causes airborne particles to settle rapidly. Ensure the area is sealed off with plastic sheeting to prevent dust from spreading further. During one project, setting up plastic barriers and fogging minimized dust migration, ensuring the next coat of finish adhered properly without imperfections.
Final Wipe-Down and Verification
After vacuuming and dusting, perform a final wipe with a lightly damp microfiber cloth, moving slowly along the grain to catch any remaining particles. Use a bright flashlight at low angle to spot any lingering dust or smudges. This thorough approach guarantees a pristine surface ready for finishing, reducing the risk of blemishes or adhesion problems. Remember, the goal is a surface so clean that when you run your hand over it, no particles catch on your fingers.
Consistent Cleaning of Tools and Environment
Maintain cleanliness throughout the project by regularly cleaning your tools and replacing or cleaning filters. Keep the area sealed and minimize foot traffic from other parts of the house that could reintroduce dust. I learned this lesson when I neglected to contain the dust, resulting in a cloud settling on my freshly sanded floors—delaying my project and increasing frustration. Consistency here ensures professional results and a smoother finishing process.
When it comes to installing hardwood floors, many DIY enthusiasts and even seasoned pros often fall prey to oversimplified beliefs that can lead to costly mistakes. One pervasive myth is that simply laying down a subfloor and installing the hardwood guarantees a flawless finish. In reality, the nuances of floor leveling significantly influence the final appearance and longevity of the floor. For example, minor dips or uneven spots in the subfloor can cause squeaks, gaps, and uneven wear over time. As highlighted in expert resources like [Mastering Floor Leveling](https://tiletrendshop.com/mastering-floor-leveling-pro-secrets-for-perfect-installations), precise leveling can make or break your project. Nuances also extend to the understanding of acclimatization—many underestimate how long hardwood needs to adjust to ambient humidity and temperature; rushing this process invites warping or gaps. A common trap is relying solely on experienced intuition instead of meticulous moisture testing, which can result in wood expansion and contraction issues. Additionally, myths abound around material selection, such as believing all adhesives are interchangeable. The wrong adhesive can compromise the integrity of the installation, especially with large-format tiles or engineered wood. Advanced installers leverage knowledge from [Expert Tile and Floor Installation Tips](https://tiletrendshop.com/tile-installation-pointers-that-save-time-and-money) to avoid these pitfalls. Now, here’s a crucial advanced question: *How does substrate porosity influence the success of a floor installation, and what methods best prepare the surface?* Understanding substrate porosity is vital because it affects adhesive bonding and moisture migration. Using a penetrative primer on overly porous surfaces ensures better adhesion and reduces the risk of future failure. This detail often trips up less experienced installers, leading to uneven floors or early detachment. In my experience, paying attention to this nuance is as important as choosing the right finish. Remember, perfection in flooring isn’t just about aesthetics—it’s about mastery of subtle details that prevent future headaches. For deeper insights, consult comprehensive guides like [The Ultimate Guide to Floor Leveling](https://tiletrendshop.com/the-ultimate-guide-to-floor-leveling-for-a-perfect-finish). Have you ever fallen into this trap? Let me know in the comments.Maintaining the pristine condition of your hardwood floors requires not only knowledge but also the right equipment. Investing in quality tools ensures longevity and professional results, especially if you’re planning to scale or undertake ongoing maintenance. One indispensable tool I personally recommend is the **Dewalt DWS779 Compact Sliding Compound Miter Saw**. Its precise cuts and adjustable bevels make edge and detailed work effortless, minimizing the risk of damage during touch-ups or adjustments. For dust management, the **Festool CT MIDI I HEPA Dust Extractor** has become my go-to. Its powerful filtration captures 99.97% of airborne particles, crucial after sanding to keep your space clean and healthy. Traditional microfiber cloths are essential, but I find that **N95 respirators** offer better protection than disposable masks, especially during ongoing maintenance. Combining these tools with a pair of high-quality headphones like the **Bose Noise Cancelling Headphones 700** helps you stay focused while working, especially during lengthy projects. As technologies advance, remote monitoring tools such as smart humidity sensors like the **Govee WiFi Hygrometer** can track environmental conditions in real time, preventing future issues like warping or gaps. In terms of long-term results, regularly checking your floor’s condition with these tools allows early detection of issues, saving costly repairs down the line. For example, consistent humidity monitoring aligns with recommendations in the comprehensive guide on mastering hardwood refinishing. Looking ahead, I believe automation and IoT devices will play a bigger role in floor maintenance, offering proactive solutions rather than reactive repairs. So, I challenge you to incorporate a smart humidity sensor into your maintenance routine — it might just save your floors from future damage. If you’re unsure about selecting the perfect equipment for your project, visit our contact page, and we’ll help you optimize your toolkit for sustained success.
Lessons I Didn’t Expect to Learn the Hard Way
One of my most eye-opening moments was realizing that even my best sweeping efforts couldn’t fully eliminate fine dust, leading me to adopt micro-dampening techniques that changed my entire process. I once trusted a standard vacuum, only to discover residual particles causing a cloudy finish; switching to a HEPA-filtered professional vacuum transformed my results entirely. I learned to pay close attention to edge cleaning—damp microfiber cloths are game-changers—and to control the environment with proper sealing and fogging when dust levels soar. These personal lessons underscore that meticulous attention now prevents costly mistakes down the line.
Tools and Resources I Rely On for Excellence
Investing in a HEPA-filter vacuum like the Festool CT MIDI I has been essential for thorough dust removal, especially after sanding. My go-to microfiber cloths are the ultra-soft, damp ones that trap fine particles effectively. For moisture monitoring, I trust the Govee WiFi Hygrometer—keeping humidity in check ensures stability and longevity. To deepen my understanding, I recommend exploring expert guides on hardwood refinishing, which provide comprehensive insights that elevate your project from amateur to professional standard.
Your Next Step Toward Flawless Floors
Think of dust cleanup as the foundation of your refinishing success—it’s an investment in durability and beauty. With the right tools and habits, you can transform a dusty challenge into an opportunity for pride in your craftsmanship. Remember, every carefully cleaned surface brings you closer to a flooring masterpiece. I encourage you to embrace these techniques and tools—they’re your secret weapons for dust-free, stunning results. Now, take that next step confidently, knowing you’re equipped with insider wisdom to make your hardwood floor refinishing not just good, but exceptional.