
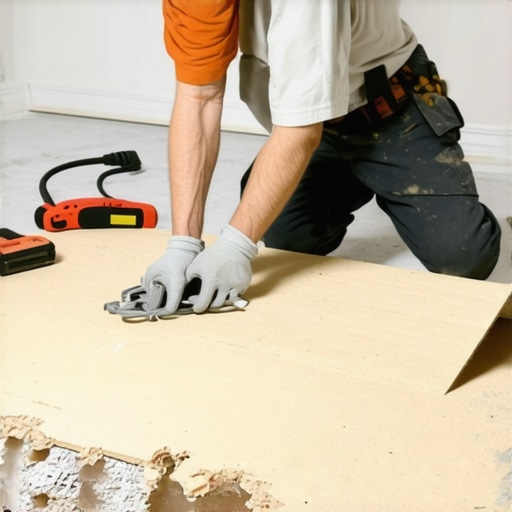
I remember the moment vividly—standing on my creaking, uneven subfloor, realizing that a massive hole I overlooked had turned into a nightmare. It was late at night, and all I wanted was to finish my tiling project, but instead, I faced a gaping hole that threatened to ruin everything. That lightbulb moment hit me hard: I needed a fast, reliable way to patch that large hole without tearing out the entire subfloor.
If you’re staring at a similar problem, don’t worry—you’re not alone. Large holes in plywood subfloors are surprisingly common, especially in older homes or after sloppy repairs. The challenge isn’t just covering it; it’s doing so quickly and effectively, so your new flooring can go down without issues.
Today, I promise to share with you a straightforward method that will have you patch and stabilize your subfloor in no time. No waiting for contractors, no complicated tools—just simple steps that anyone can follow. By the end of this, you’ll be able to repair that large hole with confidence and get back to your project.
Why Fixing Large Holes Quickly Matters
Large holes in plywood subfloors aren’t merely eyesores—they pose serious risks to your flooring’s durability and safety. If left unaddressed, this kind of damage can lead to uneven surfaces, squeaks, or even future structural issues. The key is to repair it promptly, maintaining the integrity of your entire flooring system.
The moment you notice a big hole, your first instinct might be to ignore it or patch with a piece of scrap wood. But that can lead to uneven support, causing your new floor covering to crack or become unstable. Instead, understanding the importance of a solid, level, and well-supported subfloor will save you headaches down the line.
Imagine pouring new tile or hardwood over a weakened, uneven patch. It’s like building on quicksand; the results are unpredictable and often disappointing. A proper fix doesn’t just restore your subfloor—it reinforces it, creating a stable foundation that ensures your beautiful floor lasts for decades.
Furthermore, addressing the issue fast allows you to avoid costly repairs later, which can escalate if the problem worsens. A quick patch now can save thousands, especially if water damage, pests, or other issues have contributed to the hole.
If you’ve ever experienced a sagging or hollow spot under your feet, you know how unsettling it can be. That’s why understanding the best repair methods is so crucial. And trust me, I’ve made my share of early mistakes, like trying to patch with inadequate materials—only to find out that the fix didn’t hold. That’s why I’ll guide you through a proven approach that avoids these pitfalls.
Before we get into the step-by-step process, consider how you can prevent future problems. Regularly inspecting your subfloor, especially in high-moisture areas or after any structural changes, is an excellent way to catch issues early. For more tips on avoiding common installation mistakes, check out [Floor Leveling Challenges](https://tiletrendshop.com/floor-leveling-challenges-common-mistakes-and-how-to-avoid-them).
Now, let’s get practical. With this knowledge, you’ll be ready to tackle that big hole head-on and get your project back on track. Ready to dive into the repair process? Let’s go.
Prepare Your Workspace and Materials
Start by clearing the area around the hole, removing any debris or loose particles that could interfere with the repair. Wear safety goggles and gloves to protect yourself during cutting and handling materials. Gather essential supplies: plywood patches (matching thickness and grain pattern), construction adhesive, screws or nails, a saw, drill, measuring tape, level, and a utility knife. Remember, a well-prepared workspace ensures smoother execution and reduces errors.
Assess and Cut the Plywood Patch
Measure the dimensions of the hole accurately using a tape measure. Add a 1/2 inch margin to ensure complete coverage. Mark these measurements onto your plywood sheet with a pencil. Use a circular saw or jigsaw to cut the patch precisely, mimicking the shape and size of the hole. For irregular shapes, you can trace the perimeter of the hole directly onto the plywood for an exact fit. During my own repair, I used a jigsaw to cut a custom-shaped patch that seamlessly fit into a complex corner, resulting in a nearly invisible repair.
Strengthen the Edges and Fit the Patch
Sand the edges of the patch to remove splinters and create a smooth surface that seats flush. Apply a generous bead of construction adhesive around the edges of the hole and on the back of the plywood patch. Carefully position the patch into the hole, pressing firmly to ensure full contact with the subfloor. Use a level to check that the patch is even with the surrounding floor. When I did this, I pressed down multiple times and used a small weight to keep the patch in place while the adhesive set, preventing any future squeaks or gaps.
Secure and Reinforce the Repair
Fasten the patch with screws or nails around the perimeter at 6-inch intervals. Countersink the fasteners slightly below the surface to prevent interference with flooring installation. Apply additional adhesive beneath the patch if necessary for extra stability. Consider adding blocking underneath, such as wood strips glued and secured with caulk or screws, to reinforce weak areas, especially under large or heavy patches. During my project, I used a pneumatic nailer for quick fastening, which sped up the process and ensured a solid hold.
Finish the Surface for Flooring Compatibility
Once the patch is secured, sand any high spots or uneven edges until flat and flush with existing flooring. Use a gradual sanding block or orbital sander for smooth results. Test the flatness using a straightedge or a self-leveling tool to confirm the surface is continuous. If necessary, apply a floor leveling compound following the instructions on this guide. For larger repairs, I recommend applying the leveling compound in thin layers and allowing each to cure fully, avoiding cracks or bubbles.
Check and Prepare for Flooring Installation
After the patch has cured and the surface is smooth, perform a test by walking over it or pressing with a straightedge to ensure there’s no bounce or movement. Address any remaining low spots with additional leveling compound or sanding. This step is crucial because an uneven patch can cause future flooring issues, such as squeaks, cracks, or delamination. Trust me, taking the time to thoroughly prepare the repair area pays off when installing your new flooring.
Many homeowners and even aspiring professionals fall for misconceptions that can sabotage flooring projects. One widespread myth is that you can simply eyeball flatness without proper tools; in reality, relying solely on the naked eye often leads to uneven surfaces that cause squeaks or cracking [floor leveling challenges](https://tiletrendshop.com/floor-leveling-challenges-common-mistakes-and-how-to-avoid-them). Another mistake is underestimating the importance of moisture testing before installation; hidden moisture can lead to mold, warping, or flooring failure months down the line. Advanced installers know that proper moisture barriers and accurate testing—like the plastic sheet test or calcium chloride tests—are essential for a durable finish.
A critical nuance often overlooked is the significance of subfloor preparation. For example, many assume adding a thin layer of leveling compound suffices, but without proper assessment of subfloor stability and porosity, subsequent issues will arise. To achieve a perfectly flat and stable surface, sophisticated techniques like high-precision self-leveling compounds and examining joist deflections are employed, which are documented in resources such as [precise floor leveling techniques](https://tiletrendshop.com/precise-floor-leveling-techniques-to-achieve-flawless-surfaces). Skipping these steps can result in uneven tile grout lines or uneven hardwood planks.
The hidden nuance is the impact of subfloor material compatibility. For instance, installing certain adhesives or underlayments on concrete or plywood without understanding the chemical interactions can lead to bonding failures or buckling. Experts recommend always consulting manufacturer guidelines and performing small test sections beforehand. Additionally, my own experience taught me that quality matters—cheap adhesives or fast-setting compounds may seem convenient but could compromise the entire project. This is why investing in proper materials and understanding their nuances elevates your craftsmanship.
Lastly, many underestimate the importance of control joints and expansion gaps, especially when dealing with large areas. Failing to incorporate these can lead to cracks and buckling due to thermal expansion or moisture changes. For comprehensive guidance, check out [flooring installation fundamentals](https://tiletrendshop.com/flooring-installation-fundamentals-leveling-for-a-seamless-look). Remember, mastering these nuances not only ensures a visually appealing finish but also prolongs the lifespan of your flooring.
Have you ever fallen into this trap? Let me know in the comments.Maintaining your flooring’s longevity requires the right tools and consistent care. Investing in high-quality equipment like a **laser level** ensures your subfloor remains perfectly flat over time, which is essential for preventing future buckling or uneven tiles. I personally rely on a **Bosch GLL 3-50**, a laser that offers precise, self-leveling capabilities, making long-term maintenance straightforward and accurate. For smoothing out minor imperfections, a **corner-specific floor sander** like the **Mirka DEROS** proves invaluable—its ergonomic design and dust extraction system make routine buffs efficient, reducing wear and tear on your floors. When dealing with stubborn grout or stains, I prefer a **dental-grade steam cleaner**, which converts regular cleaning sessions into deep sanitizing routines without harsh chemicals, preserving the finish of both hardwood and tile. Prediction of future trends points toward integrated smart maintenance systems—imagine sensors embedded in the subfloor alerting you to moisture or shifting before significant damage occurs. To keep your floors looking their best, regular inspections using a **multifunctional moisture meter** are critical, especially in areas prone to humidity fluctuations. A **Protimeter Surveyes** device I recommend provides quick readings, helping you prevent issues like mold or warping.
How Do I Keep My Floors in Top Shape Long-Term
Establish a maintenance routine that combines routine cleaning with periodic inspections. Always use gentle cleaning solutions compatible with your flooring material—avoid overly abrasive products that can wear down surfaces prematurely. For hardwoods, applying a **specialist finish** like **oil-based polyurethane** periodically creates a protective barrier against scratches and spills. When moving furniture, always employ **floor protectors**—small rubber pads or felt strips—to avoid scuffs and dents. I advise scheduling professional deep cleaning or leveling assessments every few years; this proactive approach detects underlying issues early. Moreover, for tile installations, maintaining proper expansion joints and using flexible grout reduces cracking over time, especially in climates with temperature swings. You might consider using an **ultra-violet curing sealant** for added protection, as recommended by experts on [floor leveling challenges](https://tiletrendshop.com/floor-leveling-challenges-common-mistakes-and-how-to-avoid-them). As you improve your maintenance regimen, remember that investing in the right tools makes this process more manageable and effective. Think of equipment like a **self-leveling laser** or **dustless sander** not just as conveniences but as long-term investment—they elevate your ability to sustain beautiful, durable floors. I encourage you to try out a **professional-grade moisture meter** today—small investment, big payback in protecting your flooring investments for years to come.
Lessons That Changed My Approach to Flooring Repairs
One of the most profound lessons I learned was never to underestimate the importance of precise measurements. Rushing through the sizing process of the patch often led to gaps or overlaps, which compromised the entire repair. Accuracy isn’t just about getting it right visually—poor measurements can cause uneven support, affecting the longevity of your floor.
Another insight was the significance of proper adhesive application. In my first attempts, I used too little adhesive, resulting in a loose patch that squeaked underfoot. Now, I understand that a generous, even bead of construction adhesive ensures a solid bond and prevents future squeaks or shifting.
Finally, I realized that reinforcement underneath the patch can make all the difference. Adding blocking or structural bracing beneath large patches creates a more stable foundation, safeguarding your flooring for years to come. This extra step might seem optional, but it transforms a quick fix into a professional-grade repair.
Tools and Resources That Elevated My Flooring Game
My go-to tool for measuring and confirming flatness is the self-leveling laser. It provides an unmatched level of precision that’s crucial when dealing with large patches. For cutting irregular patches perfectly, I trust the custom jigsaw blades and a sharp pencil for marking. These small tools make a noticeable difference in the fit and finish.
For reinforcement, I recommend the floor leveling guide, which offers step-by-step instructions on establishing a pristine substrate before laying your finished flooring. It’s helped me develop a smoother workflow and avoid common pitfalls.
Lastly, never forget a durable good tape measure and a reliable power drill—simple but essential gear that saves time and keeps your project on track. Investing in quality tools is investing in long-term success.
Embrace Your Flooring Journey: Grow with Every Step
Fixing large holes in subfloors isn’t just about patching a gap—it’s an opportunity to hone your craftsmanship and deepen your understanding of flooring structures. Every repair teaches you something new, from material behavior to tool handling, making you more confident with each project. Remember, patience and attention to detail turn a daunting task into a rewarding achievement. Your floors—and your skills—will thank you as you create lasting beauty and stability in your home.