
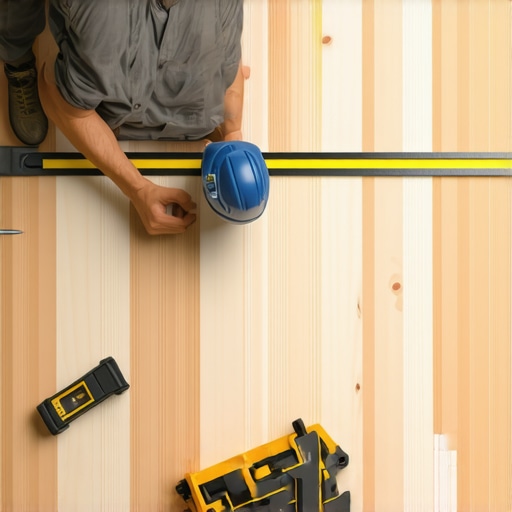
Have you ever stared at a newly laid floor, only to notice the first row is slightly crooked? It’s that sinking feeling when all your careful planning seems to unravel at the very beginning. I remember the first time I tried installing a hardwood floor, confident I’d nail it. But when I stepped back, that maddening slight slant along the first row made me rethink everything. Turns out, that small misstep at the start can cascade into a crooked floor that’s nearly impossible to fix later. That lightbulb moment taught me the importance of perfecting that initial line early on.
The Critical First Step to Flawless Flooring
Ensuring a perfectly straight first row is the foundation of any successful flooring project. It’s more than just eyeballing a line—it’s about precision, patience, and understanding how minor mistakes can snowball. If your first row isn’t aligned properly, the remainder of your layout will be off, leading to gaps, uneven surfaces, and an overall less-than-professional look. But fear not! Today, I’ll guide you through techniques I’ve honed over years of DIY projects to help you lay that first row flawlessly every time.
Is Precise Alignment Really Worth All the Fuss?
Absolutely. Early in my career, I underestimated the importance of that initial line. I naively thought I could correct any mistakes down the line. Spoiler: I couldn’t. Small misalignments tend to amplify, making your entire project look amateurish. According to flooring experts, starting with an accurate, level, and straight first row saves countless headaches and rework. For more detailed strategies, I recommend checking out our step-by-step flooring guide.
Have you faced the frustration of crooked flooring? Stay tuned—I’ll break down simple, proven techniques to make sure your first row is spot on, setting the stage for a beautiful, professional-looking floor that you’ll be proud of for years to come.
Set Up a Reliable Guideline for Your First Row
Start by choosing a reference wall or a corner that visually appears straight. Use a chalk line or a taut string to mark a perfectly straight line across the subfloor where your first row will run. As I did during my last hardwood project, I clamped a long straightedge along this line to serve as a visual guide, ensuring I didn’t drift off course. This simple step creates an initial reference point that guides the rest of your flooring layout and prevents misalignment.
Level the Starting Surface for Consistency
Before laying the first row, check if the subfloor is level using a spirit level or a long straightedge. Uneven surfaces will cause your first row to slant, and correcting this early saves costly rework. When I faced a slightly uneven concrete subfloor last month, I applied a self-leveling compound at strategic spots, then double-checked with my level. This ensured my first row laid flat, preventing problems down the line.
Align Your First Plank with Precision
Place the first board along the guideline, making sure the tongue side faces the final direction of the flooring. Use a carpenter’s square to confirm the edges are at right angles to the wall or reference line. During one installation, I used a carpenter’s square to verify the perpendicularity, which prevented my entire floor from drifting diagonally. Secure the plank temporarily with nails or spacers, but don’t fully fix it yet—this allows for fine adjustments.
Use Spacers to Create an Expansion Gap
Leave a consistent gap between the wall and your flooring—usually about 1/4 inch—to accommodate expansion. I often use plastic spacers, which maintain uniformity across the entire perimeter. This step is crucial, especially for large rooms or during seasonal changes, and ensures your floor won’t buckle over time. Once the first row is perfectly aligned and spaced, proceed cautiously to the subsequent boards.
Double-Check for Straightness and Level
After laying a few boards, step back and examine the row from different angles. Use a straightedge or chalk line to verify alignment. In my recent project, I spotted a slight bow on one board after laying down three planks. I corrected this immediately by nudging the board into alignment before proceeding—small adjustments here prevent cumulative errors.
Clamping and Securing Steps
As you proceed, ensure each new board fits snugly with the previous one. Use tapping blocks and a hammer to snugly fit each piece without damaging the edges. When working with hardwood, I tap gently with a rubber mallet, especially on tongue-and-groove joints, to achieve tight fitting joints that don’t compromise the alignment. Confirm that each row remains straight with your guide and level checks after every few boards.
Address Common Pitfalls Head-On
Be vigilant about subtle deviations in the first row—these can cause cascades of misalignment. For instance, in my earlier experience, neglecting to re-verify the straightedge after each section resulted in a slight drift over an entire wall—a mistake I rectified by removing the affected boards and resetting them accurately. Regular checks are your best defense against crooked floors. For more detailed techniques, our precise floor leveling techniques offer comprehensive strategies to perfect your installation.
Many DIY enthusiasts and seasoned installers alike fall prey to misconceptions about floor leveling and installation, often unknowingly reinforcing myths that lead to costly mistakes. One common myth is that a perfectly flat subfloor guarantees a flawless finish—that’s not entirely true. Subfloor flatness is crucial, but neglecting moisture levels, material compatibility, and proper acclimation can sabotage your project from the start. Overlooking these nuances often results in uneven tiles or warped hardwood that’s difficult to correct later. For instance, recent studies show that moisture imbalance accounts for up to 80% of flooring failures, emphasizing the importance of comprehensive subfloor assessment before installation.
Is Achieving a Truly Level Surface Possible Without Sophisticated Tools?
Many assume that professional-grade equipment is necessary to level floors effectively, but in my experience, using a long, high-quality straight edge combined with a laser level can yield precision comparable to costly tools. Rushing the leveling process or relying solely on visual cues is a trap—small dips or high spots can cause big problems down the line. Proper surface preparation, including targeted grinding or underlayment application, helps mitigate these issues. Don’t forget to check for hidden dips or humps with a water level or a master level; this simple step can prevent a cascade of problems when installing tiles or hardwood. For more advanced techniques, our guide on precise floor leveling offers detailed insights.
Have you ever fallen into this trap? Let me know in the comments.
Another nuance often misunderstood is material acclimation. Many assume that bringing materials into the project space is enough, but without proper humidity and temperature adaptation—typically 48-72 hours in the environment—they can expand or contract after installation, causing cracks or gaps. Hardwood, in particular, is sensitive and requires careful acclimation to avoid warping or buckling later. The myth that these adjustments aren’t necessary might save time initially, but it can lead to significant issues that compromise durability and appearance. According to industry experts, neglecting this step is one of the leading causes of finished floor failures.
Why Do Some Floors Seem Perfect at First but Fail Over Time?
This phenomenon often results from overlooked factors like subfloor material incompatibility or improper adhesive use. For example, applying traditional thinset directly over certain plastics or uneven concrete results in poor adhesion and eventual lifting or cracking. The key is understanding the specific requirements for each substrate and material. Using the correct adhesive, primer, and sealant is essential for long-term performance. I recommend consulting detailed technical guides, such as our tile installation best practices, to ensure every step is executed flawlessly.
In essence, mastering floor installation involves much more than surface preparation. It requires a keen eye for detail, understanding of material behavior, and commitment to thorough testing and correction. Don’t let common myths and misconceptions undermine your efforts. In my experience, paying attention to these hidden nuances makes all the difference between a floor that lasts decades and one that needs early replacement. Ready to elevate your flooring skills? Dive into our comprehensive installation guide and transform your space with confidence.
Keep It Working: Essential Tools for Long-Term Success
Achieving a perfect floor isn’t a one-and-done task; it requires ongoing maintenance and the right tools to ensure it stays pristine for years to come. One tool I swear by is a high-quality moisture meter, particularly for hardwood floors. Moisture fluctuations can cause wood to expand or contract, leading to gaps or buckling. I use a pin-type meter from brands like Wagner, which provides quick, accurate readings of subfloor and ambient humidity. Regular checks every season help me catch moisture issues early, so I can address them before damage occurs. This proactive approach aligns with the insights shared in our comprehensive guide on maintaining flawless installations.
For tile surfaces, specialized cleaning tools like a grout haze remover and soft-bristle scrub brushes are indispensable. I prefer an oscillating tool with a grout removal attachment for deep cleaning and resealing, especially in high-traffic areas. These tools efficiently restore the look without damaging the grout or tiles, prolonging their lifespan. Incorporating surface sealants periodically not only enhances the appearance but also provides a protective barrier against stains and moisture ingress.
Refining Your Methods forDurability
Using a digital level or a laser leveling device is crucial for maintaining proper floor elevation over time. I invest in a laser level from Dewalt that projects a bright, straight line across large areas, making it easier to spot uneven spots and correct them promptly. Maintaining your subfloor’s integrity directly impacts the longevity of your flooring—think of it as the foundation of a house. For example, applying a self-leveling compound to uneven subfloors, as detailed here, can save you from future headaches and costly repairs.
Another key aspect is proper cleaning and protective measures. I recommend a microfiber mop for gentle yet effective dust removal, preventing scratches that can hasten wear. Additionally, installing furniture pads and area rugs in high-traffic zones reduces stress on your floors and preserves their beauty. These small adjustments, combined with routine inspections, ensure your floors continue to look their best long-term.
Anticipating Future Trends in Flooring Care
The industry is moving towards smart maintenance solutions. Imagine integrating IoT-enabled sensors that monitor humidity and temperature levels, alerting you before conditions become problematic. While still emerging, these innovations promise smarter, more proactive maintenance routines, drastically reducing downtime and repair costs. Staying informed about such advancements means you can adopt cutting-edge practices early, giving your floors a true longevity boost. For example, implementing automated climate control systems in conjunction with moisture monitoring can maintain optimal conditions seamlessly.
How can I ensure my flooring remains in top condition over the years?
Adopting a routine check with precise tools like moisture meters and laser levels is your best strategy. Regular inspections, combined with preventive measures—such as sealing, appropriate cleaning, and cautious furniture management—will keep your floors looking vibrant. Don’t forget to document and analyze your results periodically; it helps identify trends and adjust your maintenance plan accordingly. For a detailed maintenance regimen, consult our expert-approved techniques. Try integrating a moisture meter into your quarterly maintenance routine—you’ll be surprised how much it reveals about your environment and the health of your floors.
Lessons That Shaped My Approach to Floor Perfection
- One of the most eye-opening insights was realizing that even tiny deviations in the first row can snowball into major alignment issues, reminding me that precision at the start is always worth the extra effort.
- Another lesson was understanding that subfloor preparation isn’t just a formality—it’s the bedrock of a durable and beautiful floor, and neglecting it often leads to long-term problems that are costly to fix.
- I also learned the hard way that material acclimation isn’t optional; it’s a critical step that prevents warping, gaps, and even failure years down the line, emphasizing that good things come to those who wait.
- The myth that sophisticated tools are the only way to achieve perfect leveling was challenged when I discovered that quality long straightedges and laser levels are surprisingly accessible and effective, making precision achievable for DIYers.
- Finally, I found that routine maintenance tools, like moisture meters and proper cleaning supplies, are investments in your floor’s longevity, transforming a one-time project into a lasting upgrade for your home.
Tools and Resources That Elevated My Skills
- High-Quality Straightedge and Laser Level: These simple but precise tools help you verify every inch, ensuring your initial line is perfectly true. I trust brands like Dewalt and Johnson Level & Tool for their reliability.
- Moisture Meter: An essential for hardwood floors, it helps you detect hidden moisture issues that could cause warping. My go-to is the Wagner MMC220, known for its accuracy and ease of use.
- Technical Guides and Tutorials: The detailed step-by-step instructions on our comprehensive guide have been invaluable, providing tips that save time and reduce errors.
- Specialized Cleaning and Sealing Products: Using the right grout haze removers and sealants prolongs your floor’s beauty. I recommend products from Miracle Sealants for their effectiveness and ease of application.
Your Next Move Starts Here
Now that you’ve learned the core principles and tools for flawless flooring, it’s time to turn knowledge into action. Remember, achieving a perfect floor isn’t about perfection in one day; it’s about continuous attention to detail, learning from every step, and making improvements along the way. Every successful project adds to your confidence and skills, bringing you closer to the professional finish you desire. Dive into the next level of flooring mastery and transform your home into a testament of your dedication. Your perfect floor awaits—go make it happen!