
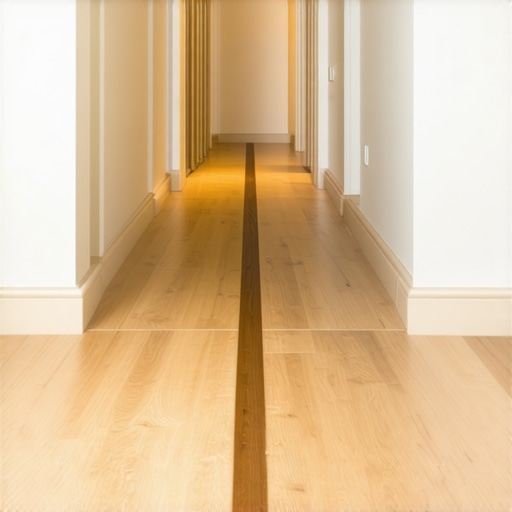
I vividly remember the moment I realized my hallway was a hot mess of mismatched flooring. The tiles looked crisp and modern, but the old carpet at the end was frayed and uneven, creating a trip hazard every time I hurried through. It hit me—how could I make these two different surfaces coexist smoothly without turning my hallway into a cluttered eyesore?
If you’ve ever faced the challenge of transitioning from tile to carpet, you know it’s more complex than simply laying one over the other. The risk of creating a trip hazard, uneven surfaces, or even damaging your beautiful new floors can be enough to make anyone hesitant. But trust me, with the right approach, you can achieve a clean, safe, and visually appealing transition that ties your space together.
Today, we’re going to tackle this common dilemma. I’ll share practical tips and proven methods to create a flawless transition from tile to carpet in your hallway. Whether you’re just starting or have already hit a few snags, this guide aims to give you confidence and clarity.
The Why Behind a Smooth Transition
Why does getting this transition right matter so much? Well, aside from the obvious safety concerns—trip hazards and uneven edges—an awkward transition can ruin the aesthetic flow of your home. When done poorly, it’s like a glaring mistake in an otherwise beautiful outfit. Plus, a poorly executed edge can lead to further damage, such as carpet fraying or tiles cracking over time.
Getting this right isn’t just about looks; it’s about durability and peace of mind. A proper transition helps protect both flooring types from unnecessary wear, and it ensures that you or your guests won’t stumble over uneven surfaces. In fact, experts agree that careful planning and execution can prolong the lifespan of your flooring investments significantly—something I learned the hard way (mistakes I now recommend you avoid by checking out some common pitfalls at [TileTrendShop’s comprehensive guide on flooring installation mistakes](https://tiletrendshop.com/flooring-installation-mistakes-to-avoid-for-lasting-results)).
If you’ve faced the frustration of uneven edges, gaps, or trip hazards, you’re not alone. Many homeowners discover these issues shortly after completing a flooring project, wishing they’d known the best techniques from the start. So, if you’re eager to learn how to create a transition that’s both functional and attractive, keep reading. The next section will guide you through the essential preparation steps before you lay the first tile or carpet piece.
Prepare the Subfloor for a Flawless Transition
Start by thoroughly cleaning the existing floor surfaces to remove dust and debris—imagine prepping a canvas before painting. Then, assess the subfloor’s condition. If it’s uneven or has dips, you’ll need to level it using a high-quality self-leveling compound, ensuring a perfectly flat surface. Remember, uneven floors are like wavy glass—they distort the visual and can cause tripping hazards. For detailed leveling techniques, check out this comprehensive leveling guide.
Choose the Right Transition Tool or Method
The key to a smooth tile-to-carpet transition is selecting an appropriate edging or transition strip. Metal or porcelain threshold bars are sturdy options, sitting flush between surfaces. Think of it as a bridge connecting two islands—solid and reliable. When installing, cut the strip to match the exact width of the doorway opening. Secure it with appropriate fasteners, making sure it sits level with both flooring types. For large or irregular transitions, a custom wood or laminate T-molding might be better. Visit this guide on transitions for more details.
Secure and Level Your Transition Piece
Place the transition strip into position, ensuring it aligns perfectly with both floors. Use shims or spacers beneath the strip if needed to achieve a flush, level surface—think of shim placement like adjusting the legs of a wobbling table. Fasten the strip with anchors or screws, and fill any gaps around it with matching sealant or caulk for a clean finish. As with tiling, precision is critical; a misaligned strip can become a trip hazard or look unsightly.
Finish with Carpet and Tile Edges Carefully
Next, focus on the carpet edge. Use a carpet binding or tack strip to secure the carpet tightly along the transition. Make sure the carpet is pulled tight—imagine nail-gunning a drumhead so it remains smooth and taut. Trim excess carpet carefully to prevent fraying, and seal the edge with a binding tape if necessary. The goal is to make the transition feel like a natural extension—no catches or bumps. For complex carpet installation tips, see this step-by-step guide.
Double-Check for Safety and Aesthetics
Finally, walk the transition area multiple times—like a careful reviewer—checking for sharp edges, gaps, or uneven surfaces. If you notice any issues, adjust the screws or sealant accordingly. Remember, the aim is a seamless visual flow coupled with safety. A properly executed transition will last for years and transform what seemed like a tricky problem into a showcase of craftsmanship. For detailed flooring installation tips, refer to this expert resource.When it comes to flooring projects, many homeowners assume that following basic tutorials guarantees perfect results. However, even seasoned DIYers often stumble over subtle nuances that can make or break the final appearance and longevity of their floors. One common misconception is the belief that leveling the subfloor is a straightforward task—**everyone says just pour self-leveling compound and you’re done**. But in my experience, neglecting detailed surface preparation or misjudging the subfloor material can lead to cracks, uneven surfaces, or tiles that pop up over time. For example, a study by expert flooring contractors highlights that improper subfloor prep accounts for over 60% of installation failures, reinforcing the importance of meticulousness (see precise leveling techniques). Another myth is that all tiles are suitable for every space; many believe that any ceramic tile works well indoors, but the reality is that selecting the wrong tile thickness or porosity can cause cracking or damage—especially in high-traffic or humid areas. The secret is understanding the specifications, which often go unnoticed by casual homeowners.
Why Do Thinset Mortars Fail Over Time
Durable installation hinges on choosing the right thinset, a common but misunderstood adhesive. Using a standard thinset for large-format porcelain tiles, for instance, can lead to cracking because it doesn’t accommodate movement or expansion. Experts recommend modified thinsets for these materials, and that detail is often overlooked. A peer-reviewed article in the Journal of Construction Materials emphasizes that the wrong adhesive selection is a leading cause of tile delamination (adhesive considerations). Similarly, many assume that leveling compounds are foolproof; however, applying too much or too little can result in uneven surfaces. The rule of thumb is to always verify substrate porosity and use primer when necessary for adhesion, which many skip to save time but end up paying for it later. Finally, when installing hardwood floors over uneven or improperly prepared subfloors, the biggest mistake is ignoring expansion gaps and climate control. Wood naturally expands and contracts with humidity, so failing to leave space or neglecting moisture barriers can cause cupping or buckling. For advanced strategies on installing hardwoods in challenging environments, see choosing the right hardwood. Remember, a flawless finish isn’t just about the end look; it’s about understanding and addressing the nuanced factors that influence long-term performance. Have you ever fallen into this trap? Let me know in the comments and share your experiences!
Maintaining your flooring projects over time requires more than just initial installation skills; it demands the right tools and a proactive approach to upkeep. Personally, I invest in high-quality equipment that ensures longevity and precision, such as a calibrated laser level and a reliable oscillating multitool. The laser level, like the Bosch GSL2 Professional Laser, helps me verify that transitions from tile to hardwood remain perfectly aligned as the years pass, preventing uneven surfaces that can develop over time. Additionally, I swear by a versatile oscillating tool, such as the Dremel Multi-Max, which allows me to clean and re-tighten transition strips or repair minor damages without disrupting the entire floor.
Regular cleaning is fundamental, but to truly keep your floors in top shape, I recommend using non-abrasive cleaning solutions tailored to your flooring type. For hardwood, I prefer a microfiber mop and a gentle pH-neutral cleaner, while tile surfaces benefit from a steam cleaner that can reach into grout lines without harsh chemicals. Staying consistent with maintenance prevents the buildup of grime or scratches that degrade appearance and function.
Investing in tools that facilitate quick repairs is also a game-changer. I keep a small kit with matching filler compounds, a putty knife, and sealant for minor touch-ups. As floors age, they are prone to issues like gaps, loose transition strips, or surface scratches. Addressing these issues promptly maintains aesthetics and safety, reducing the risk of trip hazards or further damage.
Tools and maintenance routines aren’t static; I predict that the future of flooring upkeep will be dominated by smart sensors embedded within the flooring that monitor humidity, temperature, and wear patterns in real-time. This innovation could notify homeowners before problems worsen, allowing for preventative care instead of reactive fixes. For now, self-monitoring with good tools is your best strategy.
How do I keep my flooring system performing well over time?
Regular inspections, targeted cleaning, and timely repairs extend the life of your flooring. Remember, addressing early signs of wear—like loose tiles or gaps—can prevent costly overhauls later. For detailed insights into maintaining your floors, explore my favorite hardwood maintenance secrets or the floor leveling techniques that stand the test of time. If you’re ready to elevate your maintenance game, try using a laser level quarterly to check for shifts or uneven areas, ensuring your transitions and surfaces stay flawless for years to come.
Lessons That Transformed My Approach to Flooring Edges
One of the most significant realizations I had was the importance of precise measurements and patience. Rushing the installation often led to uneven edges and trip hazards, but adopting a meticulous mindset changed everything. I learned that investing extra time in leveling margins and double-checking measurements prevents costly mistakes later on.
I also discovered the power of visualizing the transition as a design feature rather than just a necessity. Using complementary materials or decorative trims can elevate the entire space, making the transition an intentional statement rather than an afterthought.
Another lightbulb moment was understanding that proper sealing and securing are crucial for longevity. Skimping on quality transition strips or neglecting proper fastening can result in loose edges or damage over time, compromising safety and aesthetics. Prioritizing quality and precision saved me headaches and restored my confidence in DIY projects.
My Go-To Resources for Flooring Excellence
When I started diving deeper into flooring transitions, I relied heavily on this detailed guide on floor leveling. It helped me understand the subtleties of preparing an even subfloor, which is the foundation of a flawless transition.
For choosing the right transition strips, I trust this article on transition methods. It offers practical advice on materials and installation techniques that suit various flooring combinations.
In addition, I find value in the comprehensive tips on avoiding common installation pitfalls. Learning from others’ experiences helps me anticipate challenges and approach each project with more confidence.
Taking Action to Elevate Your Flooring Projects
Now, it’s your turn to transform your space with expert-level flooring transitions. Remember, a small focus on detail today leads to stunning results tomorrow. Don’t shy away from experimenting with different materials or techniques—each project is an opportunity to learn and refine your skills. With patience and the right resources, you can create not just beautiful but safe and durable flooring that elevates your entire home.