
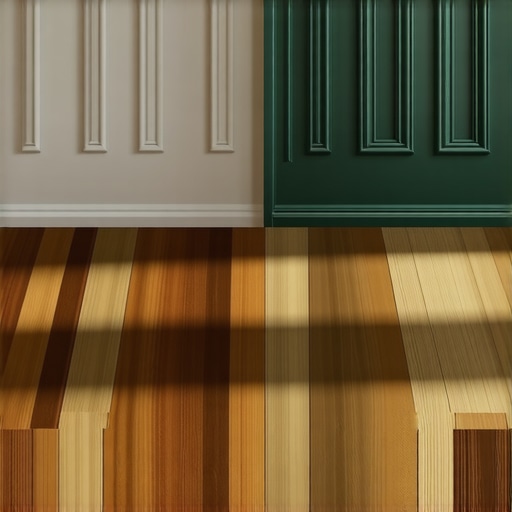
Have you ever stepped into a room where the new hardwood just doesn’t seem to match the old, leaving that awkward, jarring line where the two meet? I remember the day I faced that challenge; I had laid fresh planks in my living room, only to realize the transition from the aged oak of the hallway made the entire space look mismatched. That lightbulb moment hit me hard: blending old and new flooring isn’t just about aesthetics—it’s about creating harmony and feeling truly at home.
Why Blending Hardwood Floors Without a Transition Matters
Seamlessly integrating new flooring with existing surfaces can transform the look and feel of your space. But it’s not just about aesthetics—it’s also about preservation and avoiding common pitfalls that can turn a simple renovation into a costly mistake. Imagine walking into a room where the new hardwood feels like it belongs—you’ll save yourself from future trips and potential damage caused by uneven surfaces or obvious separations. Plus, mastering this skill can add significant value to your home, making renovations more cost-effective and visually appealing.
Is It Really Possible to Blend Without a Transition? The Skeptic’s Question
When I first embarked on this project, I was skeptical. I worried that blending would require expensive custom trims or complicated installations. Early on, I made a critical mistake: I underestimated the importance of subfloor preparation, which led to unevenness and visible seams. That’s why I recommend learning about proper floor leveling techniques before attempting such a task. Trust me, knowing the right methods can turn a herculean task into a manageable project and guarantee lasting results.
If you’ve been putting off blending your floors because it seems daunting or uncertain, you’re not alone. Many homeowners face the same doubts. Fortunately, with a few expert tips and the right tools, you can achieve a seamless look that feels natural and inviting. Ready to discover how? Let’s explore the essential steps to master this blending technique and make your floor a true showstopper.
,
Prepare Your Subfloor Carefully
Start by removing all debris and old adhesives from the area to ensure a smooth surface. Use a moisture meter to verify the subfloor’s dryness; any moisture can cause future warping. Just like laying a foundation for a house, a stable and level subfloor is critical to prevent unevenness. I once skipped this step on a small patch, and months later, the new boards started creaking and separating. Investing time here saves headaches later.
Level the Surface with Precision
Next, identify uneven spots using a long straightedge or a dedicated level. For low spots, apply a high-quality self-leveling compound, following the manufacturer’s instructions. Think of this process like filling in the dips on a uneven road to create a smooth drive. I mixed a batch myself, but bubbles formed in the compound because I didn’t stir it properly—lesson learned. For high spots, a vibratory plate or grinder can flatten protrusions.
Use Proper Tools for Better Results
Ensure you have the right notched trowel and a smooth roller. When applying leveling compounds, a trowel helps spread the material evenly; a roller removes air bubbles and pushes the compound into crevices, preventing voids. I once used a too-wide trowel, which caused uneven thickness—leading to a bumpy final surface. Practicing this small step makes a significant difference in the final foam-free, flat surface.
Plan the Transition Zones Effectively
When nearing existing flooring, measure the height difference between the new and old surfaces. For minimal differences, a slim hardwood reducer or T-molding can create a seamless transition; for larger gaps, you might need a transitional strip. Learn more about transition solutions. Once, I installed a transition strip incorrectly, causing a trip hazard—precipitating a re-do. Accurate measurements and proper tools can save time and create safer, cleaner results.
Install with Precision and Care
Lay each plank carefully, ensuring tight joints and consistent gaps for expansion. Use spacers to maintain uniformity and avoid buckling—think of it like building a puzzle; each piece must fit perfectly. I once rushed this step, and the boards started to cup. Patience and attention to detail now will prevent costly fixes later.
Finish and Seal the Floor
Once installed, sand the surface smoothly, then apply a suitable finish to protect your flooring. Use a vacuum to remove dust before sealing; a clean surface results in a glossy, durable finish. I applied a finish without proper ventilation, which caused a strong odor—I learned the importance of working in a well-ventilated space. Proper sealing enhances longevity and maintains visual appeal for years to come.
By following these detailed steps, you turn the complex task of blending new hardwood into existing flooring into a manageable, rewarding project. Every step from leveling to transition is vital to achieving that seamless look that enhances your home’s beauty and value.
Many homeowners believe that laying flooring is a straightforward process, but in reality, there are nuanced pitfalls that can compromise the longevity and appearance of your floors. One common misconception is that matching new hardwood to existing floors is simply a matter of selecting a similar color or tone. However, experts emphasize that understanding the wood’s grain, finish, and aging process is crucial for a seamless blend. According to industry studies, mismatched finishes or grain patterns can lead to an uneven visual flow, especially in open-concept spaces. Another frequent mistake is underestimating the importance of proper subfloor preparation. While it might seem tedious, skipping this step can cause uneven surfaces that lead to creaking, gaps, and even buckling over time. Many installers overlook moisture testing, which is vital because excess moisture can cause wood to warp and stain. Advanced practitioners always recommend using a moisture meter to ensure a dry, stable foundation before installation. And let’s not forget about the myth that floor leveling is unnecessary if the surface looks flat. However, even slight imperfections can become glaring over larger areas or under certain lighting conditions, affecting both aesthetics and structural integrity. For those seeking flawlessly installed floors, precise leveling techniques are essential, as highlighted in expert resources on floor leveling methods. A hidden nuance often overlooked is the difference between modified and unmodified thinset when laying tiles adjacent to hardwoods. Using the wrong type can lead to adhesion issues or future delamination. It’s a subtle point, but one that can make or break a professional-looking finish. Interestingly, many installers also assume that all adhesives are created equal, but the optimal choice depends on the specific materials and environmental conditions. For example, high humidity demands different formulations, as supported by studies from flooring research institutions. Have you ever fallen into this trap? Let me know in the comments. Mastering these advanced details helps avoid costly mistakes and ensures your floors look stunning and last for decades.
Invest in Precision Tools for Consistent Results
When it comes to flooring installation and maintenance, having the right equipment makes all the difference. I personally rely on a high-quality laser level, like the Bosch GSL 2 Professional, to ensure floors are perfectly flat before laying new material. Its accurate readings save hours spent on manual checks and prevent uneven surfaces that could cause future damage. Additionally, a moisture meter such as the Tramex CME5 helps me verify subfloor dryness—crucial for preventing warping in hardwood floors. Regularly checking moisture levels with a reliable device ensures your investment stands the test of time, especially in areas prone to humidity fluctuations.
Maintain Your Floors with Specialized Products
Cleaning isn’t just about appearance; it directly influences the longevity of your floors. I recommend using pH-balanced cleaners designed specifically for hardwood or tile, like Bona Hardwood Floor Cleaner, to preserve finishes and minimize wear. Periodic refinishing with quality sealants also extends the life of your hardwoods, protecting against scratches and water damage. Remember, avoiding abrasive tools during cleaning prevents micro-scratches that can dull surfaces over time. Incorporating these maintenance routines into your regular schedule keeps your floors looking pristine and functioning smoothly for years.
How do I keep my flooring performing well over time?
Routine inspections are essential—check for loose tiles, creaking hardwood, or uneven spots. Using a straightedge or flashlight can help spot high or low areas early. For leveling small imperfections, a self-leveling compound like Ardex FeatherFinish is my go-to—it’s easy to apply and sands smoothly. To prevent issues, I always follow the manufacturer’s guidelines meticulously, especially regarding curing times and mixing ratios, as detailed in innovative tile design resources. Regular upkeep and timely repairs significantly reduce costly replacements later.
Tools I Recommend for Flooring Mastery
For advanced maintenance, an oscillating multi-tool proves invaluable. I prefer the Fein Multimaster because of its precision and variety of attachments, ideal for sanding out small imperfections or removing old adhesive residues without damaging surrounding surfaces. When applying transition strips or sealing gaps, a quality caulking gun like the Bostitch BXC650K offers controlled application, ensuring neat edges and optimal adhesion. These tools streamline your workflow, reduce errors, and help achieve professional-grade results. Experimenting with these tools could elevate your flooring projects to the next level.
Planning for Long-Term Results and Scaling
As your space evolves, so should your maintenance approach. Embrace a proactive mindset—schedule annual inspections, reapply finishes when needed, and invest in durable equipment designed for frequent use. For larger projects or renovation scales, modular tools like cordless vacuum systems or multi-function levelers facilitate efficient work across expansive areas. Looking ahead, advancements in flooring technologies, such as smart sensors for moisture monitoring, are poised to revolutionize maintenance routines, making predictions and preventive actions even more precise. Keeping abreast of these innovations ensures your floors remain stunning and functional for decades.
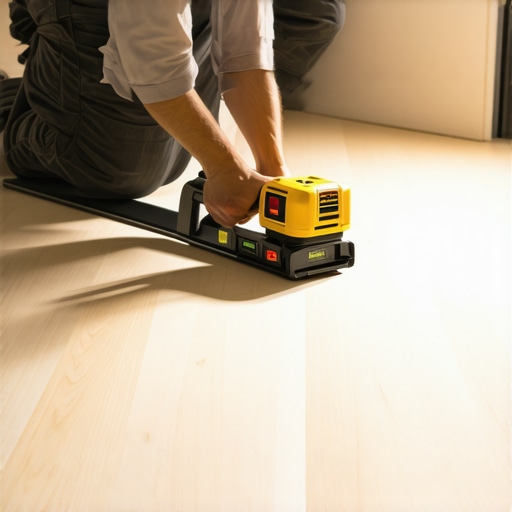
Take the time to incorporate these specialized tools and maintenance strategies into your workflow. For instance, trying out a laser level in your next project can dramatically improve the accuracy and professionalism of your finish. Remember, the key to lasting flooring success isn’t just installation—it’s ongoing care and utilizing the right equipment. Dive into product reviews or tutorials and experiment with tools like the oscillating multi-tool to see immediate improvements in your results. Ready to give your floors the attention they deserve? Start with one of these expert-recommended tools today and experience the difference in every step of your project.
What the Hardest Lessons About Blending Floors Taught Me
One of my most eye-opening experiences was realizing that even the tiniest oversight in subfloor preparation can sabotage an entire flooring project. I once ignored a small dip in the subfloor, thinking it wouldn’t matter—only to find months later that the hardwood started squeaking and developing gaps. That moment taught me the importance of meticulous leveling and thorough moisture testing, especially when blending new and old floors. It’s the little details that make or break a seamless look and lasting durability.
My Go-To Tools That Save My Flooring Projects
Over the years, I’ve come to rely on specific tools that elevate my flooring installs. A laser level like the Bosch GSL 2 ensures perfect flatness, making the entire process smoother and error-free. The Tramex CME5 moisture meter helps me catch hidden moisture issues before they become costly repairs. And a high-quality oscillating multi-tool, such as the Fein Multimaster, allows me to perfect transitions and trim work precisely. Investing in these tools has truly transformed my approach and results.
Take Action and Elevate Your Flooring Skills
Now is the time to put these insights into practice. Whether you’re considering a complete renovation or just blending new hardwood into your existing floors, applying these lessons will lead to a more refined and lasting result. Remember, mastering floor blending isn’t just about aesthetics—it’s about creating a space that feels cohesive, durable, and inviting. Ready to make your next project your best yet? Dive into the process with confidence, armed with the right tools and knowledge. Have you ever faced a flooring challenge that taught you something unexpected? Share your story below and let’s learn together.