
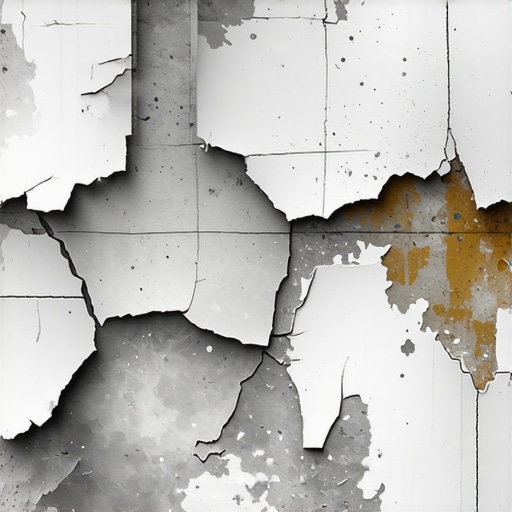
Ever had that sinking feeling when you walk into a room and notice your freshly leveled floor is already starting to reveal the cracks or patches where the primer has peeled away? I remember the first time I experienced this nightmare—thinking I did everything right, only to find stubborn peeling spots after just a few days. It was frustrating, disheartening, and honestly, it made me question my entire approach to flooring.
< h2 >The Frustration of Peeling Primer< /h2 >
Leveling a concrete subfloor is a crucial step in ensuring your flooring lays smoothly and lasts for years. But a common, yet often overlooked, issue is the primer not adhering properly—peeling off and exposing the uneven concrete below. This problem isn’t just about aesthetics; it can compromise the entire installation, leading to costly rework.
Luckily, after some trial, error, and quite a few lessons learned, I was able to pinpoint the reasons behind primer peeling. Today, I want to share how you can avoid these pitfalls and set yourself up for a successful, long-lasting flooring project.
< h3 >Is Primer Peeling Really That Big of a Deal? < /h3 >
Absolutely. When primer fails, it’s like building a house on shaky ground. The adhesion is compromised, which can cause your leveling layer to shift, crack, or even lift over time. And trust me, fixing peeling primer after the fact is a headache you don’t want. According to industry experts, proper surface preparation and choosing the right primer are key to preventing this issue (see < a href="https://tiletrendshop.com/floor-leveling-challenges-common-mistakes-and-how-to-avoid-them" target="_blank" >this guide for more insights).
Early on, I made the mistake of rushing the surface prep, thinking that a quick sweep was enough. That’s a mistake I won’t repeat. If the concrete isn’t clean, dry, and properly primed, peeling is almost inevitable.
So, if you’ve faced peeling primer, know that you’re not alone—many homeowners and even professionals stumble on this. But don’t worry; the solution is simpler than you might think. Next, we’re diving into the exact steps to ensure your primer sticks like glue and your project stands the test of time.
Prepare the Surface Thoroughly Before Applying Primer
Start with a clean, dry, and sound concrete slab. Use a industrial vacuum or broom to remove dust, debris, and grease—any particles that can interfere with primer bonding. I once skipped this step, thinking a quick wipe would suffice, but the primer peeled off within days because of trapped dirt. Ensure your surface is spotless to create an ideal base for the primer.
Use the Right Primer Type for Your Floor
Not all primers are created equal. For concrete floors, a bonding primer designed for porous surfaces is essential. I recommend a primer specifically formulated for floor leveling compounds, such as acrylic or epoxy-based primers, depending on your needs. Check the product specifications and choose one compatible with your leveling material. Using an incompatible primer can lead to peeling, which I found out the hard way when a generic primer failed after a few weeks.
Apply Primer Correctly and in Thin, Even Coats
Follow the manufacturer’s instructions precisely. Use a roller for large areas to spread the primer evenly, avoiding globules or thin spots. Applying too thick can cause the primer to dry unevenly and lose adhesion. In my experience, I used a foam roller to prevent streaks, and I worked in small sections to maintain control. An even application guarantees better sticking power, reducing peel-offs.
Allow Adequate Drying Time and Conditions
Patience is key. Let the primer cure fully before pouring leveling compounds or overlaying flooring. Most primers require at least 2-4 hours, but check your product’s label for specific drying times. Avoid applying primer in humid or cold environments, as moisture and low temperatures hinder proper drying. I once rushed a job during a rainy spell, and the primer remained tacky, leading to failures shortly after. Use a dehumidifier or climate control if necessary.
Use the Compression Technique to Ensure Bonding
Once the primer has dried, gently compress the leveling compound into the primer using a trowel or float. This step integrates the layers and minimizes air pockets. When I leveled my first floor, pressing the layer down firmly prevented bubbles and adhesion issues, resulting in a smooth, durable surface.
Check Surface Readiness Before Proceeding
Perform a simple test: sprinkle a few drops of water onto the primed surface. If the water beads up without soaking in, the primer is fully cured and ready for the next step. If it soaks in immediately, give it more time. Rushing this process is a common mistake that causes peeling later, as I experienced during a hurried project.
Consult Resources for Precise Techniques
For comprehensive guidance, review detailed methods at this resource. Proper priming is a foundational skill, and mastering it ensures your entire flooring project stays intact over decades. Remember, ignoring these details often leads to costly repairs and frustration later, a lesson learned during my early attempts.
Many homeowners and even professionals often fall prey to misconceptions when it comes to hardwood flooring, installation, and leveling. A widespread myth is that using the thickest primer or the most expensive leveling compound automatically guarantees perfect results. In my experience, what truly matters are nuanced application techniques and understanding the material’s behavior under specific conditions. For instance, overestimating your subfloor’s stability without proper assessment can lead to hidden issues that surface months later, like squeaks or unevenness, despite flawless initial installations. Prioritizing surface preparation and understanding the thermal expansion properties of your chosen materials helps avoid these pitfalls. Remember, a smooth finish isn’t solely about the product but also about mastering the intricate details of installation—like controlling moisture content and ensuring proper curing times, as detailed in professional resources on floor leveling techniques.
Keeping It Working: Essential Equipment and Proven Methods
Maintaining perfectly leveled and enduring hardwood or tile floors requires not just initial craftsmanship but also the right tools and a disciplined maintenance routine. Over the years, I’ve tested several equipment pieces that make long-term upkeep more manageable and help prevent costly repairs down the line.
One indispensable tool in my arsenal is a high-quality moisture meter. It’s crucial to regularly check ambient and subfloor moisture levels, especially in climates prone to humidity fluctuations. Consistent moisture readings ensure that your flooring remains sealed and stable, preventing warping or buckling as detailed in this resource.
Additionally, investing in a good air purifier with HEPA filters helps reduce dust and airborne particles that can settle into floor finishes over time. Maintaining a dust-free surface minimizes scratches and keeps your finish looking pristine, aligning with hardwood care secrets found here.
For regular inspections, a powerful LED flashlight and a simple circular sander with a dust collection attachment are invaluable. The flashlight illuminates high spots or uneven areas, echoing the flashlight test for flatness, while the sander removes small surface imperfections that can cause uneven wear. I recommend the orbital sander with adjustable speed and vacuum connection for controlled, dustless refinishing as discussed in professional tips here.
Beyond tools, establishing a maintenance routine is crucial. Periodic cleaning with a pH-balanced wood floor cleaner preserves the finish, while using felt pads under furniture prevents scratches. Regularly inspecting for signs of moisture or loose planks allows early intervention, extending your floor’s lifespan significantly.
Looking ahead, advancements in smart home sensors could revolutionize floor maintenance by providing real-time data on humidity, temperature, and structural shifts. Embracing these technologies can forewarn homeowners about issues before they become visible, saving time and money.
How do I keep my floors in top shape over time?
Consistent care involves a combination of proper cleaning, environmental control, and routine inspections. Use tools like moisture meters and LED flashlights to identify potential problems early, and follow recommended practices for cleaning and furniture placement. Remember, a proactive approach is far more effective than reactive repairs, especially when coupled with modern technology, as highlighted here. Try integrating a regular moisture check into your quarterly maintenance routine to catch issues before they escalate—your floors will thank you for it.
The Hardest Lesson I Learned About Floor Primer That’s Still Shaped My Projects
- Going beyond the surface: I realized that meticulous surface preparation isn’t just a step—it’s the foundation of success. Skipping detailed cleaning almost always led to peeling issues down the line, reinforcing the truth that attention to detail saves time and money.
- The magic of patience: Rushing to install layers without fully curing the primer caused me unnecessary headaches. Waiting for the recommend drying times transformed my results from shaky to rock-solid, proving patience is a vital component in flooring.
- Compatibility is king: Using the wrong primer left me battling peeling and adhesion failure. Investing time to research and select the right primer for specific substrates and leveling compounds made all the difference, reminding me that the quality of materials directly impacts longevity.
- Technique over tools: Applying primer in thin, even coats with a roller might seem simple, but truly mastering this technique prevented uneven bonding and future peeling. It’s often the small, consistent actions that lead to professional-grade finishes.
- Testing before proceeding: The water bead test became my go-to step before pouring leveling compounds. Confirming primer readiness visually and tactilely avoided premature overlaps, showcasing the importance of inspection in craftsmanship.
My Must-Have Resources for Floor Leveling and Installation
- This guide on precise floor leveling techniques from Tile Trend Shop is invaluable for mastering surface preparation and ensuring your primer bonds perfectly—it’s the blueprint I wish I had early on. Discover techniques here.
- Mastering floor leveling pro secrets offers insider tips from seasoned professionals, saving me from costly mistakes and guiding me through advanced techniques. Read more.
- Contact us at Tile Trend Shop for personalized advice—sometimes a quick chat helps clarify complex steps and tailor solutions to your specific flooring project. Reach out today.
Take Charge of Your Flooring Journey Today
Remember, mastering the art of proper primer application and surface prep is more than just a technical skill—it’s a commitment to building beautiful, durable floors that stand the test of time. With patience, the right resources, and a keen eye for detail, your flooring project can surpass expectations. Don’t let small mistakes snowball into costly repairs—embrace these lessons and set yourself up for success. Your renewed, flawless hardwood or tile floors are just a few informed choices away.
What has been your biggest lesson learned when preparing a floor for leveling or finishing? Let me know below!
,