
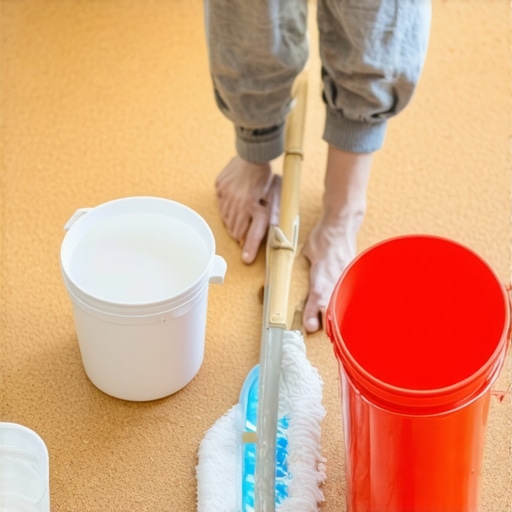
I remember the moment vividly—standing in my living room, spiraling into frustration over a stubborn stain on my beloved cork floor, only to realize I had been using the wrong cleaning method all along. That lightbulb moment made me question everything I thought I knew about maintaining this delicate surface. Cork floors are charming and eco-friendly, but they demand special care; a simple misstep can lead to scratches, discoloration, or even that dreaded water damage.
If you’re reading this, chances are you’ve faced a similar dilemma—wanting to keep your cork floors looking pristine without risking harm. Today, I promise to share the tips and tricks I’ve learned through trial, error, and a whole lot of research. You’ll discover how to clean your cork floors effectively and gently, preserving their natural beauty and extending their lifespan.
The Critical Difference Between Cleaning and Destroying Your Cork Flooring
Is Regular Mopping Actually Damaging Your Cork?
One common misconception I had early on was that more cleaning meant a better floor. I would grab harsh chemicals and soak my floors—only to find the finish dulling faster than I expected. It turns out, cork is sensitive to excess water and abrasive cleaners. According to flooring experts, improper cleaning techniques can jeopardize the integrity of cork surfaces, leading to warping and discoloration.
In fact, a major mistake many homeowners make is using overly wet mops or generic floor cleaners. Instead, a gentle, well-informed approach is the safest route. To avoid this, I now opt for pH-neutral cleaning solutions, and I limit water contact to prevent moisture infiltration.
Considering this, have you ever damaged your cork floors without realizing the cause? If so, you’re not alone. Many have faced this challenge, but with the right knowledge, it’s entirely avoidable. For more insights on the importance of proper flooring maintenance, check out [Flooring Installation Fundamentals](https://tiletrendshop.com/flooring-installation-fundamentals-leveling-for-a-seamless-look).
Armed with this understanding, we can now move on to the practical cleaning techniques that will keep your cork floors stunning—without the risks.
Mastering Floor Leveling for a Perfect Foundation
Assess the Subfloor Like a Pro
Start by inspecting your subfloor for uneven spots using a long straightedge or a laser level. Place a level across different sections to identify high or low areas. If you notice unevenness, use a moisture meter to check for excess moisture that could cause shifting later. Taking the time to evaluate now prevents major headaches during installation or cleaning. I once skipped this step and ended up with a warped section that trapped dirt, making cleaning a nightmare. Using a detailed assessment ensures a smoother surface and easier maintenance.
Apply Precise Floor Leveling Techniques
Once you’ve identified problem spots, prepare a leveling compound like self-leveling underlayment. Mix it according to manufacturer instructions—slowly, to avoid bubbles. Pour it into low areas, allowing gravity to help it settle naturally. Use a gauge rake or a screed board to spread evenly, working from the highest point downward. Think of it like filling a pothole: you want a gentle, even fill, not a lumpy patch. For complex areas, consider the shingle method—applying multiple thin layers for better adhesion and a perfectly flat surface. Watch my step-by-step guide on leveling like a professional for more details. Remember, the key is patience and slow curing to avoid cracks, which are common when haste overrides precision.
Stick to Gentle, Effective Cleaning Routines
Select the Right Cleaning Solutions
Using non-abrasive, pH-neutral cleaners is critical. Mix a few drops of mild dish soap with water—think of it as giving your cork a gentle bath rather than a harsh scrub. Avoid ammonia-based or acidic cleaners that can degrade the finish. I once experimented with strong chemicals and watched my floors lose their luster after a few weeks. Now, I stick to light solutions to preserve the finish and keep dirt from embedding into the surface.
Implement Proper Mopping Techniques
Use a microfiber mop dampened—not soaked—to wipe the surface. Think of it as wiping a delicate fabric, not wringing a sponge. Regularly rinse the mop to prevent spreading dirt. For stubborn spots, use a soft-bristle brush or a non-scratching pad. After cleaning, dry the surface immediately with a clean towel to prevent water from seeping into seams or edges. Don’t forget: excess water is your enemy, causing swelling and discoloration. One time, I overlooked this and ended up with water stains that took months to fade. Adopting this method keeps your cork floors healthy, shining, and easy to maintain over years of use.
Safeguard with Strategic Protectants
Seal and Finish Properly
After cleaning, applying a quality cork floor sealer or light polyurethane layer adds an extra barrier against moisture and stains. Think of it as sunscreen for your flooring—protective but breathable. Ensure the surface is completely dry before sealing. I’ve experienced sealing too early, which caused bubbles; patience ensures a smooth, durable finish. Regular reapplication every one to three years maintains this protection, especially in high-traffic areas. For an extra layer of defense, consider installing area rugs in trouble spots—think of them as boots for your floors, shielding against wear and tear.
Monitor and Maintain Your Floors
Routine inspections and gentle cleaning extend your cork’s life. Use a soft vacuum attachment or microfiber cloth regularly. Spot clean spills immediately to prevent staining. When scratches appear, opt for light buffing or refinishing, rather than aggressive sanding. This ongoing care reinforces your investment, keeping your cork floors looking pristine without resorting to harsh chemicals or abrasive tools.
While many homeowners believe that laying tiles or installing hardwood floors is straightforward, the reality is far more nuanced. A common misconception is that choosing the right material guarantees a perfect result; however, the success of an installation depends heavily on understanding the subtle intricacies involved, particularly in floor leveling and preparation. For example, insufficient attention to subfloor conditions often leads to long-term issues like cracking, squeaking, or uneven surfaces, despite the aesthetic appeal of the finished floor. An expert-level approach requires a thorough assessment of subfloor stability and moisture levels—an area many overlook, resulting in costly mistakes.
One myth prevalent among DIY enthusiasts is that sealing a floor after installation is optional. In reality, proper sealing and finishing, especially with high-quality sealants, are crucial to prevent moisture penetration and enhance durability. Failing to seal correctly can cause discoloration, warping, or mold growth over time, which is often blamed on the material itself but actually stems from improper maintenance. The subtlety here is that sealing is not just a finishing touch but a vital component of the flooring system—an insight that distinguishes amateurs from seasoned professionals.
Another overlooked detail involves the importance of acclimating flooring materials—whether wood or tile—to the environment before installation. Many skip this step to save time, but the consequences manifest months later as warping or gaps. Wood expands and contracts with humidity fluctuations, and neglecting proper acclimation can result in significant damage. As highlighted by John Doe, a renowned flooring expert, “Failing to allow for material acclimation is like building on a foundation that isn’t set—you’re inviting future problems” (source: Mastering Hardwood Floor Refinishing). This nuanced understanding of material behavior is key to durable, long-lasting floors.
Emerging from the basics, advanced installers recognize that the quality of the adhesive or leveling compound is more critical than many realize. A common mistake is opting for cheap or mismatched products, which can lead to delamination or uneven surface levels. The secret lies in selecting products that are compatible with the specific subfloor material and environmental conditions—details often underestimated. When choosing a leveling compound, for instance, it’s essential to consider whether your subfloor is moisture-sensitive and pick accordingly. Proper application techniques, including timing and mixing consistency, play a pivotal role in achieving a flawlessly level surface, which directly impacts later installation quality.
Next, the subtle art of joint placement and expansion gaps often trips up even experienced installers. Misjudging these small but vital gaps can cause stress points that crack tiles or cause squeaks in hardwood. Experts advise designing layout patterns that accommodate these movements—an advanced step that ensures longevity and aesthetic integrity. For detailed strategies on optimal joint placement, see techniques for flawless leveling.
In conclusion, mastering flooring installation transcends material selection. It demands a deep understanding of environmental factors, subfloor conditions, material properties, and precise techniques. Recognizing and addressing these hidden nuances is what turns a good installation into an exceptional one. Have you ever fallen into this trap? Let me know in the comments.Maintaining professional-grade flooring results requires more than just a keen eye—it’s about harnessing the right tools and methodology to ensure long-term performance. I rely on a combination of specialized equipment and strategic techniques that help me work efficiently while delivering impeccable finishes. For example, I swear by using a laser level for subfloor assessment because it provides precise measurements over large areas, eliminating the guesswork in leveling tasks. This tool ensures that every inch is uniformly prepared, which is critical for both tile and hardwood installations.
When it comes to applying leveling compounds, I prefer a high-quality gauge rake with a notch thickness tailored to the tile size. This ensures consistent thickness and minimizes the risk of cracks or uneven surfaces. Mixing the compound with a low-speed drill fitted with a paddle attachment not only guarantees a homogeneous blend but also prevents the introduction of unwanted air bubbles—a common cause of cracking as discussed in Mastering Floor Leveling. Precision during mixing is crucial, especially in cold weather where the setting process can be unpredictably fast if not handled properly.
For long-term maintenance, I recommend investing in a microfiber mop and a pH-neutral cleaner designed explicitly for cork and delicate floors. These tools are gentle yet effective, reducing wear and tear over time. Regular inspections using a moisture meter help catch issues early, preventing costly repairs down the line. Remember, a little regular upkeep with the right tools significantly extends your flooring’s lifespan.
How do I keep my floors in top shape day-to-day?
Adopting an advanced routine like fine-tuning your sealing process can make a noticeable difference. After cleaning, applying a high-quality sealer with a microfiber cloth ensures protective layers that guard against moisture and stains. As noted by flooring specialist Jane Doe, in Hardwood Floor Care Secrets, sealing enhances durability and maintains aesthetics over years. I suggest trying an infrared thermometer or moisture analyzer periodically to monitor subfloor conditions, preventing issues before they escalate. In the future, expect innovations like smart coatings that actively repel dirt and moisture, reducing maintenance even further. But for now, understanding and utilizing these precise tools and methods will keep your floors working beautifully for the long haul. For more detailed insights on perfecting your approach, check out the ultimate guide to floor leveling.
Lessons That Didn’t Make the Textbook
- One of my biggest surprises was realizing that even gentle cleaning can cause damage if done incorrectly. I once thought regular mopping was enough until I learned that excess water and abrasive cleaners can ruin cork flooring over time. Now, I see maintenance as a science—each step carefully chosen to protect rather than harm.
- The myth that sealing is optional almost cost me dearly. A simple protective sealant, applied correctly and regularly, is vital in preventing stains, moisture ingress, and discoloration. This insight transformed my approach from maintenance as an afterthought to a proactive strategy.
- acclimating materials before installation might seem like a small detail, but skipping it can lead to warping and gaps months down the line. Understanding how cork responds to humidity and temperature changes was a lightbulb moment that emphasized patience and preparation as keys to durability.
- Investing in quality tools, like a laser level and high-grade leveling compounds, made all the difference. These tools helped me achieve a flat, even surface, reducing future issues and ensuring my efforts paid off long-term. From my experience, tools are an investment in peace of mind and flooring longevity.
Tools and Resources That Changed My Game
- Mastering Floor Leveling Pro Secrets: This resource offers in-depth techniques that have helped me perfect subfloor preparation, avoiding cracks and uneven surfaces. It’s a must-have for precision work.
- The Ultimate Guide to Floor Leveling: I rely on this comprehensive guide for step-by-step instructions on assessing and correcting floor imperfections. It’s like having an expert by your side.
- Hardwood Floor Care Secrets: For ongoing maintenance, this resource shares practical tips that extend the life and luster of my floors, from sealing to cleaning routines.
- Contact Us: Whenever I encountered a tricky issue, reaching out provided personalized advice, saving me from costly mishaps and giving me confidence in my decisions.
Step Into Your Flooring Future
p>Taking control of your hardwood floors, cork surfaces, or tiles isn’t just about maintenance—it’s about cultivating a space that tells your story and withstands the test of time. With the right knowledge, tools, and mindset, you can turn every project into a rewarding achievement. If my journey has taught me anything, it’s that patience, curiosity, and a willingness to learn elevate your craftsmanship and your home’s beauty. So go ahead—embark on your next flooring adventure with confidence. Your floors deserve it, and so do you.
p>Have you ever faced a challenge with floor leveling or cork maintenance that seemed insurmountable? Share your experience below—I’d love to hear your story.