
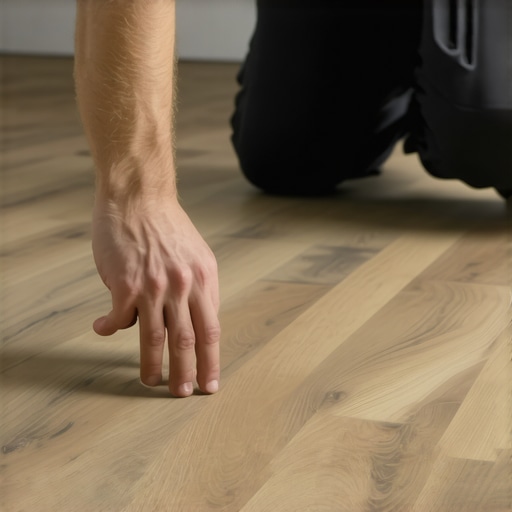
I vividly remember the first time I laid vinyl planks in my living room, only to be greeted the next morning by unsightly gaps that seemed to appear out of nowhere. It was a moment of frustration—because I thought I had measured everything perfectly. Turns out, even small imperfections in subfloor leveling can lead to these pesky openings. Have you ever experienced that sinking feeling when your new flooring reveals its flaws shortly after installation? You’re not alone.
Why Gaps in Vinyl Plank Flooring Drive Us Crazy—and What to Do About It
Gaps not only ruin the aesthetic of your beautiful floor but can also be a gateway for dirt, moisture, and even pests. When I first noticed gaps, I felt discouraged, questioning if I’d chosen the right flooring or if I’d done the installation correctly. But here’s the good news: a little knowledge and some straightforward techniques can make those gaps disappear or become less noticeable.
Before diving into solutions, it’s important to understand the root cause. Often, this issue isn’t about your flooring material but about the underlying subfloor and how it was prepared. Many DIY enthusiasts overlook the importance of proper leveling, which can lead to these imperfections showing up in the final look. In fact, a common mistake I made early on was skipping the step of thorough subfloor analysis—something I now realize is crucial. For more detailed insights on preparing your subfloor correctly, you might find this resource helpful: the ultimate guide to floor leveling.
Addressing gaps isn’t just about aesthetics; it’s about ensuring your flooring lasts and performs as intended. In the sections ahead, I’ll walk you through proven techniques to hide, seal, or even prevent gaps before they start. So, if those imperfections have been bothering you, stick around. You’re about to learn how to transform that frustrating sight into a seamless, beautiful surface.
Ready to tackle this head-on? Let’s move into the practical steps that will give your vinyl plank flooring that flawless finish you’re craving.
Assess the Subfloor and Correct Out-of-Level Areas
Start by inspecting your subfloor using a long straightedge or level—think of it as a giant ruler checking for uneven spots. In my own experience, I used a laser level to pinpoint low areas, which turned out to be the culprit behind those pesky gaps. If you find high or uneven spots, mark them clearly. Then, prepare to level these areas with an appropriate floor leveling compound. Spread the compound carefully, working from the deepest point outward, like smoothing icing on a cake. Allow it to cure fully before proceeding to ensure a flat, stable surface. For detailed techniques, refer to this guide on floor leveling.
Prepare Your Flooring Area Properly
Remove any debris, dust, or old adhesive residues from the subfloor. Use a vacuum or a damp cloth for cleaning, similar to cleaning a countertop before painting. This step creates a clean canvas, ensuring your vinyl planks adhere properly and don’t shift later. Check the manufacturer’s installation instructions to confirm the recommended acclimation period—this usually involves leaving the planks in the room for 48 hours to adapt to temperature and humidity conditions. This process prevents expansion or contraction post-installation, which can cause gaps. Selecting the right flooring is also crucial; opt for planks with a good quality locking mechanism to facilitate tight spans and reduce gaps.
Arrange and Acclimate the Vinyl Planks
Lay out the planks in the room, staggering the seams similar to bricks for strength and visual appeal. Allow them to acclimate for at least 48 hours, as mentioned earlier, to prevent unexpected expansion or shrinking that could introduce gaps. During this time, store the planks flat and avoid stacking them more than a few layers to prevent warping. When you’re ready, start installation from one corner, pressing each plank firmly until it clicks into place, making sure the tongue and groove are fully engaged. Use a tapping block, like a gentle hammer for delicate work, to fit planks snugly together without damaging edges.
Use a Tapping Block and Vinyl Puller for Tight Joints
When joining planks, employ a tapping block along the edges to ensure a tight fit—think of it as a gentle nudge that locks the pieces together without causing damage. I once had a section where the planks wouldn’t align properly, and a few light taps with the block fixed the issue immediately. For stubborn gaps or misaligned boards, a vinyl pulling tool can help gently slide planks into perfect position. These tools act like a DIY clamp, applying controlled pressure without risking damage. Properly fitted joints minimize the chance of gaps forming over time.
Seal or Fill Remaining Gaps Effectively
If minor gaps remain after installation, don’t panic. Use a high-quality vinyl gap filler or sealant designed for flooring—apply sparingly with a putty knife, pressing it into the gaps. Smooth the surface, and wipe away excess before it cures. For larger gaps, consider installing matching vinyl seam filler strips or transition moldings to mask imperfections. Remember, a well-sealed floor not only looks better but also protects against dirt and moisture infiltration. For helpful sealing techniques, see this article on sealing and finishing.Many homeowners and even seasoned professionals often think that achieving a perfect floor surface is just about following basic leveling steps and selecting quality materials. However, there’s a layer of nuance that most overlook, which can significantly impact the longevity and aesthetic of your flooring. One common myth is that self-leveling compounds guarantee a perfectly flat surface without meticulous preparation. In reality, improper substrate preparation—like ignoring the substrate’s porosity or moisture content—can lead to surprise cracks or unevenness down the line. Studies from flooring experts emphasize that understanding the substrate’s behavior is crucial; for instance, porous concrete absorbs moisture unevenly, causing leveling compounds to dry inconsistently, which results in subtle shifts and gaps over time. This oversight often causes frustration and costly corrections later. Additionally, many believe that once the subfloor seems flat visually, it’s ready for installation. But beneath the surface, hidden hills or dips can exist, especially if a proper comprehensive assessment, such as a dampness test or using a precision laser level, isn’t performed. These irregularities may seem minor but can cause major issues—like cracking tiles or buckling hardwood—especially in high-traffic areas. When installing tiles or hardwood, advanced techniques involve verifying the moisture content and stability of the subfloor, applying appropriate primers, or even implementing a decoupling membrane to accommodate slight movements and prevent future damage. Elevating your installation process to include these hidden nuances can save you years of maintenance headaches. So, are you aware of the substrate’s specific properties before you begin? Do you know the type of leveling compound suitable for your surface? Making educated decisions here means your flooring will not only look great initially but perform reliably for decades. Remember, a flawless finish isn’t just about the visible surface; it’s about the foundation beneath. For a comprehensive overview of mastering these subtle but critical steps, check out these pro secrets for flawless leveling. Have you ever fallen into this trap of underestimating the importance of substrate properties? Let me know in the comments.Maintaining your expertly installed floors requires the right tools and consistent care. Personally, I rely on a few specialized pieces of equipment that make long-term upkeep much more manageable and effective. For hardwood floors, a high-quality microfiber mop paired with a pH-balanced cleaner is essential. I prefer using a microfiber mop because its fine fibers lift dirt without scratching the surface, and the gentle cleansers prevent finish wear over time.
For tile installations, a grout cleaning and sealing kit can transform a tired surface into a sparkling centerpiece. I’ve found that regularly applying a sealant with a grout-specific applicator brush helps prevent stains and moisture infiltration, extending the lifespan of the tile. When it comes to leveling and minor repairs, a digital moisture meter is invaluable. I use mine periodically to check humidity levels beneath hardwood or tile, ensuring the subfloor remains stable and preventing issues like warping or buckling.
What strategies do I recommend for long-term durability? Consistent monitoring paired with proper cleaning is key. For example, employing a weighted roller after sealing can ensure even coverage and adhesion, reducing the risk of future gaps or cracks. Additionally, employing specific maintenance products formulated for your flooring type—such as hardwood refinishing oils or tile rejuvenators—can restore and preserve appearance without invasive sanding or replacement.
Looking ahead, I predict the trend will lean more towards smart maintenance tools integrated with IoT technology. Imagine devices that monitor moisture levels and send alerts directly to your phone, enabling proactive care before problems escalate. This future approach aligns with the trend towards automation and data-driven home improvements, making flooring maintenance less of a chore and more of an effortless process.
How do I maintain my flooring equipment and tools over time? Regular cleaning and proper storage are essential to prolong their life and effectiveness. For instance, cleaning brushes with warm water and drying thoroughly prevents buildup and deterioration. Calibration of digital tools should be checked annually, following manufacturer guidelines, to ensure accuracy. Investing in quality tools—like a professional-grade trowel or a durable grout float—not only improves your finishing but also reduces wear and the need for replacement.
To help you get started, I recommend trying a detailed sealer application using a grout brush, as discussed in this comprehensive guide. Regularly updating your toolkit with these specialized items can make maintenance routine easier and ensure your floors remain beautiful for years to come.<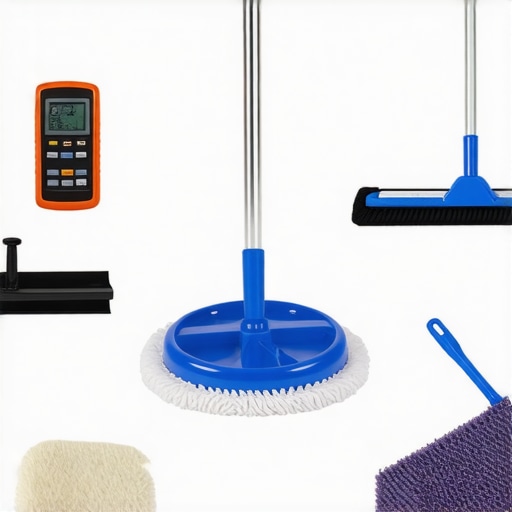 >
>
Image Description: A collection of professional flooring tools laid out neatly on a workbench, including a digital moisture meter, grout float, microfiber mop, and sealing brushes.
Image Alt Text: Essential tools for long-term flooring maintenance and care.
What Floor Leveling Taught Me About Longevity
One of the most eye-opening lessons I learned was the importance of thorough subfloor assessment. Initially, I assumed visual flatness was enough, but I soon discovered that microscopic dips could cause gaps that undermine your flooring’s integrity. Investing in a laser level and understanding substrate properties averts future headaches, saving time and money in the long run. To deepen your knowledge, explore these professional-level secrets.
Why Cutting Corners on Preparation Leads to Heartache
I once skipped detailed cleaning and moisture testing, thinking it was unnecessary. The result? Warped planks and persistent gaps. Proper cleaning, acclimation, and moisture barriers sound trivial but are the backbone of long-lasting floors. Remember, neglecting preparatory steps often results in costly repairs down the line. For an in-depth guide, see this comprehensive resource.
My Biggest Surprise About Tools and Maintenance
Maintaining your flooring tools isn’t just about cleanliness; it’s about precision. Using calibrated moisture meters or sealed grout brushes ensures your installation remains flawless over time. Regular care of your equipment extends their life and upholds your quality standards. For expert-recommended tools, check out these essential items.
Insider Wisdom: Hard Lessons From Floors That Didn’t Make It
- Don’t Assume Visual Flatness Equals Stability: Subtle undulations can sabotage your project—measurement tools are your friends.
- Skip the Dry Run and Acclimate?: Expect surprises. Always let your materials settle in their future environment.
- Overlook Tool Calibration: It’s the secret ingredient for professional results and lasting floors.
- Neglect Subfloor Preparation: The fastest way to see gaps and buckling later on.
Tools and Resources That Keep Me on Track
- Laser Distance Meter: Precise measurements save headaches.
- Moisture Meter: Detect hidden issues before starting.
- High-Quality Tapping Block and Puller: For tight fits and seamless joints.
- Pro guides and tips: Ongoing learning keeps results flawless.
Your Journey to Flawless Floors Starts Now
Remember, mastering vinyl flooring isn’t just about technique; it’s about respect for the process and your materials. Embrace these lessons, equip yourself properly, and enjoy the pride of a professional-looking surface that lasts. The foundation you build today determines your flooring’s future—so start strong and finish even stronger.
Have you experienced a hidden floor issue that caught you off guard? Share your story below—let’s learn together!