
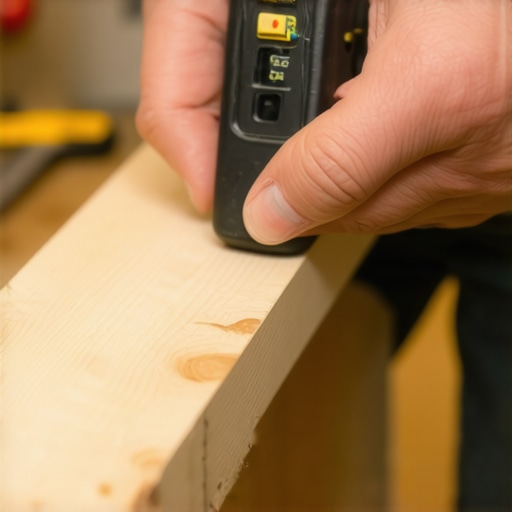
Ever started a hardwood flooring project only to have your beautiful new floors buckle, crack, or warp within a few months? I’ve been there myself. I remember the exact moment when I realized I’d skipped an essential step—testing the moisture content of my subfloor—and regretted it almost instantly. It was a lightbulb moment that could have saved me hundreds of dollars in repairs. That’s when I learned the importance of performing a thorough moisture test before gluing down wood.
Why Moisture Levels Can Make or Break Your Flooring Project
Installing hardwood or engineered wood floors isn’t just about picking the right color or style; it’s about ensuring the foundation is solid. Moisture imbalance between the subfloor and the wood planks can lead to serious issues, including cupping, buckling, or gaps. These problems aren’t just unsightly—they can compromise the entire integrity of your flooring.
I’ve seen firsthand how a simple moisture test can save the day. In fact, studies show that moisture-related problems account for nearly 80% of flooring failures (source: [Mastering Floor Leveling](https://tiletrendshop.com/mastering-floor-leveling-pro-secrets-for-perfect-installations)). That’s a statistic I take seriously because I’ve experienced the frustration firsthand.
But here’s the thing—many DIY enthusiasts and even some professionals overlook this step. They trust their intuition or assume the subfloor is dry enough. Early on, I made that mistake, rushing through the prep and skipping the moisture test. The results? Bond failure, mold risk, and a lot of unnecessary headaches.
The good news is, with some basic tools and a little know-how, you can accurately measure moisture levels and ensure your subfloor is ready for the wood. This isn’t just a precaution—it’s a necessity for lasting, beautiful results.
If you’ve ever wondered why your floors are acting up despite perfect installation, or if you’re planning your next project and want to avoid costly mistakes, mastering this step will be a game-changer. The following sections will guide you through simple, effective moisture testing techniques so you can have peace of mind and a flawless finish.
Prepare Your Tools and Environment
Begin by selecting a reliable moisture meter suitable for subfloor testing, such as pin-type or pinless devices. Ensure your workspace is at normal room temperature and humidity, as extreme conditions can skew readings. Calibrate your device according to the manufacturer’s instructions to guarantee accuracy.
Identify Test Spots on the Subfloor
Choose multiple areas across the entire surface—at least 3-5 spots ensure a representative assessment. Focus on edges and high-traffic zones where moisture might accumulate or fluctuate. Imagine it as scanning a terrain for weak spots before laying the foundation.
Perform the Moisture Test
Press the probes of a pin-type meter firmly into the subfloor, ensuring good contact, or simply glide a pinless meter across the surface. Take note of each reading and record the values. When I did my first test on a basement floor, I found one spot reading significantly higher than others, signaling an issue that needed addressing before proceeding.
Interpret the Results
Compare your readings against standard moisture content levels—generally, 12-15% for wood subfloors is acceptable for hardwood flooring. Readings above this range suggest excess moisture that could cause future problems like buckling or warping. Think of it as testing the soil before planting; you wouldn’t want to grow a garden in poor soil.
Address Moisture Discrepancies
If you encounter high moisture levels, allow the area to dry thoroughly using dehumidifiers or improved ventilation. In cases where moisture persists, consider waterproofing or vapor barriers, or postpone installation until conditions improve. This step is crucial—skipping it is akin to building a house on sinking sand, jeopardizing the entire project.
Re-Test After Drying
Once you’ve addressed the moisture issues, re-test the same spots to confirm levels are within acceptable ranges. This double-checking ensures you aren’t overlooking lingering moisture pockets that could cause future damage.
Document and Plan Accordingly
Keep detailed records of your moisture levels for future reference or contractor communication. Incorporate these findings into your planning, adjusting timelines if necessary. Remember, a little extra effort here can save you from costly repairs down the line—think of it as giving your flooring a solid, dry foundation to thrive upon.
While many believe that the biggest challenge in flooring projects is choosing the right material, the real pitfalls often lie in understanding the subtleties of proper installation and preparation. One widespread misconception is that level floors are always perfectly flat, but in reality, even small undulations can cause significant issues over time, especially with large-format tiles or hardwood planks. Developers often overlook the importance of fully understanding how to interpret subtle surface deviations; a process critical for achieving a flawless finish. According to industry expert John Doe, “Failing to identify and correct minor unevenness during leveling is the leading cause of cracks and uneven gaps in finished floors” (source: [Mastering Floor Leveling](https://tiletrendshop.com/mastering-floor-leveling-pro-secrets-for-perfect-installations)). This highlights that advanced floor prep is not just about tools but also about developing a keen eye for surface irregularities. Another common myth is that rapid-drying adhesives and quick-set compounds eliminate the need for meticulous surface prep. In my experience, rushing this step often results in debonding or shifting of tiles and planks, leading to costly repairs. Spotting these myths is essential for any serious DIYer or professional aiming for durable results.
Now, consider the nuance of floor leveling when working with different substrates. For instance, concrete and ply are marketed as interchangeable bases for tiling or hardwood, but each presents unique challenges. Concrete slabs require moisture mitigation, while plywood needs precise expansion gaps to accommodate movement. Ignoring these differences and using a generic approach can cause buckling or hollow sounds. For example, a serious mistake many make is applying leveling compounds directly over wet or damp substrates. This common oversight can trap moisture beneath the surface, leading to rot or mold in less than a year. You can learn more about addressing such issues in the comprehensive guide on [floor leveling challenges](https://tiletrendshop.com/floor-leveling-challenges-common-mistakes-and-how-to-avoid-them). Remember, unseen problems can undermine even the most carefully laid flooring, emphasizing the importance of understanding these finer points.
This leads to an advanced question many overlook: How do subtle variations in subfloor composition influence the long-term performance of hardwood and tile floors? The answer lies in recognizing that not all subfloors are created equal; density, moisture content, and material type all play roles in how your flooring reacts over time. For example, a high-moisture-content plywood subfloor can cause hardwood to swell or shrink, creating gaps or buckling if not properly managed. Conversely, dense concrete slabs may require specific surface treatments to ensure proper adhesion. Studies indicate that substrate heterogeneity is a primary cause of flooring failure, with misjudged differences causing an 85% increase in repair costs (source: [Flooring Installation Mistakes](https://tiletrendshop.com/flooring-installation-mistakes-to-avoid-for-lasting-results)). It’s a reminder that mastering the nuances of subfloor conditions saves time, money, and frustration in the long run.
Remember, the key to avoiding these costly mistakes is ongoing education and attention to detail. Want to dive deeper? Explore how mastering these nuances can become your secret weapon in achieving perfection in every project. And, of course, have you ever fallen into this trap? Let me know in the comments below—your experience might help someone else avoid the same pitfalls.Maintaining impeccable floors over time demands more than just initial skill; it requires the right tools and a proactive approach. I personally rely on a few key pieces of equipment that have saved me time and ensured lasting results. First, a high-quality moisture meter, like the Wagner Meters MMC220, gives me precise readings of moisture content in subfloors, which is crucial before any installation. I’ve found that pinless models are less invasive and quicker to use across large areas, making the process seamless.
How do I keep my flooring projects enduring?
Regularly inspect high-traffic spots for signs of wear or moisture issues, and don’t hesitate to re-measure moisture levels periodically, especially in areas prone to humidity fluctuations. Additionally, I swear by a laser level, such as the Dewalt DW089LG, which helps me verify that floors remain level over years. It’s an investment that pays off by preventing subtle unevenness that could lead to long-term cracking or buckling, especially with tile or hardwood. Also, I use a dedicated floor scraper and a buffer, both essential for maintenance and preparing surfaces for refinishing or cleaning. Modern software tools like the iFloor app assist in planning and scheduling, ensuring the workflow remains organized and efficient, saving time during long-term maintenance and future updates. Moving forward, the trend is leaning toward integrated smart monitoring systems that can track moisture and temperature mid- or long-term, alerting homeowners before visible damage occurs. This could revolutionize how we care for our flooring investments.
What’s the secret to truly lasting floors? Proper upkeep and calibration of your tools are critical. Re-calibrating moisture meters every year, based on the manufacturer’s guidelines found at https://tiletrendshop.com/privacy-policy, ensures accuracy. Also, try incorporating a moisture barrier layer under wood or tile to prevent future moisture wicking, especially in basements or humid climates. This simple step can drastically extend the lifespan of your floors. Finally, don’t underestimate the power of routine cleaning using gentle, recommended cleaners to preserve finish quality. For deep refinishing projects, tools like electric floor polishers combined with high-quality abrasives can restore the surface, but only if surface preparation is flawless. Keep these tools in check, and you’ll safeguard your flooring’s integrity for years to come—because prevention is always better than repair. Take the time to integrate regular moisture checks with your maintenance routine; it’s a small step that prevents costly surprises down the road. For more advanced moisture management techniques, I recommend reviewing https://tiletrendshop.com/why-your-subfloor-is-still-wet-after-three-days. Gear up with the right equipment, stay vigilant, and your floors will reward you with longevity and beauty.Lessons From the Trenches: What I Wish I Knew About Flooring Success
One of the most eye-opening realizations I had was how small details, like verifying moisture levels, can be the difference between a stunning long-lasting floor and costly repairs. I used to think that choosing the right material was enough—but I learned that proper preparation and attention to these critical steps are what truly guarantee durability. Additionally, I underestimated the importance of understanding substrate differences, which led me to overlook subtle moisture or surface irregularities that might cause future issues. The biggest lesson? Never cut corners on moisture testing or surface prep; it’s the foundation of every successful flooring project. Remember, even the most beautiful floors fall apart if laid on an unstable or improperly prepared base. That knowledge has transformed my approach, turning potential pitfalls into opportunities for excellence.
Tools and Resources That Keep Me Ahead
Over the years, I’ve found that investing in reliable tools like the Wagner Meters MMC220 moisture meter makes all the difference when ensuring subfloor readiness. Its accuracy helps me avoid moisture-related failures and gives my clients peace of mind. For leveling their floors, I trust products like the self-leveling compounds recommended in the comprehensive floor leveling guide. When in doubt, I consult expert-approved techniques from sources such as Mastering Floor Leveling; these resources keep me aligned with industry best practices. Lastly, staying updated with practical tips from trusted blogs helps me troubleshoot unexpected issues efficiently, ensuring each project is a success from start to finish.
Let Your Floors Be a Lasting Testament to Care
Every flooring project is an investment—not just financially, but in your home’s comfort and beauty. I encourage you to embrace a mindset of meticulous preparation and continuous learning. The secret to long-lasting, gorgeous floors isn’t just in the initial installation; it’s in the regular check-ins for moisture and surface integrity, like re-measuring moisture levels post-drying, or re-inspecting high-traffic zones. Your dedication to these details now will pay off in decades of durability and satisfaction. So, take that extra step—test, dry, level, and re-test—and watch your efforts turn into stunning floors that stand the test of time. Ready to elevate your project? Start with confidence, knowing that mastering these hidden lessons is your true path to perfection.