I remember the moment clearly. I had just finished installing a new tile floor in my client’s kitchen, feeling pretty confident. But within a few months, those tiles started to crack and shift. Turns out, I overlooked some crucial installation steps, and that mistake cost me time, money, and trust. That lightbulb moment taught me a vital lesson: even the most beautiful flooring won’t last if it isn’t installed with expert precision and long-term planning.
Why Proper Installation Is the Foundation of Lasting Floors
In my experience, the secret to flooring that stands the test of time isn’t just choosing high-quality materials. It’s about mastering the right installation strategies that address every detail — from surface preparation to finishing touches. As the industry evolves, so do the best practices, making continuous learning essential. If you’re tired of redoing your floors every few years, it’s time to focus on expert-level techniques that deliver durable, stunning results in 2025 and beyond.
Have you ever faced flooring problems that seemed to appear out of nowhere?
If so, you’re not alone. Many homeowners and professionals fall into common traps—like skipping proper level surfaces or rushing through sealing—that compromise long-term durability. Early mistakes, such as neglecting to use the right leveling techniques, can lead to costly repairs later. I’ve been there, and I can tell you that investing in proven strategies, like those detailed in expert-flooring strategies, makes all the difference.
So, what’s the solution? The key lies in a combination of precise preparation, proper materials, and expert techniques. For example, ensuring your subfloor is perfectly leveled is non-negotiable. Without that, even the most durable tiles or hardwoods will eventually show signs of wear. Want to learn more? Check out precise leveling techniques that can transform your installation process.
Stay tuned. In the next sections, I’ll walk you through actionable steps to elevate your flooring projects, avoid common pitfalls, and guarantee long-lasting beauty. After all, your floors should be a source of pride — not recurring headaches.
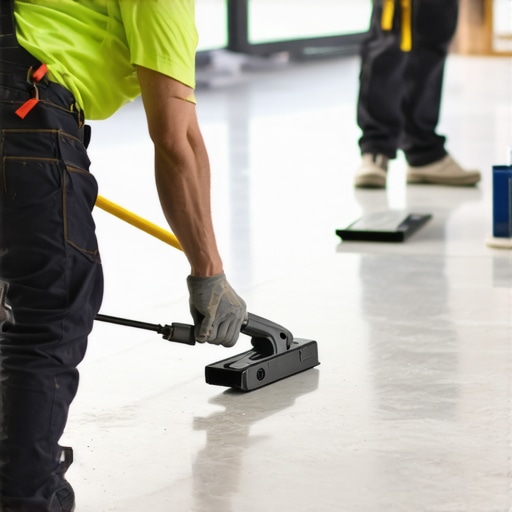
Level the Surface Before Laying the Floor
Start with a meticulously prepared subfloor. I vividly remember a project where I skipped this step, and within six months, the tiles started to crack. To avoid that, I used a professional-grade floor leveling compound, following the steps outlined in precise leveling techniques. Mix the compound thoroughly, then apply it with a trowel, working from the highest point to the lowest. Use a straightedge to check for levelness, and ensure it cures fully before proceeding. This foundation guarantees that your tiles or hardwoods sit perfectly flat, preventing future cracks or uneven wear.
Choose the Right Adhesive and Grout
Picking quality materials is crucial. For tiles, opt for a high-quality thinset mortar designed for your specific tile type and environment. For hardwood, a premium adhesive that compensates for slight subfloor movements is ideal. When applying, follow manufacturer instructions precisely. During my last installation, I used a notched trowel to spread the mortar evenly, then pressed the tiles firmly into place, ensuring full adhesion. For grout, select a flexible, stain-resistant option. Proper application involves filling all gaps completely and wiping excess before it sets. This prevents cracks and water infiltration, which can compromise long-term durability.
Lay the Floor with Precision
Accurate placement is non-negotiable. I remember setting a large format tile that required cutting. I used a wet saw for clean cuts and dry-fit each piece before applying adhesive. Use spacers consistently to ensure even joints, and check alignment frequently with a level or chalk lines. When laying hardwood, stagger the joints for strength and visual appeal, and tap each plank into place with a rubber mallet for tight fit. This attention to detail minimizes movement and gaps over time, extending the life of your floor.
Sealing and Protecting for Longevity
Once installed, sealing is your best friend. Apply a high-quality sealer to grout lines and hardwood surfaces as recommended. For tiles, use a penetrating sealant to guard against stains and moisture. For hardwood, consider a durable finish that resists scratches and water damage. I once sealed a hardwood floor with a commercial-grade polyurethane, which not only enhanced its shine but also provided a protective barrier. Regular maintenance, like cleaning with specialized products, extends the lifespan of your floors. For hardwood, I recommend reviewing hardwood floor care secrets to keep your investment looking its best for years to come.
Inspect and Address Issues Promptly
Even with perfect installation, issues can arise. Regular inspections help catch problems early. If you notice loose tiles or gaps, address them immediately. For minor issues, a quick reapplication of adhesive or sealant can save you from costly repairs later. Remember, proper maintenance and prompt repairs are vital for lasting beauty and performance.

Many homeowners and even some professionals fall prey to misconceptions about flooring installation, often leading to costly mistakes. Let’s dig deeper into what most people get wrong about this crucial phase of your home improvement journey, so you can avoid the pitfalls and achieve lasting results.
Why the Myth That All Flooring Materials Are Equal Is Dangerous
One widespread misconception is that any flooring material can be installed using the same techniques. In reality, each type—be it hardwood, tile, or laminate—has unique requirements. For instance, hardwood benefits from a moisture barrier and specific subfloor preparation, while tiles demand meticulous surface leveling and proper adhesive selection. Neglecting these nuances can cause issues like warping, cracking, or delamination over time. I’ve seen many projects where ignoring these details led to early failure, emphasizing the importance of tailored installation strategies. For a comprehensive understanding, check out expert strategies for 2025.
Are You Overlooking Subfloor Conditions?
One of the most common pitfalls is assuming the subfloor is suitable without proper inspection. Many underestimate the importance of a perfectly level, dry, and clean surface. Even minor irregularities can cause tiles to crack or hardwood planks to squeak and warp. This is why professional-grade leveling compounds and thorough assessment are non-negotiable. Skipping this step is a surefire way to invite issues down the line. For advanced tips, see precise leveling techniques.
Believing That DIY Can Replace Professional Expertise
While DIY is tempting, especially with abundant online tutorials, the complexity of professional-level flooring installation often requires more than just basic skills. Mistakes like improper adhesive application, inadequate joint spacing, or rushed sealing can compromise durability and aesthetic appeal. The truth is, investing in expert knowledge and tools pays off by preventing future repairs and maintaining value. For detailed insights, visit professional flooring strategies.
How Do You Avoid These Common Mistakes?
The best way to ensure a successful installation is continuous learning and attention to detail. Use high-quality materials, follow manufacturer instructions, and don’t skip essential preparatory steps like surface leveling and moisture testing. Regular inspections during and after installation can catch issues early, saving you money and time. Remember, a durable floor is the result of informed decisions and meticulous execution. If you’re eager to master these techniques, explore hardwood floor care secrets.
Have you ever fallen into this trap? Let me know in the comments, and share your experiences so others can learn from your mistakes!
Keeping your floors in top condition requires the right tools and a proactive maintenance routine. Over the years, I’ve tested and trusted specific equipment and methods that ensure my installations and repairs stand the test of time. Whether you’re a homeowner or a professional, having a reliable toolkit and understanding long-term care can save you money and preserve the beauty of your floors for years to come.
Invest in Quality Trowels and Leveling Tools
One tool I always recommend is a high-quality notched trowel. I prefer stainless steel models with comfortable handles because they allow for precise adhesive application, preventing gaps or uneven surfaces. When installing tiles, a good rubber mallet is indispensable for tapping pieces into place without damaging them. For hardwood, a tapping block helps ensure tight joints. For surface leveling, I rely on a professional-grade self-leveling compound and a good screed or straightedge to check flatness. These tools help achieve the perfect foundation, reducing future issues like cracking or shifting.
Use Digital Moisture Meters and Surface Testers
Moisture management is critical, especially for hardwood and some tile installations. I always test subfloors with a digital moisture meter before beginning work. This step prevents problems like warping or buckling caused by trapped moisture. A surface tester helps verify that the substrate is dry and ready for installation. As trends evolve, digital tools are becoming more accurate and easier to use, making moisture testing faster and more reliable. Check out expert installation tips for more on moisture control techniques.
Maintain Your Tools for Long-Term Results
Proper maintenance of your equipment extends its lifespan and maintains accuracy. After each project, clean your trowels, levels, and other tools thoroughly to remove residual adhesive or grout. Store them in a dry place to prevent rust. I also recommend periodically calibrating your laser levels and moisture meters to ensure precise measurements. Investing in quality tools and caring for them means fewer surprises during installation and less need for rework.
Plan for Future Repairs with the Right Products
Long-term results depend on proactive fixes. Keep a stock of high-grade sealants, repair kits, and compatible adhesives. When issues like minor cracks or scratches appear, addressing them early prevents larger problems later. Regularly inspecting your floors with a keen eye helps identify potential trouble spots before they become costly repairs. For expert advice on maintenance routines, visit hardwood floor care secrets.
Embrace the Future of Flooring Maintenance
The trend in flooring upkeep is moving toward smart, automated solutions. Innovations like IoT-connected moisture sensors and AI-powered floor condition monitors are on the horizon, promising even more precise maintenance. As these technologies become affordable, I recommend experimenting with them to stay ahead of potential issues. For now, combining traditional tools with modern methods gives you a comprehensive approach to keeping your floors beautiful and durable for decades.
Start by evaluating your current toolkit and upgrading essential items. Try incorporating a digital moisture meter or investing in a quality trowel set. These small but impactful steps will make a big difference in the longevity of your flooring projects. Remember, consistent maintenance and using the right tools are the keys to lasting beauty and performance—so don’t skimp on quality or diligence.
The Hardest Lesson I Learned About Flooring Installation
One of my most valuable lessons came from a simple oversight—assuming that surface preparation was optional. I once installed a tile floor without thoroughly leveling the subfloor, and it wasn’t long before cracks appeared. That experience taught me that skipping detailed surface assessment can jeopardize the entire project. Now, I always prioritize meticulous surface prep, knowing that it’s the foundation of lasting durability.
3 Myths About Flooring That Held Me Back
For years, I believed that all flooring materials could be installed with the same techniques. It’s a misconception that can lead to costly repairs. Each material—whether hardwood, tile, or laminate—has specific needs. For example, hardwood benefits from a moisture barrier, while tiles require precise leveling. Recognizing these differences early on has helped me achieve better results and avoid unnecessary rework.
What Experts Won’t Tell You About Long-Lasting Floors
Many professionals keep their secret weapon under wraps—consistent, ongoing maintenance. Even the most perfectly installed floor needs regular inspections and prompt repairs. Small cracks or scratches, if addressed early, can prevent costly replacements down the line. This proactive approach is what truly extends a floor’s lifespan beyond initial installation.
Curated Tools That Changed My Approach to Flooring
Investing in quality tools has been transformative. A high-quality notched trowel ensures even adhesive spread, reducing future cracks. Digital moisture meters provide quick, accurate readings that prevent warping, especially for hardwood floors. Lastly, a reliable straightedge or screed guarantees a perfectly level surface. These tools make a significant difference in achieving professional-quality results that last.
Your Next Step Toward Lasting Floors
It’s time to embrace these lessons and tools to future-proof your flooring projects. The industry is evolving, and the best way to stay ahead is by continuous learning and diligent execution. Whether you’re a DIY enthusiast or a seasoned pro, adopting these practices will help you create floors that remain stunning and durable well into 2025 and beyond. Ready to elevate your skills? Explore hardwood floor care secrets or expert strategies for flooring installation today. What’s the biggest flooring mistake you’ve learned from? Share below and let’s grow together!”},
Your post really resonated with me, especially the emphasis on surface preparation and choosing the right materials. I’ve had my fair share of DIY flooring attempts, and I can vouch for how overlooked subfloor conditions can lead to unexpected cracking or shifting down the line. The tips on using professional-grade leveling compounds are spot-on—I’ve seen firsthand how they make a difference in long-term durability.
One challenge I faced was selecting the right adhesive for a particularly humid basement. Does anyone have recommendations for adhesives that perform well in high-moisture environments while maintaining flexibility? I believe understanding moisture management is crucial for ensuring longevity, especially as climate trends shift. Curious to hear what products or techniques others have found effective in tricky conditions. Thanks for shedding light on these essential installation strategies!
Reading this article really hits home because I’ve experienced similar issues with flooring cracking prematurely due to inadequate surface preparation. The emphasis on leveling and proper adhesion can’t be overstated—neglecting these steps often leads to avoidable problems down the line. One thing I’ve found helpful is using a moisture barrier when installing hardwood in areas prone to humidity fluctuations. It’s interesting how small details, like the type of sealant or adhesive, can dramatically impact the floor’s lifespan.
Regarding your question about adhesives for high-moisture environments, I’ve had good results with products like Bostik’s Best Adhesive, which is known for its flexibility and water resistance. It’s also crucial to ensure that the subfloor is thoroughly dry before application and to control indoor humidity levels to prevent trapped moisture. Have others experimented with different brands or techniques for moisture-prone spaces? Would love to hear your experiences, as I believe these small adjustments can save a lot of hassle later on. Overall, this post reinforces the importance of meticulous planning and ongoing maintenance for long-lasting floors.
This article really emphasizes the importance of surface prep, which is sometimes underestimated in DIY projects. I remember a time when I skipped a thorough leveling step, and sure enough, cracks appeared within a year. The use of high-quality leveling compounds and extra attention to detail truly make a difference in future durability. One thing I’ve learned over the years is that moisture management is a game-changer, especially in basements or high-humidity zones where hardwood or tiles are involved. A good moisture barrier can prevent a lot of issues before they start.
In your experience, have you found that certain brands of moisture barriers perform better? I’ve had success with products that also resist mold and mildew, which is a bonus for long-term health of the floor. Also, I’m curious—what are your thoughts on the latest digital moisture meters? I see them becoming more affordable and accurate, which makes my inspections faster and more reliable. Continuous learning and investing in the right tools, I believe, are key to avoiding the common pitfalls. Would love to hear others’ recommendations on moisture control products or techniques that have worked well for them.