
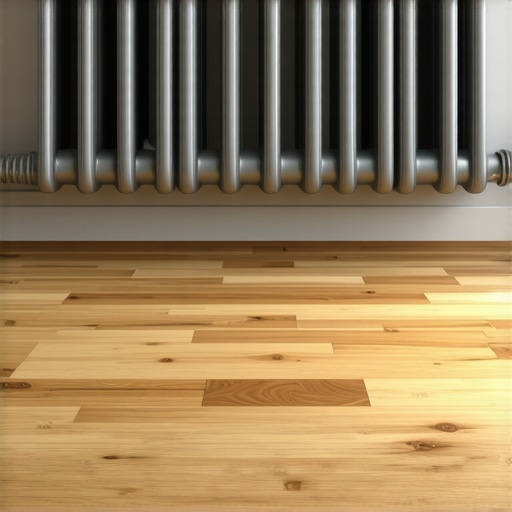
I remember the moment clearly—crawling under a brand-new, glossy hardwood floor, only to realize I had overlooked one critical detail: how the flooring would fit snugly around radiators. That awkward, itchy feeling of regret hit me hard. After countless hours of meticulous tiling and floor sanding, it suddenly dawned on me that I missed a simple yet vital trick. The gap! It was glaringly obvious that without proper spacing, the entire installation could drift into chaos—warping, buckling, or even damage down the line.
The Hidden Challenge of Installing Hardwood Around Radiators
Many DIY enthusiasts and even seasoned pros underestimate this sneaky issue. The problem isn’t just aesthetic—it’s functional. Typical hardwood flooring doesn’t account for expansion and contraction caused by temperature fluctuations. Radiators, especially those with small gaps, can create uneven pressure points, resulting in unwanted movement or damage.
What makes this truly tricky is the fact that most guidelines focus on general flooring installation without spotlighting the unique challenges around heating systems. Misjudging the spacing here isn’t just a minor mistake; it can lead to cracks, squeaks, and even costly repairs. I learned this the hard way early on, rushing into an installation without considering the space around radiators. Instead of a clean finish, I ended up with gaping gaps that collected dust and looked like shoddy workmanship.
Here’s the thing—there’s a clever way to handle this that’s often overlooked. It involves removing the frustration and preventing future problems. I’ll walk you through the secret I discovered, based on my experience and expert advice, to ensure your hardwood installation is both beautiful and durable. Trust me, once you master this spacing trick, your floors will be the envy of the neighborhood.
But first, let’s tackle the common doubts that might be holding you back.
Is Proper Spacing Around Radiators Actually Worth the Hype?
A lot of folks dismiss it as overkill. “Why bother? The radiator covers it anyway,” they say. Well, I made this mistake initially—thinking leaving a minimal gap was sufficient—and the result was a stressed-out floor that showed every flaw. According to flooring specialist advice, choosing the right gap is crucial for long-term stability and avoiding costly fixes later. This simple step can save you time, money, and headaches, turning a tricky spot into a showcase of craftsmanship.
Now, are you ready to discover how to get this right once and for all? Let’s dive into the steps and techniques that will elevate your hardwood flooring project, making it both stunning and resilient. For a comprehensive understanding of floor leveling that complements this approach, check out our detailed [step-by-step guide to flooring installation and leveling success](https://tiletrendshop.com/step-by-step-guide-to-flooring-installation-and-leveling-success).
Marking the Correct Gap Before Installation
Start by measuring the gap size recommended by the manufacturer, typically around 1/4 inch, to accommodate expansion. Use a ruler or a spacer tool to mark the distance along the wall and radiators. During my last project, I used painter’s tape to create a visual guide, ensuring consistent spacing around each radiator, which prevented me from accidentally installing too close or too far.
Removing Radiator Covers and Accessories
To ensure accurate spacing, temporarily remove radiator covers, valves, or any attachments. This allows you to work freely around the pipes and makes it easier to set the proper gap. I once skipped this step and had to redo parts of the installation due to misaligned spacing caused by covers that I neglected to remove.
Scribing the Floor to Fit Radiator Curves
When radiators have curved or irregular shapes, use a flexible scribing tool or a piece of cardboard to trace the exact outline onto the floor. Cut the flooring along this line, leaving extra space for expansion. In my experience, this technique avoided gaps and prevented the need for filler pieces later, saving time and ensuring a seamless look.
Using Spacers During Adhesive Application
Place spacers or even small wedges between the flooring and the wall or radiator. This maintains a uniform gap as you lay each plank. I recommend setting the spacers in advance and verifying their position regularly. In one case, I used toothpicks as makeshift spacers, which worked well for quick adjustments.
Securing the Flooring Without Over-tightening
As you connect each plank, be cautious not to press or tighten too forcefully, as this can shift the flooring and alter the spacing. Use a tapping block and a rubber mallet to gently snug the pieces into place. During a past flooring job, I over-tightened a plank, causing it to buckle slightly; adjusting with patience saved me from having to replace the entire section.
Reattaching Radiator Covers and Final Checks
Once the flooring is securely installed with the correct spacing, reattach radiator covers and any accessories. Check the gaps visually and with a measuring tape to ensure consistency throughout. Doing this final review prevented uneven gaps that could have compromised the aesthetic and structural integrity of the floor.
For additional tips on adapting your flooring to different room layouts and heating systems, consider reviewing our comprehensive guide on [floor leveling and expansion gaps](https://tiletrendshop.com/the-ultimate-guide-to-floor-leveling-for-a-perfect-finish). Proper planning and execution here will save you from future repairs and ensure your hardwood floors withstand the test of time.Many homeowners and even some professionals fall prey to misconceptions that can compromise the integrity and aesthetic of flooring projects. One prevalent myth is that achieving a perfectly level subfloor guarantees flawless tile or hardwood installation. However, subtle imperfections in the subfloor—like minor dips or uneven patches—can lead to cracked tiles or squeaky floors if not addressed with advanced leveling techniques, such as those outlined in our detailed [floor leveling guide](https://tiletrendshop.com/how-to-achieve-flawless-floor-leveling-before-tile-laying). An overlooked nuance is the importance of controlling moisture levels during installation; excessive or uneven moisture can cause wood expansion or contraction, leading to gaps or buckling over time, as highlighted in expert studies on wood behavior. Additionally, many assume that all leveling compounds are created equal; in reality, using the wrong type can result in cracking or inadequate support, which is why selecting the appropriate product—like a fast-setting underlayment—is crucial. A common mistake is neglecting expansion joints, especially in large or irregularly shaped rooms, which are vital to accommodate thermal movement and prevent warping. Recognizing these hidden factors allows for more durable and visually appealing results. Do you tend to overlook these advanced considerations? Share your experiences in the comments! For more expert insights, visit our comprehensive [floor installation and leveling resources](https://tiletrendshop.com/step-by-step-guide-to-flooring-installation-and-leveling-success) and [precise leveling techniques](https://tiletrendshop.com/precise-floor-leveling-techniques-to-achieve-flawless-surfaces). Remember, mastering these nuances ensures your flooring project will stand the test of time, combining beauty with resilience.Maintaining your flooring investment requires more than just regular sweeping and mopping; it demands the right tools and proactive care. I personally swear by a high-quality microfiber mop, which minimizes scratches and effectively lifts dust without pushing debris into the surface. For deeper cleaning, a soft-bristled brush vacuum is indispensable—I’ve learned that models with gentle agitation and HEPA filters prevent pushing dirt into grout lines or wood grain, extending the lifespan of your floors.
To address stubborn stains or grout haze, a steam cleaner with adjustable height and temperature controls has become my go-to. It emits just enough steam to loosen grime without damaging delicate materials, a technique I adopted after reading manufacturer guidelines on tile and wood maintenance. For hardwood floors, a specialized wood floor buffer with variable speed settings helps in polishing and restoring sheen without causing scratches—something standard machines often damage.
Choosing the correct cleaning products is crucial; I recommend pH-neutral cleaners specifically formulated for hardwood and tile. Using abrasive or acidic agents can strip finishes or etch surfaces, which I’ve personally seen happen from DIY experiments.
Looking ahead, the trend in flooring maintenance is leaning towards smart, automated solutions. Robotic mops equipped with sensors are becoming more affordable and intelligent, enabling scheduled cleaning that adapts to floor conditions—reducing manual effort while maintaining pristine surfaces. Investing in these tools now can save you time and preserve your floors’ beauty for years.
How do I maintain my flooring over time?
Routine maintenance paired with the right equipment can prevent issues like scratches, warping, or grout deterioration. Regularly inspect high-traffic areas, and consider sealing grout annually to prevent moisture infiltration that causes discoloration or damage. Implementing a strict ‘no-shoe’ policy in your home also reduces grit buildup, which can scratch surfaces.
For detailed techniques on floor preservation, explore our [detailed guide to floor leveling and long-term results](https://tiletrendshop.com/step-by-step-guide-to-flooring-installation-and-leveling-success). A proactive approach—like promptly addressing small damage—significantly extends the life of your floors. Try using a microfiber mop with a gentle cleaner for your next routine, and witness how a simple change can make a noticeable difference.
Replacing traditional tools with smart, purpose-built equipment ensures your floors stay stunning and durable. As technology advances, I predict that automated maintenance solutions will become standard in residential flooring care, simplifying home upkeep and preventing costly repairs down the line.
Lessons Hidden in My Flooring Journey
One of the hardest lessons I learned about hardwood installation is the importance of patience when measuring gaps around radiators; rushing can lead to costly repairs later. I once underestimated how crucial proper spacing was, resulting in cracks that haunted me months afterward.
Another insight was how neglecting to remove radiator covers could throw off your entire alignment, serving as a silent enemy to your carefully planned gaps. It’s the details that separate a good floor from a truly resilient one.
My biggest revelation was the impact of scribing curves accurately—using simple cardboard or flexible tools saved me from unsightly filler strips and ensured a seamless transition around complex radiator shapes. This technique turned a frustrating irregularity into a testament to craftsmanship.
Lastly, I discovered that even the best spacers can fail if not checked regularly. Small adjustments during installation made a significant difference in achieving a uniform and professional finish, proving that continuous attention to detail pays off in the long run.
Handpicked Resources to Elevate Your Flooring Game
- Innovative Tile Designs: Exploring options that complement hardwood floors has transformed my approach to home aesthetics. The site offers inspiring ideas that elevate any space.
- Step-by-Step Installation Guides: Their detailed instructions on floor leveling and tile installation have been my go-to references, providing clarity and confidence for every project.
- Expert Tips and Tricks: The collection of insider advice helps avoid common pitfalls, saving time and frustration. I trust these resources because they’re based on real-world experience and tested techniques.
- Customer Support and Consultations: Their responsive team provides personalized guidance, ensuring your specific challenges are addressed with tailored solutions, which I’ve found invaluable during tricky spots in my projects.
Your Turn to Elevate Flooring Skills
Embracing these insights and resources will empower you to approach hardwood flooring installation with confidence and precision. Remember, mastering the nuances of spacing around radiators not only enhances durability but also elevates your craftsmanship to a new level. Every challenge is an opportunity to learn and refine your skills—so get started, and transform your space into a showcase of lasting beauty and expert touch.