I remember the moment clearly. I had just finished laying a brand-new tile floor in a client’s kitchen, proud of my work. Weeks later, I returned to see cracks and unevenness that I couldn’t explain. Turns out, I overlooked some crucial installation details. That was my lightbulb moment—realizing that in 2025, the key to a durable, long-lasting floor isn’t just in the materials but in the strategy behind the installation.
Why Proper Installation Is Your Best Investment
In the world of flooring, the devil is truly in the details. A beautiful tile or hardwood floor can be a showstopper, but if it’s installed poorly, it’ll start showing signs of wear and tear sooner than you think. The difference between a floor that lasts 10 years and one that endures for decades often comes down to the installation process. That’s why staying updated on expert strategies is so vital—especially with new techniques emerging in 2025.
Have You Faced This Problem Before?
If you’ve ever had to repair cracked tiles or relevel a floor, you know how frustrating and costly it can be. Believe me, I’ve been there. Early on, I made the mistake of rushing through leveling without paying attention to the substrate or using the right materials. It’s a mistake I’ve learned from and now advise others to avoid. For instance, mastering floor leveling techniques is fundamental to lasting results.
In the upcoming sections, I’ll share proven strategies that have helped me and countless professionals elevate their installation game. These aren’t just tips; they’re essentials for anyone serious about durability in 2025 and beyond. Ready to transform your approach and get results that stand the test of time? Let’s dive into the best practices that will make your floors not just beautiful but resilient.
Ensure a Solid Base with Precise Floor Preparation
Before laying down any tiles or hardwood, I learned the hard way that a flawless surface is non-negotiable. I once rushed to install a tile floor over uneven concrete, thinking minor imperfections wouldn’t matter. The result was cracked tiles within a year. Now, I always start by thoroughly cleaning and preparing the substrate. Use a high-quality primer if needed, and address any cracks or dips with proper leveling compounds. For perfect results, mastering floor leveling techniques is essential. This step acts as the foundation for everything that follows, much like ensuring your foundation is solid before building a house.
Achieve Flawless Surface with Advanced Leveling
Leveling is more than just smoothing out the floor; it’s about creating a perfectly flat plane that supports durable installation. I once faced a stubborn hump in a hardwood subfloor, which caused squeaking and uneven wear over time. I applied precise leveling techniques to fix it, using a self-leveling compound. The key is to tape and mask surrounding areas to prevent excess spreading. Think of leveling like tuning a musical instrument — every tiny adjustment ensures harmony and durability in the long run.
Use Appropriate Materials for Stability and Bonding
Choosing the right adhesives and mortars is critical. I once used a generic thin-set mortar for a large tile job, only to see it fail prematurely. Now, I opt for high-performance adhesives that are suitable for the specific tile or wood type. For example, epoxy-based adhesives provide extra strength and flexibility, reducing the risk of cracks. Always check product specifications and compatibility, especially in 2025 when new formulations offer improved durability. Proper material selection is like choosing the correct gear for a tough hike — it makes all the difference in enduring conditions.
Follow a Step-by-Step Installation Process
Installing tiles or hardwood in the right order prevents costly mistakes. I follow a systematic process: lay out the tiles to plan the pattern, apply adhesive with a notched trowel, and press firmly to ensure full contact. For hardwood, I stagger the seams and leave expansion gaps. I once skipped the expansion gaps on a hardwood floor, which led to buckling as the wood expanded with humidity. The lesson? Never rush — detailed planning and execution are your best tools. For detailed guidance, check out step-by-step strategies.
Double-Check and Cure Properly
After installation, I always double-check for levelness and alignment. I use a long spirit level or laser level for accuracy. Once satisfied, I let the material cure fully, which can take 24-72 hours depending on the product. Rushing this step risks loosening or cracking the tiles or wood. Patience here is key—think of it as letting paint dry thoroughly for a perfect finish. Proper curing ensures that your investment lasts for decades, not just years.
Regular Maintenance Extends Lifespan
Finally, maintenance is crucial. I recommend sealing grout lines annually and using appropriate cleaners. Hardwood floors benefit from periodic refinishing, which I document in refinishing tips. Well-maintained floors not only look beautiful but also resist wear and damage better over time. Think of it as giving your floors a regular health check — proactive care keeps them durable for generations.
Many DIY enthusiasts and even seasoned professionals fall prey to misconceptions that can sabotage their flooring projects. One of the most widespread myths is that a perfectly level subfloor isn’t crucial, but in reality, overlooking proper leveling techniques can lead to cracked tiles, squeaky hardwood, and uneven surfaces that degrade faster. Contrary to popular belief, using cheap adhesives might save initial costs, but in the long run, they often fail, causing costly repairs and replacements. In 2025, the emphasis on high-quality materials and meticulous preparation is more vital than ever.
Why Do So Many Overlook the Nuance of Subfloor Preparation?
The secret to durable flooring isn’t just in choosing the right materials but in understanding the subtle intricacies of preparation. For example, even minor dips or bumps can cause significant issues down the line, especially with modern materials that demand precision. The common mistake is rushing this step, assuming that a quick clean or a basic primer suffices. However, expert techniques like detailed floor leveling can prevent future failures. Skipping or underestimating this process often results in uneven wear, gaps, or cracking, which are costly to fix later. Remember, the foundation you build on is what determines the longevity of your flooring.
Another misconception is that all adhesives are created equal. Many believe that a generic thin-set mortar will perform just as well as specialized, high-performance options. But experts emphasize that selecting the right bonding agents tailored to your specific flooring material and environment can dramatically extend its lifespan. Recent studies and industry reports, such as those highlighted in expert installation strategies, demonstrate that the right materials combined with proper application techniques reduce the risk of failure by up to 50%.
Advanced installers also understand that the order and timing of each step are critical. For example, rushing the curing process can lead to loose tiles or warped hardwood. Patience during curing isn’t just a tip—it’s a necessity backed by scientific research showing that proper curing significantly improves adhesion and durability (see related guide).
Have you ever fallen into this trap? Let me know in the comments. Applying these nuanced insights and avoiding common pitfalls can save you from costly mistakes and ensure your project stands the test of time. Remember, in 2025, mastery over details isn’t optional—it’s essential for lasting results.
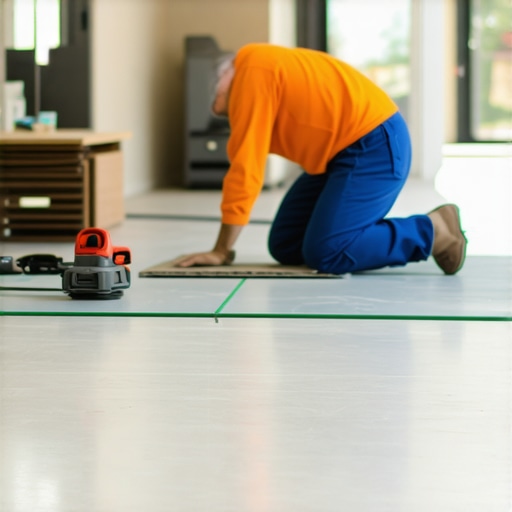
Keep It Running Smoothly with the Right Tools
Maintaining durable flooring in 2025 hinges on using the right equipment that ensures quality and longevity. I personally swear by a high-grade oscillating multi-tool for sanding and minor repairs. Its versatility allows me to handle everything from smoothing out uneven edges to removing old adhesive residues without damaging the surface. Investing in a quality multi-tool from brands like Dremel or Fein pays off in the long run, as they offer precision and durability that cheaper models can’t match. Tip: Regularly replace worn-out blades and accessories to maintain cutting efficiency and avoid damaging your floors. As technology progresses, expect smarter tools with integrated sensors that can detect moisture levels or surface irregularities, further streamlining maintenance tasks.
For leveling and surface prep, I rely on a digital laser level. Unlike traditional bubble levels, laser levels provide consistent accuracy over larger areas, which is essential when checking for dips or high spots after installation. Proper leveling not only ensures aesthetic appeal but also prevents premature wear and cracking. In the future, expect laser levels to incorporate AI-driven calibration, automatically adjusting for environmental changes and providing real-time feedback to prevent errors.
How do I maintain my floors over time?
Consistent care is vital for long-term durability. For example, sealing grout lines annually with a high-quality sealant prevents moisture infiltration that can weaken the substrate. Hardwood floors benefit from routine refinishing, which restores their shine and repairs minor scratches before they deepen. I recommend following expert tips from hardwood floor care secrets to develop a maintenance schedule suited to your flooring type. Using appropriate cleaners and avoiding harsh chemicals also extend the lifespan of your surfaces.
Incorporating smart sensors into your maintenance routine can further enhance results. For instance, moisture sensors embedded in the subfloor can alert you to leaks or humidity issues before they cause damage. As smart home technology advances, integrating these sensors with your mobile device allows for proactive maintenance, saving you time and costly repairs. Pro Tip: Regularly inspecting and cleaning your flooring, combined with timely repairs using the right tools, will keep your surfaces looking their best for decades.
Scaling Up Your Maintenance Routine
If you’re managing multiple floors or a commercial space, consider investing in automated floor cleaning systems equipped with AI navigation. These devices can perform routine cleaning while monitoring surface conditions, reducing manual effort and catching potential issues early. Additionally, professional-grade leveling compounds and adhesives designed for large-scale projects are now available, making future renovations or repairs more manageable and cost-effective. As the industry moves toward smarter, more integrated solutions, staying updated on the latest tools and techniques will set you apart and ensure your floors remain resilient and beautiful.
Start by trying one of these advanced maintenance tips today—perhaps upgrading to a laser level with smart calibration or setting a regular sealing schedule. Small improvements lead to long-term success, and embracing new tools in 2025 will future-proof your flooring investments. Remember, proper maintenance and the right equipment are your best allies for lasting, stunning results.
The Hardest Lesson I Learned About Flooring Installation
One major realization hit me after a failed project—attention to detail can make or break the longevity of your floors. I once underestimated the importance of substrate preparation, rushing through leveling and ending up with cracked tiles within a year. That experience taught me that meticulous prep work, like mastering floor leveling techniques, is the backbone of durable flooring.
Why Cutting Corners Costs in the Long Run
Using cheap adhesives or skipping curing times might save money upfront, but it often leads to costly repairs down the line. I learned that investing in high-performance materials and respecting curing schedules ensures your floors stay beautiful and resilient for decades. Industry reports, such as those found in expert installation strategies, emphasize the importance of quality materials paired with proper application.
What I Wish I Knew When I Started
Patience is key—wait for full curing before walking or adding furniture. Rushing this step can cause tiles to loosen or crack. Additionally, proper surface preparation, including cleaning, priming, and leveling, is non-negotiable. These lessons, learned through trial and error, are now part of my core approach to flooring installation, ensuring lasting results.
Curated Tools That Changed My Workflow
Investing in a digital laser level transformed my ability to check for dips and high spots accurately. A high-quality oscillating multi-tool helps me with minor repairs and surface smoothing. These tools save time and improve precision, making them indispensable for durable, professional results.
Keep the Momentum Going
Embrace the mindset that every step—no matter how small—contributes to the longevity of your flooring. Regular maintenance, like sealing grout annually and refinishing hardwood, extends the life of your investment. Smart sensors and automated cleaning systems are paving the way for proactive upkeep, ensuring your floors look stunning and perform well for years to come. Ready to elevate your flooring game and avoid costly mistakes? Dive into continuous learning and stay updated with industry innovations.
What’s the biggest flooring mistake you’ve ever made, and what did it teach you? Share your experience below, and let’s learn from each other’s journeys to perfect durability in 2025!