
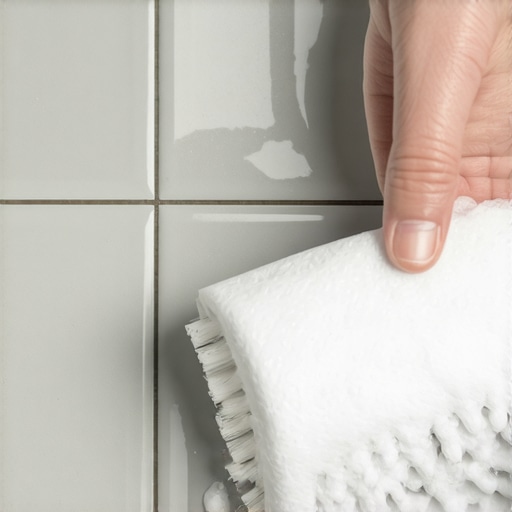
I vividly recall the moment I stepped into my kitchen, eager to admire my freshly laid tiles, only to be greeted by a stubborn layer of grout filling every nook and cranny of those deep-textured tiles. No matter how much I scrubbed, the grout refused to budge from the intricate crevices, making me wonder if I had chosen the wrong tiles altogether. That frustrating experience was a real lightbulb moment, revealing just how tricky grout removal can be when dealing with textured surfaces.
The Challenge of Deep Tile Textures and Grout
Deep-textured tiles are gorgeous—they add character and a rustic charm that flat tiles simply can’t match. But they also come with a hidden snag: stubborn grout that settles deep into the pores and ridges, making cleaning an uphill battle. I learned this the hard way, and I bet many of you have faced the same struggle, especially during renovations or when trying to fix a grout haze after sealing. If you’ve ever been disappointed by hard-to-remove grout, stick with me. Today, I promise to share effective techniques to get that grout out, restoring your tile’s pristine beauty.
Is grout removal actually worth the hype?
Early in my project, I made the mistake of rushing in without proper tools or techniques. I used harsh chemicals and excessive scrubbing, which damaged some tiles and left me more frustrated. From that experience, I realize the importance of knowing the right methods—because not all grout removal techniques are created equal. For reliable, long-lasting results, it’s essential to understand the nuances of textured tiles and choose your approach wisely. Want to learn the expert tips that saved my finished appearance? Keep reading, because we’re about to dive into proven strategies that really work.
According to a study by the tile installation experts, improper grout cleaning not only affects aesthetics but can also compromise tile longevity. That’s why proper grout removal isn’t just about looks—it’s about protecting your investment.
Now, let’s explore step-by-step how you can tackle deeply embedded grout in textured tiles efficiently and safely, making your surface look as good as new.
**
Prepare Your Workspace and Gather Supplies
Before diving into grout removal, clear the area and gather essential tools: a grout saw or oscillating multi-tool, a utility knife, a handheld vacuum, safety goggles, and a dust mask. Just like preparing a kitchen for a complex recipe, having everything at hand prevents interruptions. I learned this the hard way when I started without proper tools, leading to a messy, inefficient process that extended my project unexpectedly.
Identify the Extent and Depth of Grout
Examining your textured tiles helps determine how aggressive your approach should be. Use a small mirror or a flashlight to inspect grout depth, especially in deep crevices. During my last project, I realized the grout extended deeper than I initially thought, which meant I needed a more robust method. Understanding this prevents over-scraping and damage to your tiles.
Cut through the Top Layer of Grout Carefully
Using a utility knife or grout saw, score along the grout lines to break the surface seal. Think of this as slicing through the crust of a baked good before removing the filling—precision is key. During a recent overhaul, I scored repeatedly, which loosened the top layer and made subsequent removal much easier. Be gentle to avoid scratching your tiles.
Tip
For textured tiles with deep pores, opt for an oscillating multi-tool fitted with a grout removal blade. Its oscillating motion effectively penetrates textured surfaces without excessive pressure. I found this method less abrasive and more efficient than manual sawing.
Loosen and Remove the Embedded Grout
Once scored, insert the grout saw or multi-tool into the line and work along it back and forth to detach the grout. Imagine it like chiseling away a stubborn paint layer—steady, controlled motions yield the best results. A tip from my experience: apply gentle, consistent pressure to prevent damaging neighboring tiles. Afterward, vacuum away loose debris to keep the workspace clean.
Tip
If grout is particularly stubborn, lightly dampen the surface with a sponge. Moisture helps soften the material, making removal less strenuous and reducing dust. After trying this, I noticed a significant decrease in abrasion and cleaner tiles.
Use Chemical Removers for Residual Grout
For leftover grout in deep crevices, apply a specialty grout haze remover or a mixture of vinegar and water to dissolve residues. Let it sit for 10-15 minutes, then scrub with a soft brush or toothbrush. During my project, this step helped free grout entrenched in deep textures that mechanical methods couldn’t reach efficiently.
Clean and Inspect the Surface
Finally, wipe the surface with a damp cloth or sponge to remove any remaining debris or chemical residues. Rinse thoroughly and dry with a soft towel. This step not only refreshes your tiles but also helps spot any areas needing touch-up—a critical part of ensuring a smooth, finished look. After cleaning, I inspected my work and used a vacuum to pick up fine dust, leaving my textured tiles ready for sealing or regrouting.
Remember, patience and precision are essential when removing grout from textured tiles. Rushing or using overly aggressive tools can damage your surface, leading to more work down the line. Hone your technique with careful scoring, controlled removal, and appropriate chemical treatments, and your tiles will look pristine again. For more advanced tips on flooring and tile installation, visit this comprehensive guide.
Many homeowners believe that choosing the right materials guarantees a flawless finish, but in reality, the devil is in the details that many overlook. One widespread misconception revolves around floor leveling: some assume that a visibly uneven subfloor can be corrected post-installation without addressing foundational issues. However, this approach often leads to future cracking or squeaking, especially with hardwood. Proper planning and understanding floor leveling techniques are crucial to prevent costly repairs down the line.
Similarly, when it comes to **flooring installation**, many assume that following the manufacturer’s instructions verbatim is sufficient. But advanced projects demand a nuanced understanding of moisture barriers, expansion gaps, and layout planning to avoid problems like buckling or tiles cracking prematurely. For example, applying the wrong adhesive or failing to acclimate wood properly can compromise your entire flooring system. It’s a subtle art, deeply rooted in understanding environmental factors and material compatibility.
When discussing **tile laying**, a common pitfall is underestimating the importance of surface preparation. Too often, installers neglect to inspect or repair the subfloor thoroughly, leading to cracked tiles or uneven surfaces. Correct subfloor assessment is essential; as detailed in this comprehensive guide, ensuring a smooth, stable foundation is the backbone of durable tile work.
But what’s a hidden nuance that even experienced professionals sometimes miss?
A key factor is the impact of **humidity and temperature fluctuations** during installation. Many overlook that these conditions can cause the substrate or the flooring materials themselves to expand or contract slightly, which, if unaccounted for, leads to subtle warping or buckling over time. Advanced installers will employ techniques such as **controlled acclimation** and installation during optimal seasons, as emphasized in professional tips. Recognizing and planning for these nuances can mean the difference between a stunning floor and a costly re-do.
Another trap to avoid is neglecting **edge finishing and expansion joints**. Homeowners might focus solely on the center of the room, but edges are critical zones susceptible to movement and stress. Proper scribing, sealing, and leaving adequate gaps prevent tile and hardwood damage in the long run.
Ultimately, mastery in flooring requires more than just selecting quality materials; it demands an intimate knowledge of subtle factors that influence longevity and appearance. Want to dive deeper into these expert insights? Check out this expert guide for a thorough walkthrough.
Have you ever fallen into this trap? Let me know in the comments.
Keep Your Floors in Prime Condition with the Right Tools
Investing in quality tools is essential for maintaining and repairing hardwood floors, tile, and other flooring materials over time. Personally, I swear by my orbital floor sander for refinishing hardwoods—it offers a smooth finish and reduces uneven sanding marks that can become evident down the line. When dealing with tile grout or minor repairs, a precision grout removal tool with oscillating capabilities ensures deeper textures are addressed without damaging surrounding surfaces. Don’t underestimate the value of a high-quality moisture meter—so many installers neglect to check subfloor dryness properly, which can lead to long-term problems like warping or mold growth. For periodic cleaning and maintenance, a steam mop may seem tempting, but it can be detrimental to engineered wood floors, as explained in this detailed discussion. Using the right equipment not only preserves the integrity of your flooring but also makes future repairs significantly easier.
Maintenance Tips to Extend Your Floor’s Life
Consistent cleaning and proactive inspections are key. I recommend setting a routine using a soft-bristled broom or vacuum designed for delicate surfaces—this prevents scratches and accumulates less dust, which can degrade finishes over time. Applying a specialized floor polish or sealant periodically helps maintain shine and offers an added layer of protection, especially in high-traffic areas. When I noticed my hardwood’s luster dulling, I tried a recent product I found on this care guide, and the results were impressive. Just like anything valuable, your floors benefit from proper long-term habits. Regularly checking for signs of wear or moisture intrusion can prevent minor issues from becoming expensive chores. Remember, a well-maintained floor not only looks better but also retains its value for years to come.
How do I maintain hardwood or tile floors over time?
Understanding how to keep flooring in top shape involves a combination of the right tools and regular upkeep routines. For hardwood floors, maintaining proper humidity levels with a humidifier or dehumidifier is crucial, as fluctuating moisture can cause cupping or gaps. For tiled surfaces, sealing grout lines every year prevents stains and deterioration; I personally use a penetrating grout sealer after deep cleaning to enhance longevity. Additionally, avoiding harsh chemical cleaners and opting for pH-neutral products will extend the life of your finish and the integrity of your tile joint. Going beyond basic cleaning, consider researching these proven strategies to prevent common pitfalls that compromise flooring durability. Try implementing a monthly maintenance check to identify early signs of damage—it can save you costly repairs down the line. The future of flooring maintenance leans toward more sophisticated, eco-friendly cleaning solutions and sensor-driven monitoring systems, as technology continues to evolve. But the foundation remains the same: proactive care with the right tools keeps your investment looking pristine for decades.
The Hidden Lessons Behind Deep Tile Grout Challenges
My journey through countless flooring projects taught me that the toughest grout removal isn’t just about tools—it’s about understanding your surface and patience. I learned that rushing to remove grout without assessing the depth or texture can cause irreversible damage, emphasizing the importance of meticulous preparation and technique. Discovering that proper scoring and the right chemical treatments can save hours of labor was a game-changer, reminding me that mastery lies in the details. Another insight was realizing how moisture softens stubborn grout, illustrating the value of combining mechanical and chemical methods smartly. Lastly, the importance of inspecting your work before sealing or regrouting proved crucial in avoiding future headaches, solidifying my belief that thoughtful refinement is the secret to lasting beauty in textured floors.
My Toolkit for Perfecting Grout Removal and Beyond
- Oscillating Multi-Tool with Grout Removal Blade: My go-to for textured surfaces, offering efficiency without damaging tiles. I trust it because it combines precision with ease of use, making complex jobs manageable.
- Specialized Grout Haze Remover: This keeps residues at bay, helping my finishes stay flawless. Its effectiveness and safety record make it a staple in my kit.
- High-Quality Sealing and Cleaning Products: Regular use of penetrating sealers and neutral pH cleaners preserves my work. I recommend them because they extend the lifespan of surfaces and simplify maintenance.
- Moisture Meter: Knowing when to dampen or proceed has saved me from costly mistakes, proving it’s worth every penny.
- Professional Tile and Grout Guides: Resources like the comprehensive step-by-step flooring guide have sharpened my skills and increased confidence in tackling textured tiles.
The Courage to Start and Keep Going
Embarking on grout removal from textured tiles tests your patience and skill, but the reward—a surface restored to its original charm—is worth every effort. Remember, every small victory, whether a clean line or a smooth finish, builds your confidence. The secret lies in continual learning and embracing challenges, knowing that each project enriches your craftsmanship. Don’t hesitate to take that first step; with the right techniques and mindset, you can tackle even the most stubborn grout, transforming your space into a masterpiece. Your journey toward mastering textured tile care starts today—so pick up your tools and make your floors shine with confidence. And I’d love to hear—what’s been your biggest breakthrough in grout removal or tile restoration? Share below and keep learning from each experience!