
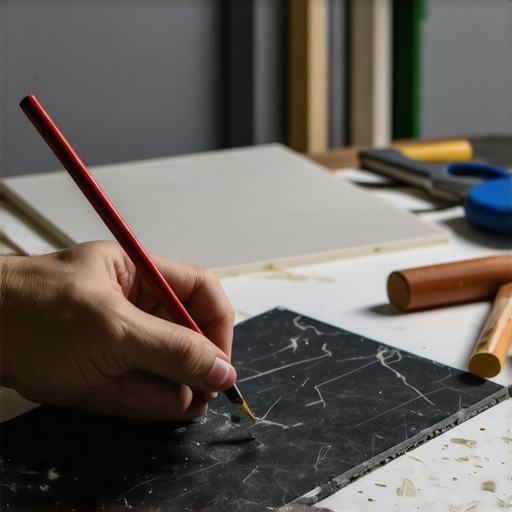
I’ll never forget the day I ruined a beautiful dark tile floor simply because I couldn’t get the lines straight. I had *measured* carefully, or so I thought, but once I started laying tile, those crooked lines became a glaring eyesore. Frustration boiled over—I felt like I’d wasted my entire weekend. Sound familiar?
That was the moment I stumbled upon a simple yet genius trick involving a soapstone pencil. This secret transformed my approach and saved countless projects since. Today, I want to share this technique with you—something I wish I knew when I first started. Whether you’re laying dark tiles for a kitchen backsplash or flooring, getting those lines right is crucial for a polished, professional look.
Why Precision Counts When Marking Dark Tiles
Dark tiles, especially black or charcoal, are notorious for revealing even the tiniest of markings or misalignments. Any scribble, smear, or mistaken line becomes instantly visible. That’s why choosing the right marking tool makes a WORLD of difference. Of course, regular pencils tend to be too light or leave marks that are hard to erase, leading to a lot of guesswork and rework.
Enter the soapstone pencil—a humble, reliable tool that has earned its place in my toolkit. Unlike standard pencils, soapstone marks are clearly visible but easy to wipe away after positioning. Plus, the soft, chalky nature of soapstone ensures your lines go on smoothly without scratching the tile surface. Interestingly, soapstone has been used for centuries for marking and carving because of its durability and ease of use, and its application in tile installation is no different.
Early on, I made the mistake of relying on a regular pencil, which smudged easily against the dark surface or, worse, left faint lines I couldn’t see under my work light. That simple mistake cost me time and patience, and it’s a lesson I won’t forget. For anyone tackling dark tile projects, understanding the correct marking method is essential to avoid those costly errors.
Now, let’s dive into how you can master the soapstone pencil trick and elevate your tile installation game. We’ll cover the step-by-step process, common pitfalls, and how to make your lines virtually foolproof. Ready to say goodbye to crooked lines and hello to flawless tile layouts? Great—let’s get started!
Marking Precise Guidelines
Start by measuring your layout carefully, then transfer those measurements onto your dark tiles using a soapstone pencil. Imagine you’re drawing a trail on a dark forest floor—you want the line to be bold enough to see but easily erased once the tile is in place. A specific time I used this was when laying a new kitchen backsplash; I measured the wall, marked dotted guidelines with soapstone, and adjusted as needed before applying adhesive.
Aligning Tiles Without Guesswork
Place the first tile at your starting point, then gently draw a chalk line on the tile edge aligning with your marked guideline. Use your level to ensure the tile is perfectly straight—think of it as balancing a broomstick on your finger. Repeat the process for subsequent tiles, continuously checking the chalk lines against your measurements. This technique prevents crooked rows, especially on large surfaces.
Handling Crooked Lines and Mistakes
If you notice a misaligned tile after applying, wipe away the soapstone with a damp cloth quickly—its chalky texture makes removal effortless. Once cleaned, re-mark with fresh soapstone and realign. I recall a time when I accidentally drew a line slightly off-center; quick erasure and re-marking saved that entire section from being scrapped. This flexibility highlights why soapstone is invaluable during installation.
Protecting Your Tile Surface
Be cautious to avoid scratching your tiles while marking. Use a light touch with the soapstone pencil; pressing too hard can leave permanent marks or scratch sensitive surfaces. When working around edges, especially adjacent to trim or cabinetry, employ masking tape along your guidelines. This prevents accidental smudging or marking outside desired areas.
Integrating the Technique into Your Workflow
In practice, I combined this method with another tip: marking the back of tiles before setting them down. This way, I had visual guides on both surfaces, ensuring perfect spacing and alignment—akin to assembling a puzzle with clear picture guides. Practicing these steps reduces errors, saving time and reducing waste. For a comprehensive approach to leveling and layout, visit this guide.
Many homeowners and even DIY enthusiasts assume that following basic measurements and simple leveling procedures guarantees a flawless floor. However, seasoned flooring installers know that this is just the tip of the iceberg. One common misconception is that a perfectly leveled subfloor alone ensures a perfect finish, but in reality, overlooking subtle nuances can lead to long-term issues like cracking, warping, or uneven wear. For instance, ignoring the moisture content of your subfloor can cause adhesives to fail or tiles to pop over time; studies show that moisture migration is a leading cause of flooring failure, as noted by industry experts. Moreover, a frequent mistake is relying solely on visual checks for levelness, which can be deceiving—tiny high spots or low spots invisible to the naked eye can derail a project. Advanced professionals often use laser levels and moisture meters to detect these hidden flaws, ensuring the foundation is truly ready. Have you ever fallen into this trap? Let me know in the comments. Understanding these subtle but critical details helps you avoid costly repairs and guarantees a durable, professional-looking finish. To master the finer points of floor leveling and prevent common pitfalls, I recommend checking out this guide on flooring combination techniques and professional secrets to floor leveling. Remember, paying attention to nuances rather than just surface measurements can make all the difference between a good and a truly exceptional flooring job.
Keep Your Flooring Operating Smoothly with the Right Equipment
Maintaining your tile and hardwood floors over time requires more than just routine cleaning; it involves investing in quality tools tailored for specific tasks. I personally recommend a high-quality oscillating multi-tool for detailed grout cleaning, as it allows precision without damaging the surrounding tile or wood. Additionally, a professional-grade moisture meter is indispensable—trust me, one from Tramex or Delmhorst—since it helps monitor subfloor conditions and prevents future issues like warping or adhesion failure. When I first started, I underestimated the importance of accurate moisture readings, which led to costly repairs down the line. Incorporating these tools into your routine ensures your floors remain durable and beautiful for years to come.