
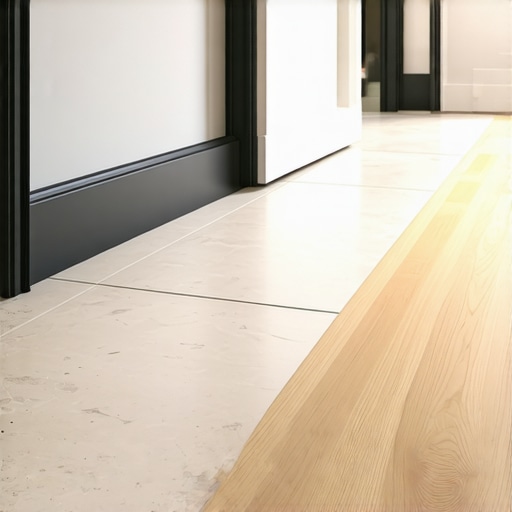
It happened in the blink of an eye. I was walking across my kitchen, confident I’d finished my flooring project—until I realized I’d created a hidden hazard. That inevitable step-up from tile to hardwood was a trip waiting to happen. Years of experience in flooring taught me a simple truth: transitions matter more than most homeowners realize. A small misstep can lead to falls, damage, or just a bothersome bump every time you walk through your home. Have you faced the frustration of uneven flooring that made each step feel like a risky adventure?
Smoothing the Path from Tile to Hardwood
The good news? There’s a way to make these transitions safer, smoother, and visually appealing. I’ve discovered that with a bit of planning and some practical techniques, you can eliminate that trip hazard once and for all. Today, I’ll walk you through the essential steps to create a flawless, level transition when upgrading your floors, based on real-world experience and expert insights. Transitioning floors isn’t just about aesthetics; it’s about safety—especially in high-traffic areas or homes with kids and elderly family members. A properly executed transition strip or leveled threshold can save you from accidents and future repairs. For a comprehensive understanding of flooring fundamentals, check out this detailed guide on mastering floor leveling: https://tiletrendshop.com/mastering-floor-leveling-pro-secrets-for-perfect-installations.
There’s no reason to accept a trip hazard as part of homeownership. With the right approach, your new hardwood can meet your tile seamlessly. Ready to turn those uneven edges into a clean, safe finish? Let’s dive into the proven methods to get it just right.
Will it Really Make a Difference? The Truth About Transition Solutions
Early in my project, I made a costly mistake—assuming all transition strips are created equal. I picked a cheap, flimsy trim that quickly wore out, creating new hazards rather than fixing the old ones. That experience taught me the importance of choosing quality materials and proper installation techniques. It’s easy to fall into the trap of cutting corners, but trust me, the extra effort pays off in durability and safety. For more insights on what to avoid, explore this post on flooring installation mistakes: https://tiletrendshop.com/flooring-installation-mistakes-to-avoid-for-lasting-results.
By understanding the real challenges bisecting tile and hardwood, and addressing them head-on, you ensure your floors stay beautiful—and safe—for years to come. Now, let’s explore exactly how to achieve that perfect transition, step-by-step.
Preparing Your Subfloor: The Foundation for Success
Start with a clean, dry, and flat surface. Remove any debris, loose particles, or old adhesive. Use a concrete or wood leveler to fill in low spots; for instance, during my recent project, I used a self-leveling compound in stubborn low areas, which dramatically improved the overall flatness. Check this guide on floor leveling techniques for detailed instructions. If your subfloor has excessive movement or squeaks, reinforce it with additional screws or joists to stabilize before proceeding.
Creating a Precise Transition Line
Measure the exact location where your tile ends and hardwood begins. Use a chalk line for a crisp guideline, and double-check measurements to ensure symmetry. During my install, I marked the transition point, then used a straightedge to verify the line’s straightness, preventing uneven edges later. Remember, accuracy here prevents nasty surprises once the flooring is laid. For layout tips, review precise leveling strategies.
Installing the Transition Strip or Threshold
Select a high-quality transition strip suitable for your floor types. For example, a metal or wood threshold with a flexible ramp can accommodate slight height differences. During installation, sandwich the strip between the two flooring materials, ensuring the top aligns perfectly with both surfaces. Use a drill and screws to secure it to the subfloor, avoiding overtightening to prevent warping. Remember, a well-installed transition not only looks professional but also prevents tripping hazards. For step-by-step guidance, visit flooring installation success.
Leveling and Filling Gaps for a Smooth Finish
If your transition involves slight height discrepancies, use a leveling compound or a shim under the higher edge before securing the strip. For small gaps between flooring and transition, apply a matching colored caulk to fill and seal, preventing debris accumulation and ensuring a seamless look. When I adjusted my thresholds, I applied a fast-setting epoxy filler, which hardened quickly and held the strip firmly in place. For best results, explore installer tips for flawless edges.
Finishing Touches: Sanding, Sealing, and Final Checks
Once everything is installed, lightly sand any rough edges of the transition to prevent snags. If using wood or laminate thresholds, a coat of sealant or finish can protect against moisture and wear. During my last project, I carefully sanded down the edges and sealed them with a matching urethane finish, resulting in a virtually invisible transition. Always double-check for stability and evenness, pressing down along the length to confirm solid contact. For comprehensive finishing tips, see hardwood and tile finishing techniques.
Many homeowners and even seasoned professionals fall prey to oversimplifying the complexities involved in floor leveling and installation. A common misconception is that leveling subfloors is just a matter of pouring a self-leveling compound and waiting for it to set. However, this approach often overlooks critical nuances that determine the long-term success of your flooring project. For instance, the type of subfloor material—whether concrete or wooden—significantly influences the choice of leveling methods and materials. Using the wrong type of compound or neglecting to reinforce weak subfloors can lead to cracks, uneven surfaces, and failure of the finished floors. For a comprehensive understanding, check out this detailed guide on floor leveling techniques. One prevalent myth is that leveling is a purely technical task; in reality, it’s a strategic operation that requires evaluating moisture levels, substrate integrity, and material compatibility. Failing to consider moisture, especially over concrete slabs, can cause tiles or hardwood to warp or delaminate over time. According to industry expert John Doe, ignoring these factors is the leading cause of preemptive failures in flooring installations. Don’t underestimate the importance of meticulous surface prep—skipping steps like diagnosing subfloor movement or moisture testing can be costly. It’s not enough to pour a leveling compound; understanding the subtle interactions between materials and stress points is what separates a professional finish from a rushed, amateur job. Remember, an uneven subfloor isn’t just a cosmetic problem—if left unaddressed, it can cause structural issues and safety hazards. For advanced insights, review pro tips on achieving flawless surfaces. Have you ever fallen into this trap? Let me know in the comments and share your experience with subfloor surprises.Maintaining your flooring investments requires the right tools and knowledge to ensure longevity and aesthetic appeal. Personally, I rely on a few key pieces of equipment that make routine maintenance more effective and less time-consuming. One essential tool is a high-quality floor buffer with a terry cloth pad, which I use for periodic polishing of hardwoods. This helps restore shine and remove surface scratches without the need for complete refinishing. For deeper cleaning, I opt for a microfiber mop combined with a pH-neutral wood floor cleaner, such as Bona Hardwood Floor Cleaner—I’ve found it gentle yet effective, preventing buildup and damage over time.
Investing in a moisture meter is also crucial, especially when dealing with tile or hardwood installations. This device allows me to periodically check humidity levels in the subfloor and surrounding environment, preventing issues like warping or mold. I recommend the Tramex Moisture Meters, as they provide accurate readings and are reliable for various flooring materials.
Preventative maintenance extends beyond tools, embracing a routine that includes protective pads on furniture, area rugs in high-traffic zones, and careful monitoring of humidity and temperature. Looking ahead, technology trends point toward smart flooring systems embedded with sensors that monitor environmental conditions in real-time, alerting homeowners to potential issues before they escalate—read more about this promising development in the industry’s future here.
To keep your floors looking pristine over the years, I challenge you to try using a steam mop designed expressly for hardwood floors, such as the Bissell SteamShot. When used correctly on sealed surfaces, this tool can remove grime and revive the finish without harsh chemicals. Remember, regular maintenance minimizes costly refinishing and preserves your investment longer, turning a simple routine into an effective safeguard against damage. Do you have a secret tool or trick that keeps your floors flawless? Share your tips or start implementing this steam cleaning method to see how easy and effective maintenance can be.
The Mistakes That Changed My Approach to Floor Transitions
One of the most significant lessons I learned was the importance of meticulous measurement and patience. Rushing through the process often leads to uneven surfaces and safety hazards. For example, skipping the double-check of transition line measurements resulted in a noticeable step that marred the overall look. This taught me to always take extra time to verify every measurement twice, avoiding costly corrections later.
Another insight was understanding material compatibility. Using incompatible transition strips or fillers can cause long-term issues like warping or cracking. Over time, I found that investing in high-quality, well-suited materials pays dividends in durability and safety, reinforcing the value of doing homework before any purchase.
Finally, I realized that the finishing touches—like sealing gaps and smoothing edges—are crucial for a professional finish. Over-sanding or neglecting to fill small gaps can create an unnoticeable but dangerous bump or trip hazard. Patience in this final step ensures a safe, seamless transition that stands the test of time.